Slack is a workplace messaging platform for channel-based conversations, direct messages, and file sharing.
It can be connected to Agen.co two ways, matching the Official / In-house filter in the connector picker:
- Official — Agen.co connects through Slack's own hosted MCP server, giving your agents search, messaging, Canvas, file, and list tools, authenticated via a Slack app with its MCP server feature turned on.
- In-house — Agen.co wraps the classic Slack Web API directly through its own integration layer, using a Slack OAuth app with user token scopes covering profiles, channels, messages, files, and search.
Prerequisites
Prerequisites
- A Slack app with the Slack Model Context Protocol (MCP) Server feature turned on — a separate toggle from a classic Slack app, under the app's Agents settings.
- The app must be directory-published or marked internal; Slack doesn't allow unlisted apps to use the MCP server feature.
- Workspace admin approval to install an MCP-enabled app, the same as installing any other custom app.
Slack's hosted MCP server has no dynamic client registration — you create a Slack app yourself and give Agen.co its Client ID and Client Secret.
- In the Agen.co portal, go to Connectors → My connectors and click Add connector.
- In the Select connector drawer, search for
Slackand select it. In the Add Slack panel, keep Official selected. The panel shows two read-only URLs — copy both:- Callback URL — completes the initial OAuth handshake between Agen.co and your Slack app.
- Gateway callback URL — used by the Agen.co MCP gateway for per-user authorization at runtime.
- Leave this panel open. In a new tab, go to the Slack API console and choose From a manifest to create the app. Pick the workspace to develop the app in — this can't be changed after creation.
- Once the app is created, open Agents in the left sidebar and turn on Slack Model Context Protocol (MCP) Server.
- Open OAuth & Permissions. Under Redirect URLs, add both URLs you copied from the Agen.co panel, then click Save URLs.
- On the app's Basic Information page, copy the Client ID and reveal and copy the Client Secret.
Return to the open Add Slack panel and fill in the fields:
Field Required Description Instance Slug Yes Prefixes each imported tool as slug__tool, so several instances of the connector can coexist. Prefilled withslack. Use lowercase kebab-case. You can change it later from the connector's settings.Client ID Yes The Client ID from the Slack app you created above. Client Secret Yes The Client Secret from the Slack app you created above. Click Connect. You're redirected to sign in to Slack and approve access — an admin may need to approve installing the app first.
Back in Agen.co, the panel switches to Select the tools to import from Slack. Every tool is toggled on; turn off any you don't want to import, then click Add.
The connector is created and its tools imported only when you click Add. If you close the panel before that, nothing is saved, even though the Slack tab reported success.
Adding the connector doesn't authorize anyone's tool calls yet. The first time each user's agent calls a Slack tool, the call returns an authorization link instead of a result. The user opens the link, signs in to Slack, and approves the same way. After that, the user's tool calls run with their own Slack identity and permissions in the workspace.
Once connected, Slack appears under My connectors with tools spanning:
| Area | What it covers |
|---|---|
| Search | Searching messages, files, users, channels, and emoji |
| Messaging | Sending, scheduling, and drafting messages; reading channels and threads; creating conversations; and adding reactions |
| Canvases | Creating, updating, and reading Canvases |
| User management | Reading user profiles and listing channel or workspace members |
| Files | Uploading and reading files |
| Lists | Creating, reading, and updating Slack lists |
Enabling the Slack connector isn't enough on its own. Tool calls remain denied until you create a policy that grants access to the specific tools you want to expose.
Integrating Slack with Frontegg allows your application to read user profiles, browse channels and conversations, post, update, and delete messages, read threads, create and manage channels and their membership, open direct messages, manage files, and search a Slack workspace — all through Frontegg's integration layer using Slack OAuth v2 (user tokens).
Prerequisites
Prerequisites
- A Slack workspace where you have permission to create and install apps
- Access to the Slack API console
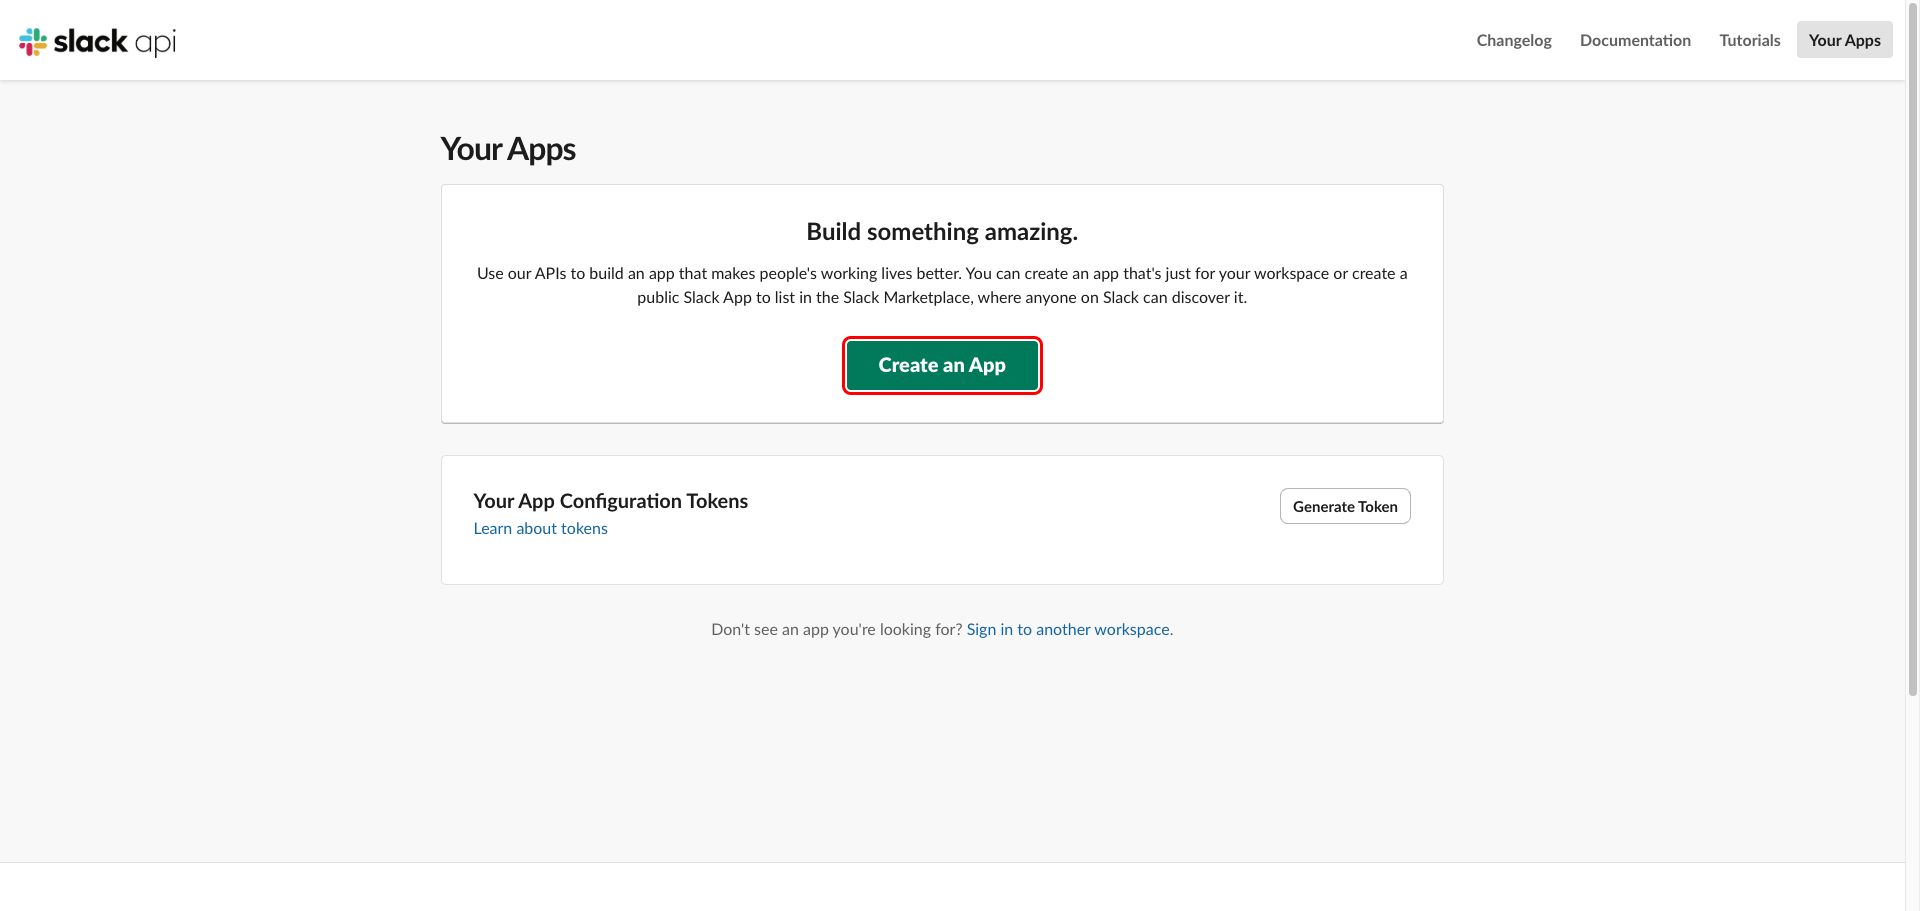
Sign in to the Slack API console with an account that belongs to the workspace where you want to install the app. Click Create an App at the top of the page.
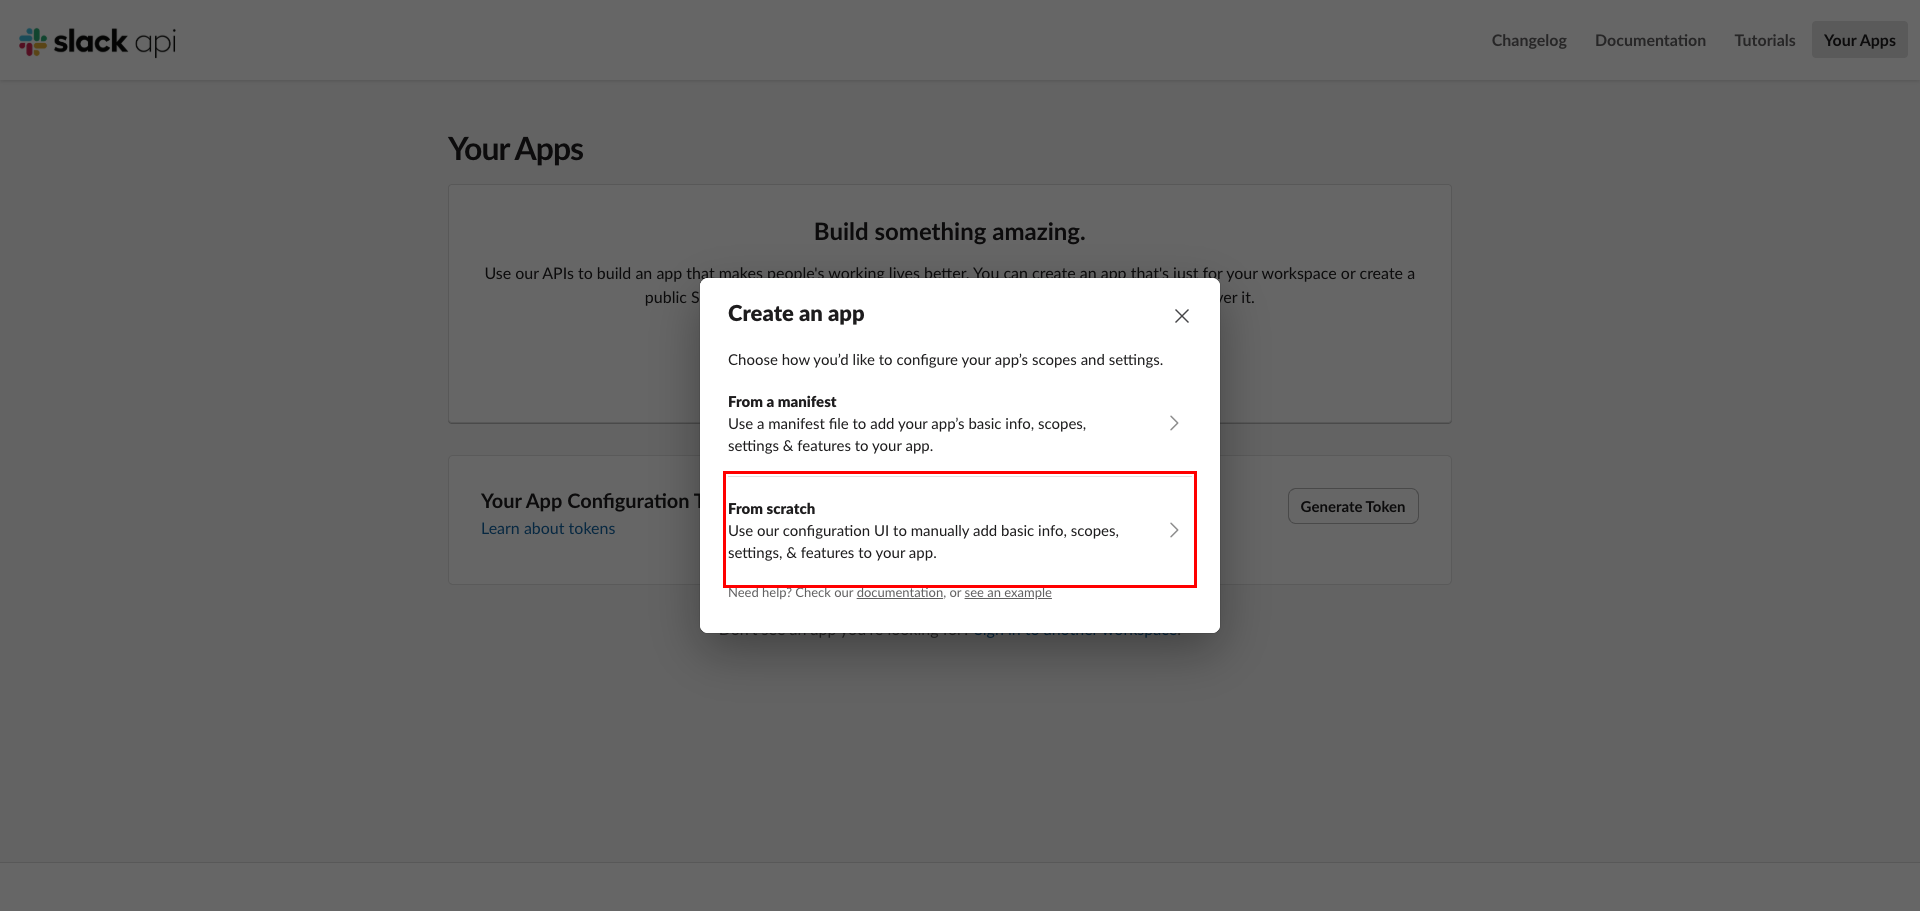
In the Create an app dialog, choose From scratch to configure the app manually through the UI.
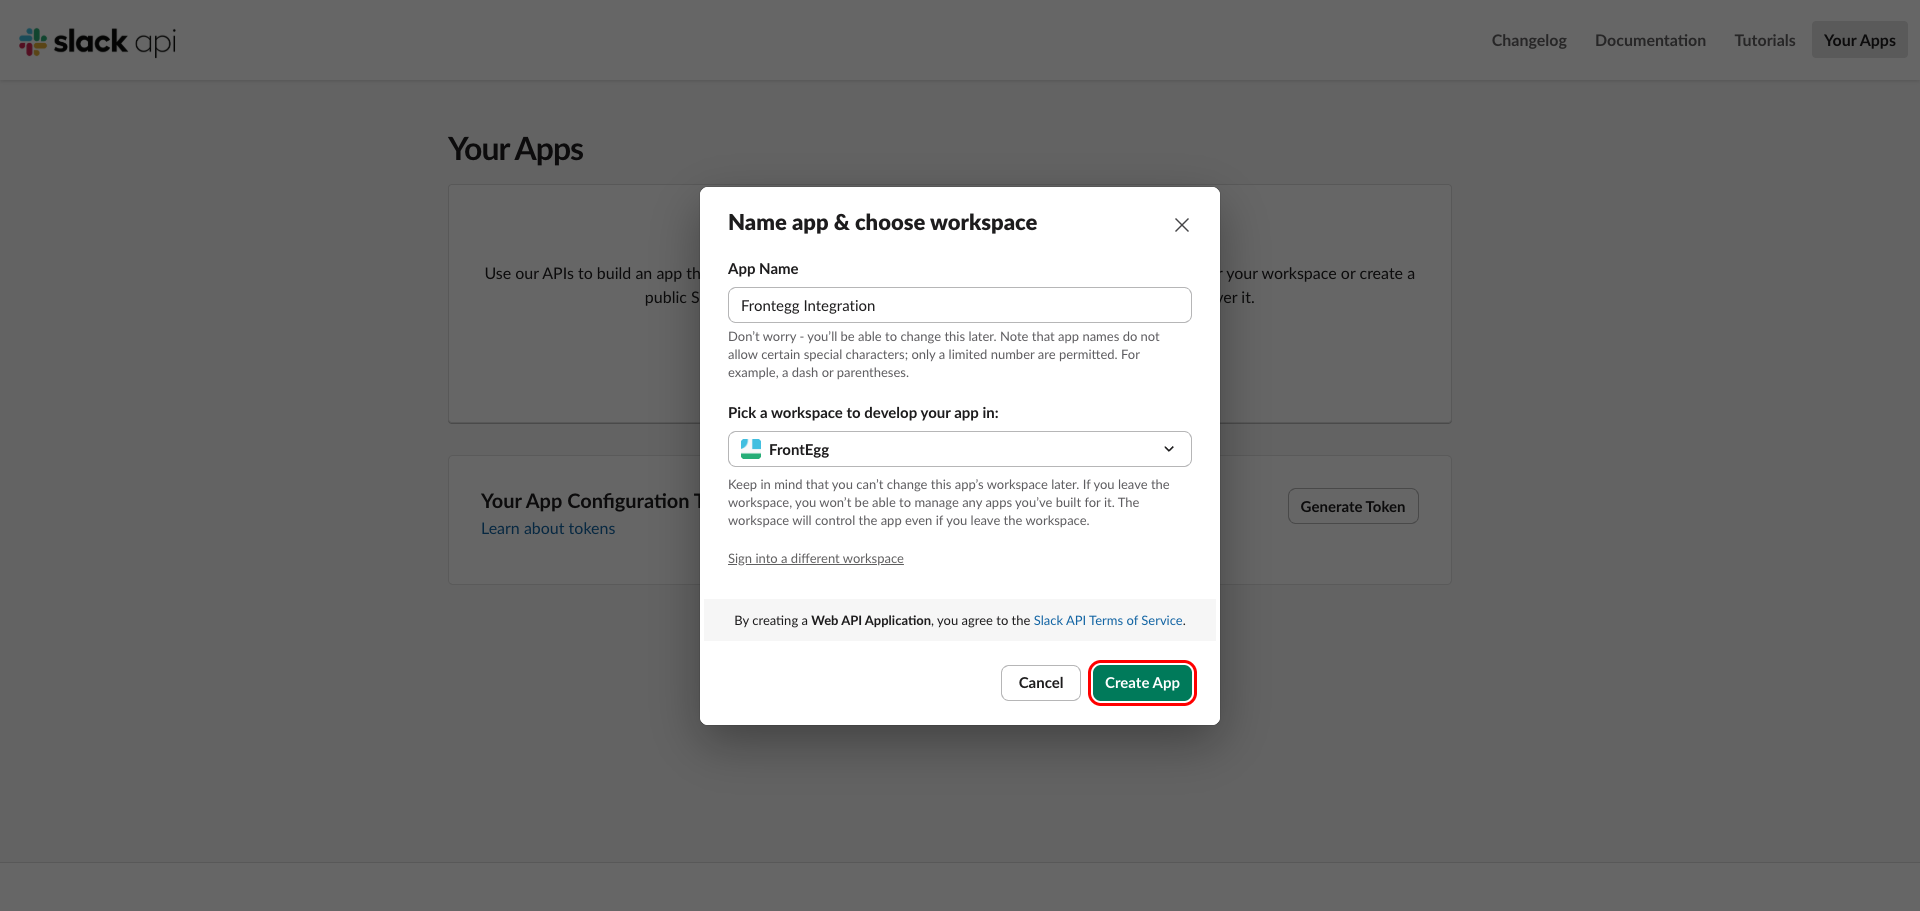
Enter an App Name (for example, Frontegg Integration) and pick the Slack workspace you want to develop the app in. Click Create App.
Workspace is permanent
Workspace is permanent
You can't change the app's development workspace after creation. Pick the workspace whose data you want Frontegg to access.
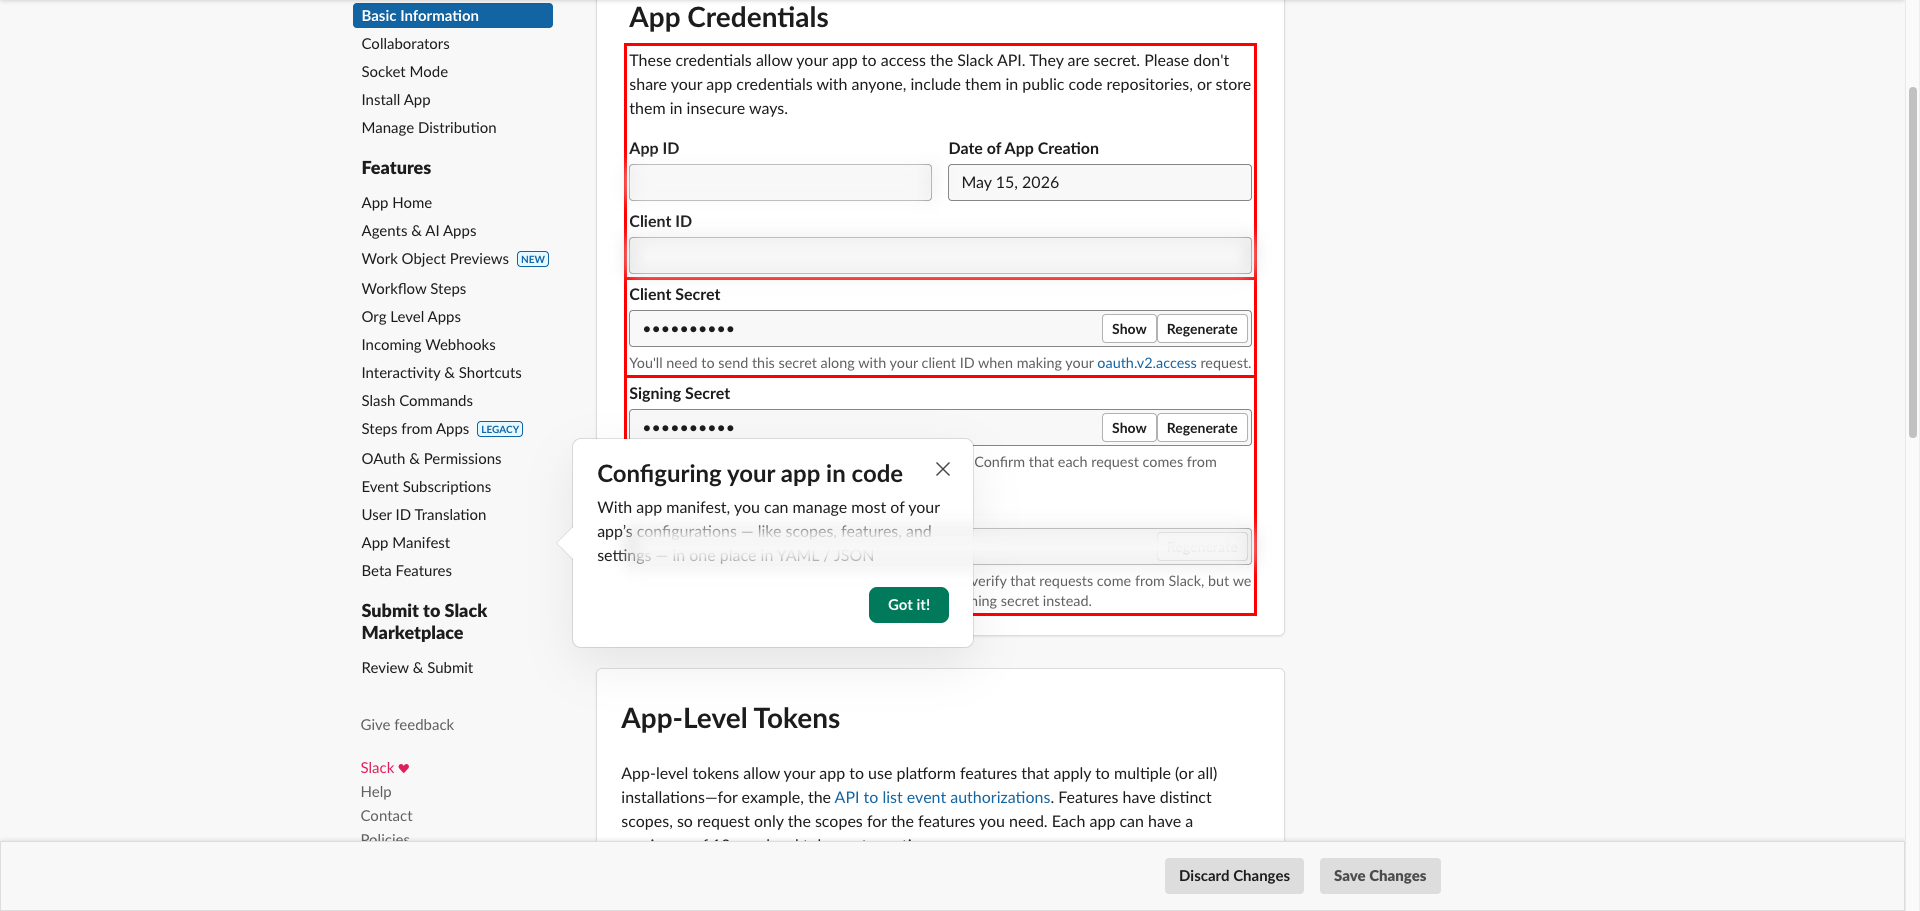
After creation, you are taken to the app's Basic Information page. Scroll to the App Credentials section. Copy the Client ID and click Show next to Client Secret to reveal and copy the secret — you'll need both when configuring the Frontegg portal.
Keep your Client Secret safe
Keep your Client Secret safe
The Client Secret authenticates your Frontegg integration to Slack. Never share or commit it to version control.
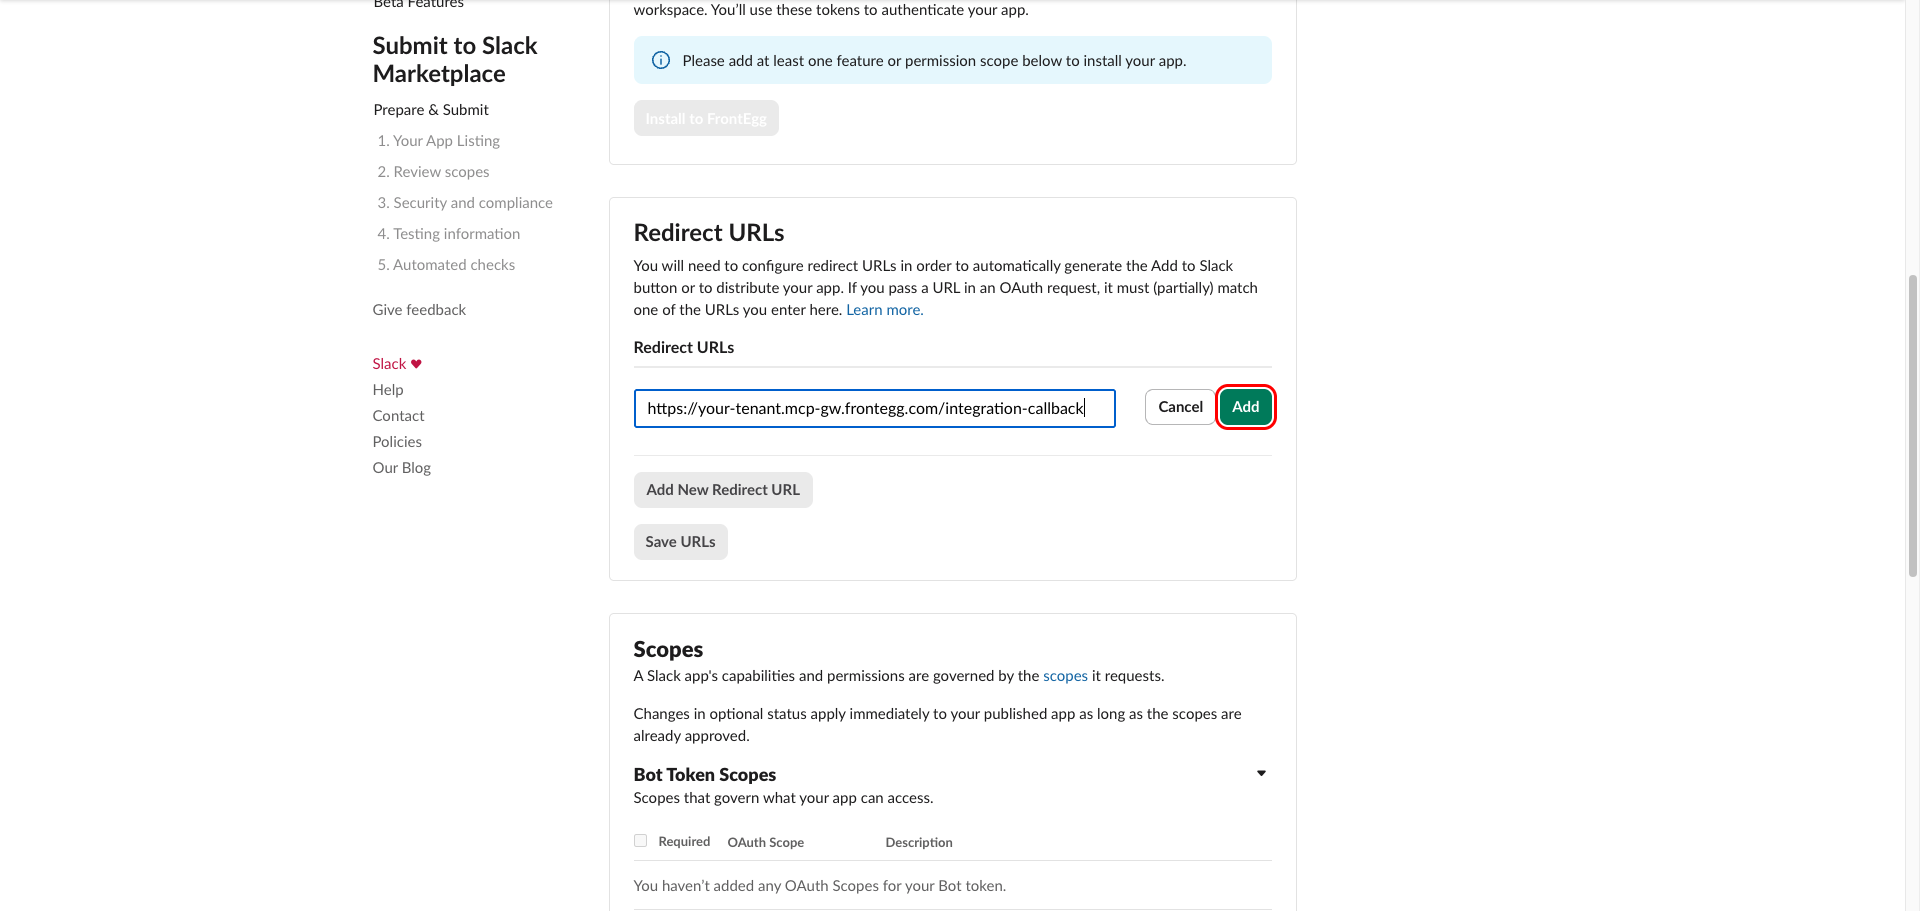
In the left sidebar, click OAuth & Permissions. Under Redirect URLs, click Add New Redirect URL and enter the redirect URL shown in the Frontegg portal for this integration — copy it whole, including the path. See How to get your Redirect URL.
The value has this shape, but take the real one from the portal rather than assembling it:
https://YOUR_MCP_GATEWAY_URL/integration-callback
Click Add, then Save URLs.
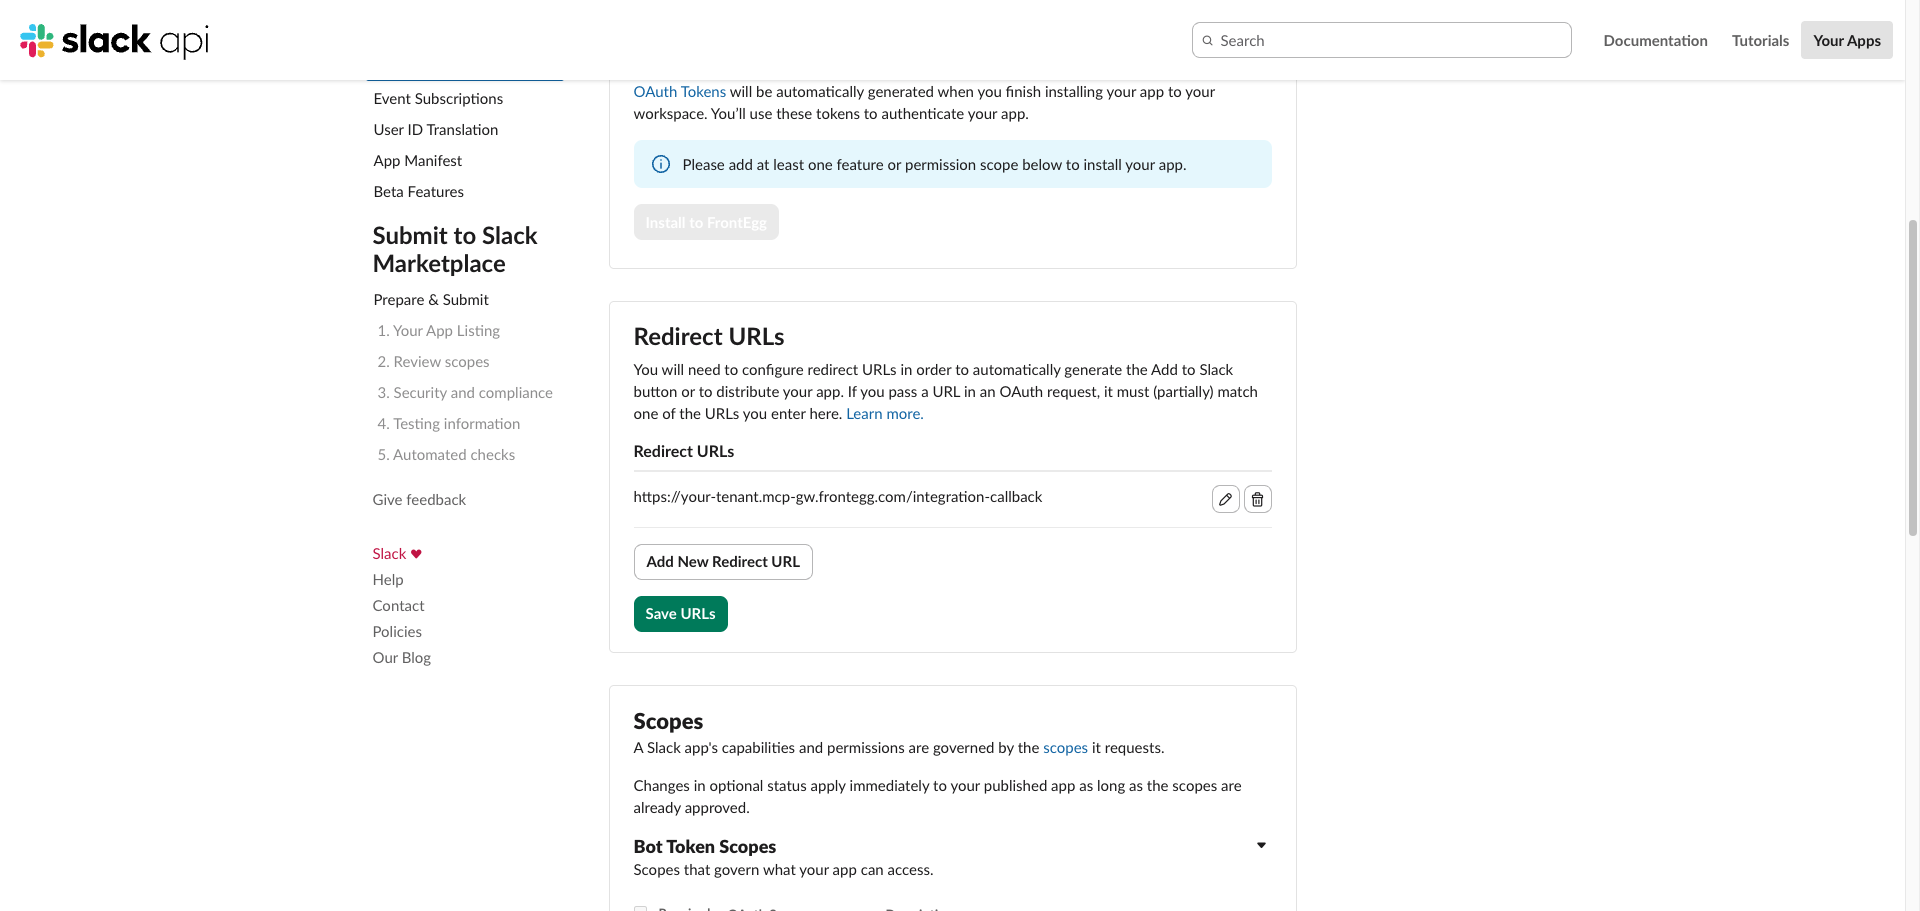
The Redirect URL now appears in the list. Verify the URL matches your Frontegg MCP Gateway exactly — a mismatch will cause the OAuth flow to fail with bad_redirect_uri.
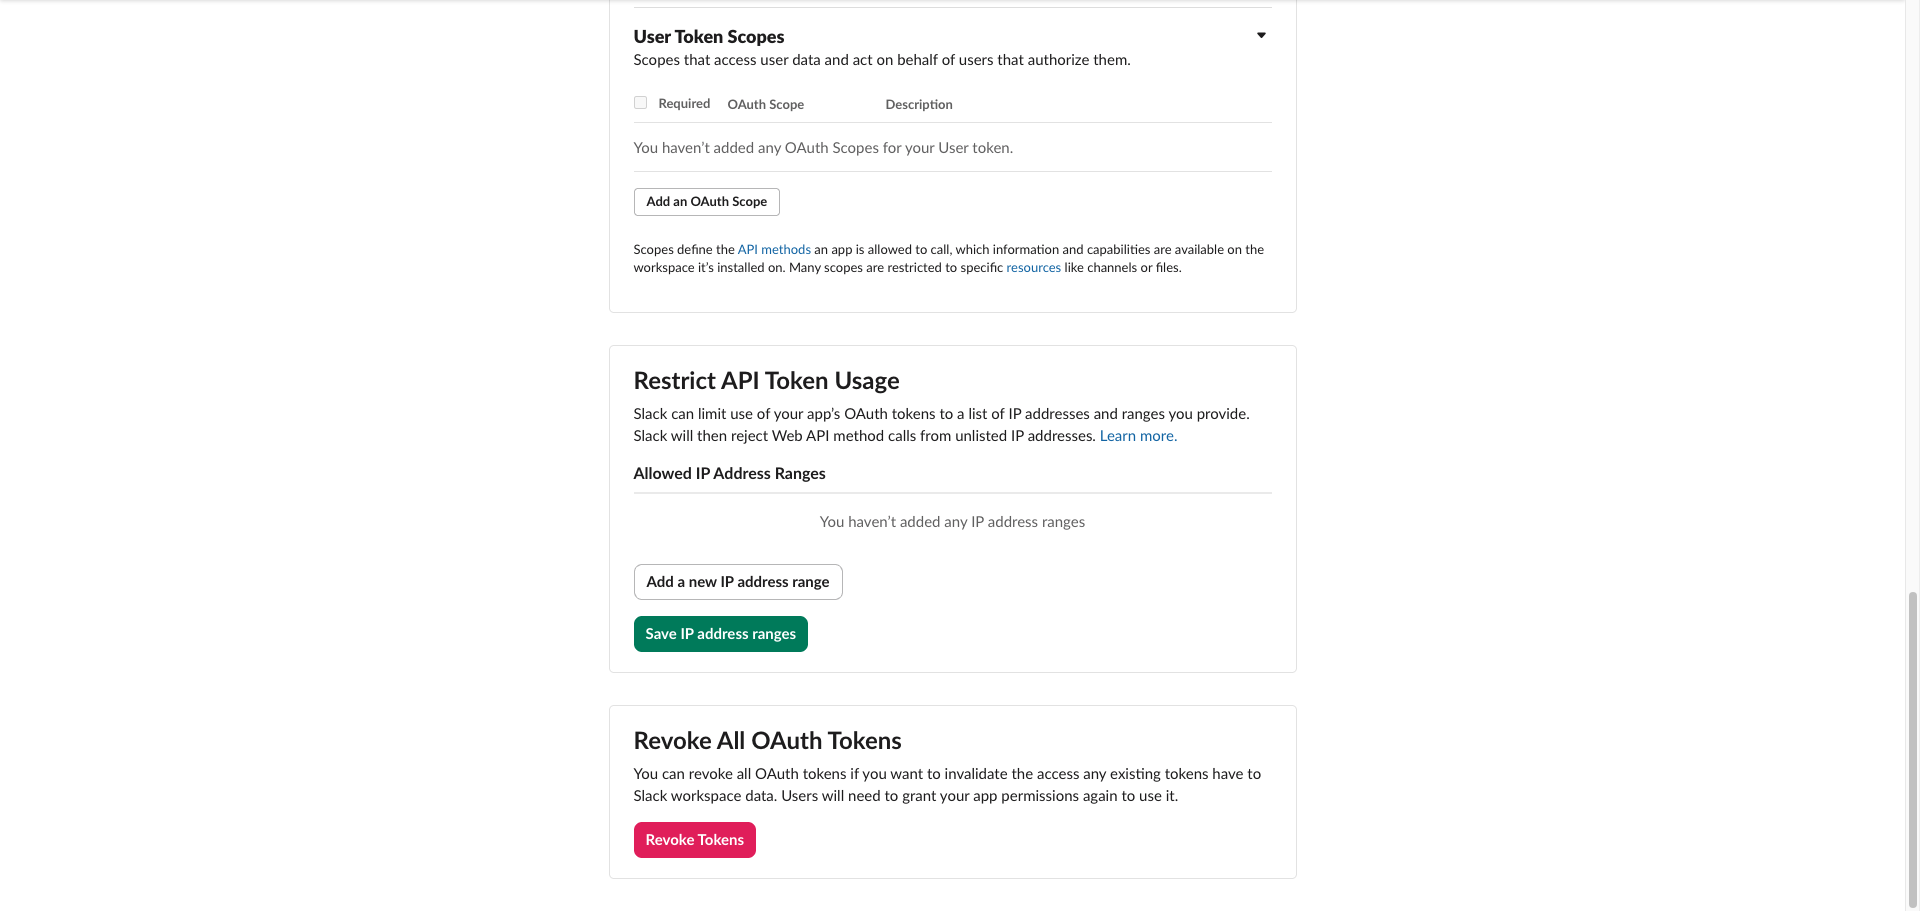
Scroll down to Scopes. Frontegg uses User Token Scopes (not Bot Token Scopes) — Slack issues a user token that acts on behalf of the user who authorizes the app. Click Add an OAuth Scope under User Token Scopes.
Use User Token Scopes, not Bot Token Scopes
Use User Token Scopes, not Bot Token Scopes
Frontegg requests user tokens via Slack's user_scope parameter. Scopes added under Bot Token Scopes are not granted to the user token and won't be available to Frontegg.
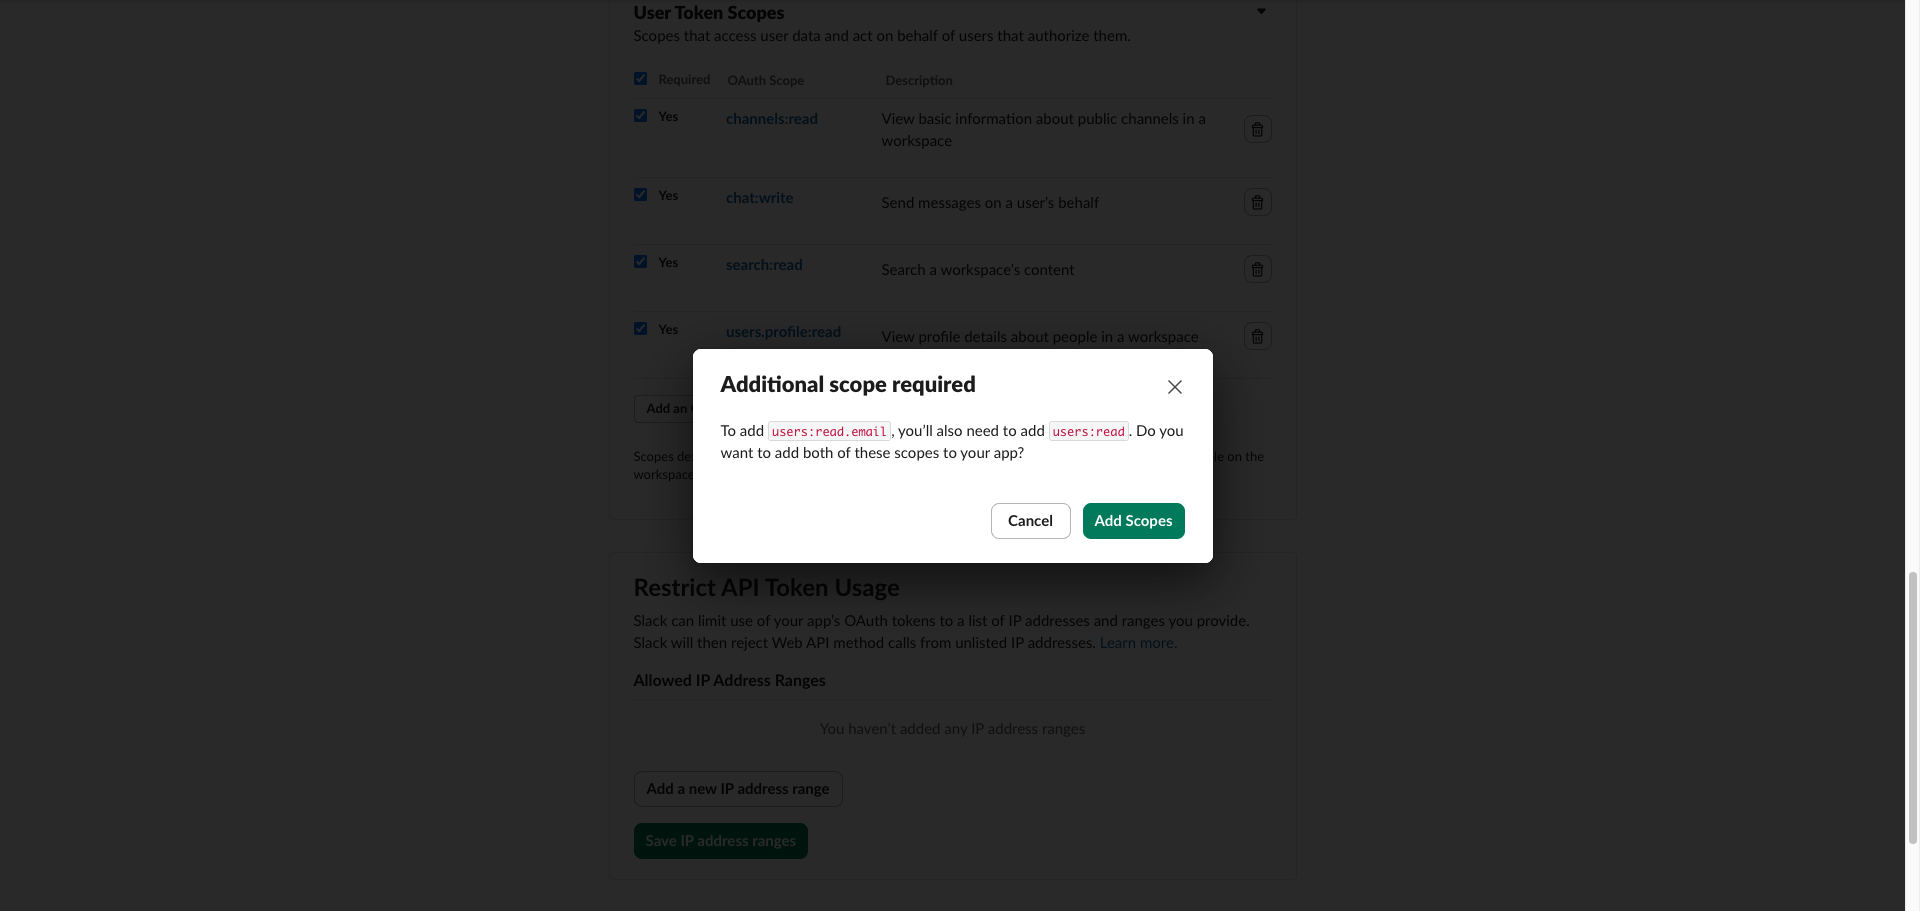
Type each scope name into the search box and select it from the dropdown. Select the following scopes:
| Scope | Description |
|---|---|
users.profile:read | View profile details about people in the workspace |
users:read | View people in the workspace |
users:read.email | View email addresses of people in the workspace |
team:read | View the workspace's name, domain, and icon |
channels:read | View basic information about public channels |
channels:write | Manage public channels and their membership |
channels:history | View messages and other content in public channels |
groups:read | View basic information about private channels |
groups:write | Manage private channels and their membership |
groups:history | View messages and other content in private channels |
im:read | View basic information about direct messages |
im:write | Start direct messages with people |
im:history | View messages and other content in direct messages |
mpim:read | View basic information about group direct messages |
mpim:write | Start group direct messages |
mpim:history | View messages and other content in group direct messages |
chat:write | Send, update, and delete messages |
files:read | View files shared in channels and conversations |
files:write | Upload and delete files |
search:read | Search the workspace's content |
Add all of them, and nothing more
Add all of them, and nothing more
Slack fails the entire authorization when any single requested scope cannot be granted, so a missing scope breaks the connection completely rather than only the matching operations. For the same reason, do not add admin.* scopes: they require an Enterprise organization and an org-wide install, and on a normal workspace they take the whole integration down.
Once you have your Client ID and Client Secret, enter them in the Frontegg portal:
- Open the Frontegg portal and navigate to [ENVIRONMENT] → Integrations → Slack.
- Enter the Client ID and Client Secret in the corresponding fields.
- Select the required scopes.
- Click Save.
When a user authorizes the integration, Slack will prompt them to choose the workspace where the app should be installed and to approve the requested scopes.
Adding a scope later needs a fresh authorization
Adding a scope later needs a fresh authorization
Scopes are granted once, when the user authorizes the app. If you add a scope afterwards, existing connections keep their old grant and the new operations stay unavailable until each user reconnects.
- A person can be reached by email alone: looking them up by address yields a user, opening a direct message with that user yields a channel, and a message can then be posted to it.
- Messages can be updated and deleted after posting, and a permalink can be generated for any message.
- Channels can be created, renamed, archived and unarchived, given a topic or purpose, and have members invited or removed.
- Messages are attributed to the app, not to the person who authorized it. Even though the integration uses a user token, a posted message shows the app as its author, so it does not read as "sent by me".
- Listings return at most 999 items per page and are paged with a cursor. File listings are the exception and use page numbers instead.
- Listing a user's conversations returns public channels only unless other conversation types are asked for explicitly — direct messages and private channels are not included by default.
- Slack's message search is a legacy method and works only with a user token. It also needs its own scope, so on an existing connection it stays unavailable until the user reconnects.
- Reading a workspace's people returns personal data, including email addresses, so those listings should be handled accordingly.