Pingdom is a website and application uptime and performance monitoring service. Integrating Pingdom with Frontegg lets your application read and manage uptime checks and transaction checks, uptime and performance data, maintenance windows, and the contacts and teams that alerts are routed to — on behalf of your users, all through Frontegg's integration layer (Pingdom API v3.1). Pingdom authenticates with a static API token sent on every request, so there is no OAuth flow.
Prerequisites
Prerequisites
- A Pingdom account
- Access to Settings → Pingdom API in My Pingdom to create an API token
Pingdom authenticates API requests with a static API token, sent on every request as the Authorization: Bearer <token> header. You create the token in My Pingdom and choose whether it has read-only or read-write access.
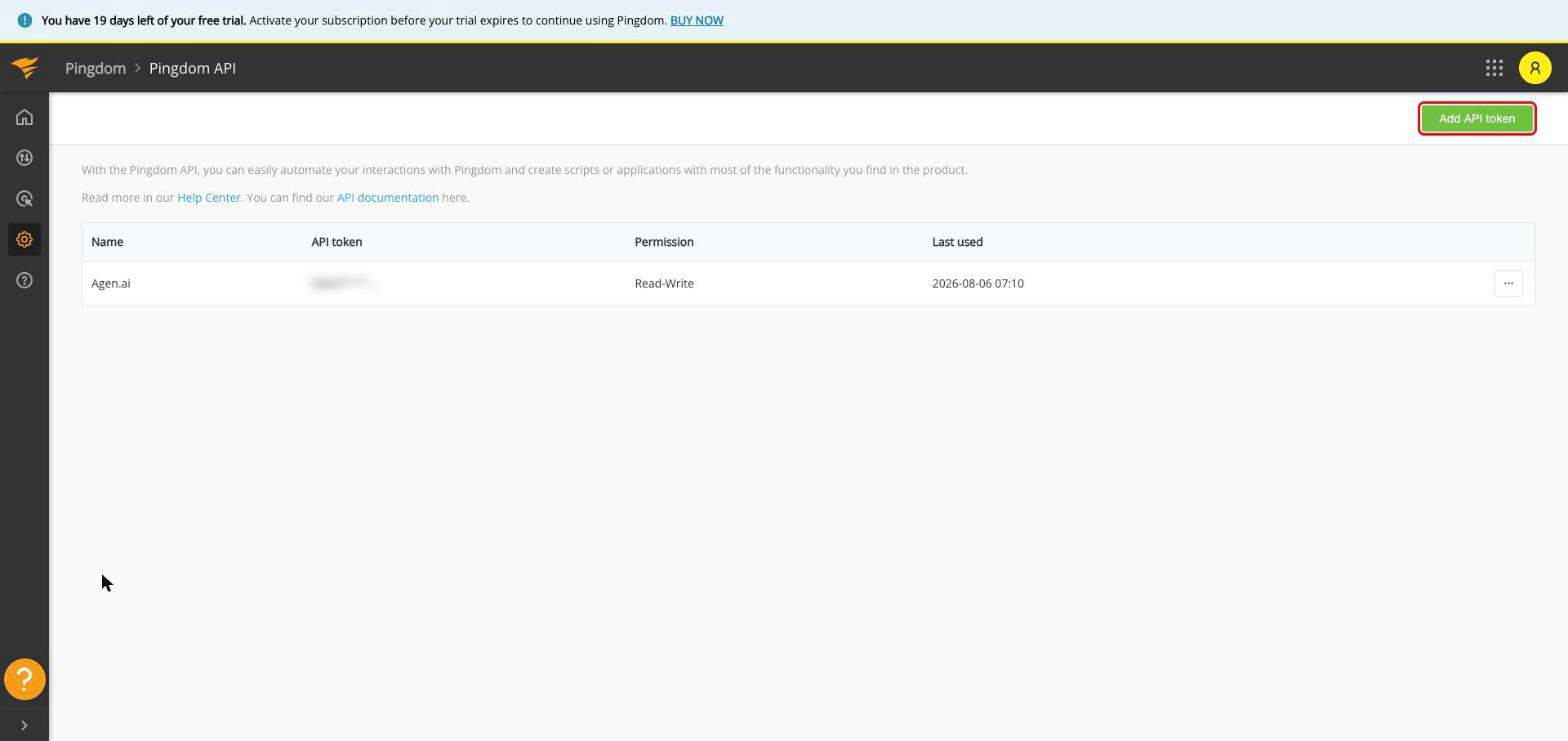
Sign in to My Pingdom, open Settings (the gear icon), and select Pingdom API. Click Add API token.
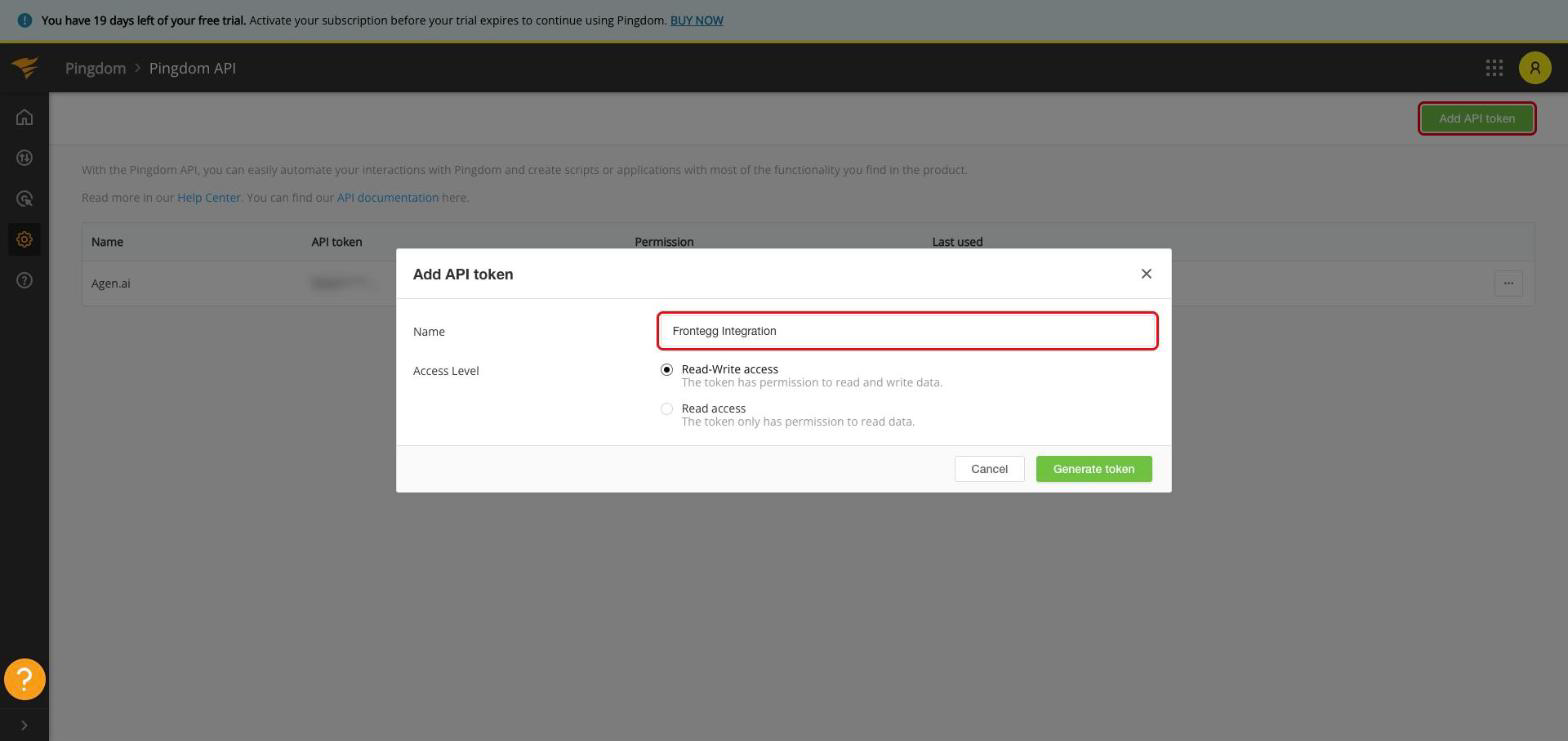
In the Add API token dialog:
- Name — Enter a descriptive name, for example
Frontegg Integration. - Access Level — Choose Read-Write access to use both read and write tools, or Read access for read-only. This is fixed when the token is created and cannot be changed afterwards. On a read-only token, the create, update, and delete tools for uptime checks, transaction checks, maintenance windows, contacts, and teams fail with a permissions error from Pingdom.
Click Generate token and copy the token value.
Copy your token now
Copy your token now
The token value is shown only once, when it is created. Copy it immediately and store it securely — treat it like a password. If it is exposed or lost, delete it and create a new one on the same Pingdom API page.
Once you have your API token, configure the integration in the Frontegg portal:
- Open the Frontegg portal and navigate to [ENVIRONMENT] → Integrations → Pingdom.
- Paste the token into the API Key field.
- Click Save.
Keep your credentials secure
Keep your credentials secure
Never share or commit your API token to version control.