Coralogix can be connected to Agen.co two ways, matching the Official / In-house filter in the connector picker:
- Official — Agen.co connects through Coralogix's own hosted MCP server, so your AI agents use the same log-querying, dashboard, alerting, and webhook tools Coralogix exposes to MCP clients like Claude Code, Cursor, and Codex, authenticated either via OAuth or a personal API key.
- In-house — Agen.co wraps the Coralogix management API directly through its own integration layer, using a dedicated personal API key you generate in your Coralogix account.
Pick Official if the built-in MCP tools cover what your agents need. Fall back to In-house if you need the full management-API surface.
Prerequisites
Prerequisites
- A Coralogix account
- If you plan to use API token authentication: a personal Coralogix API key with the role presets your agents need (at minimum
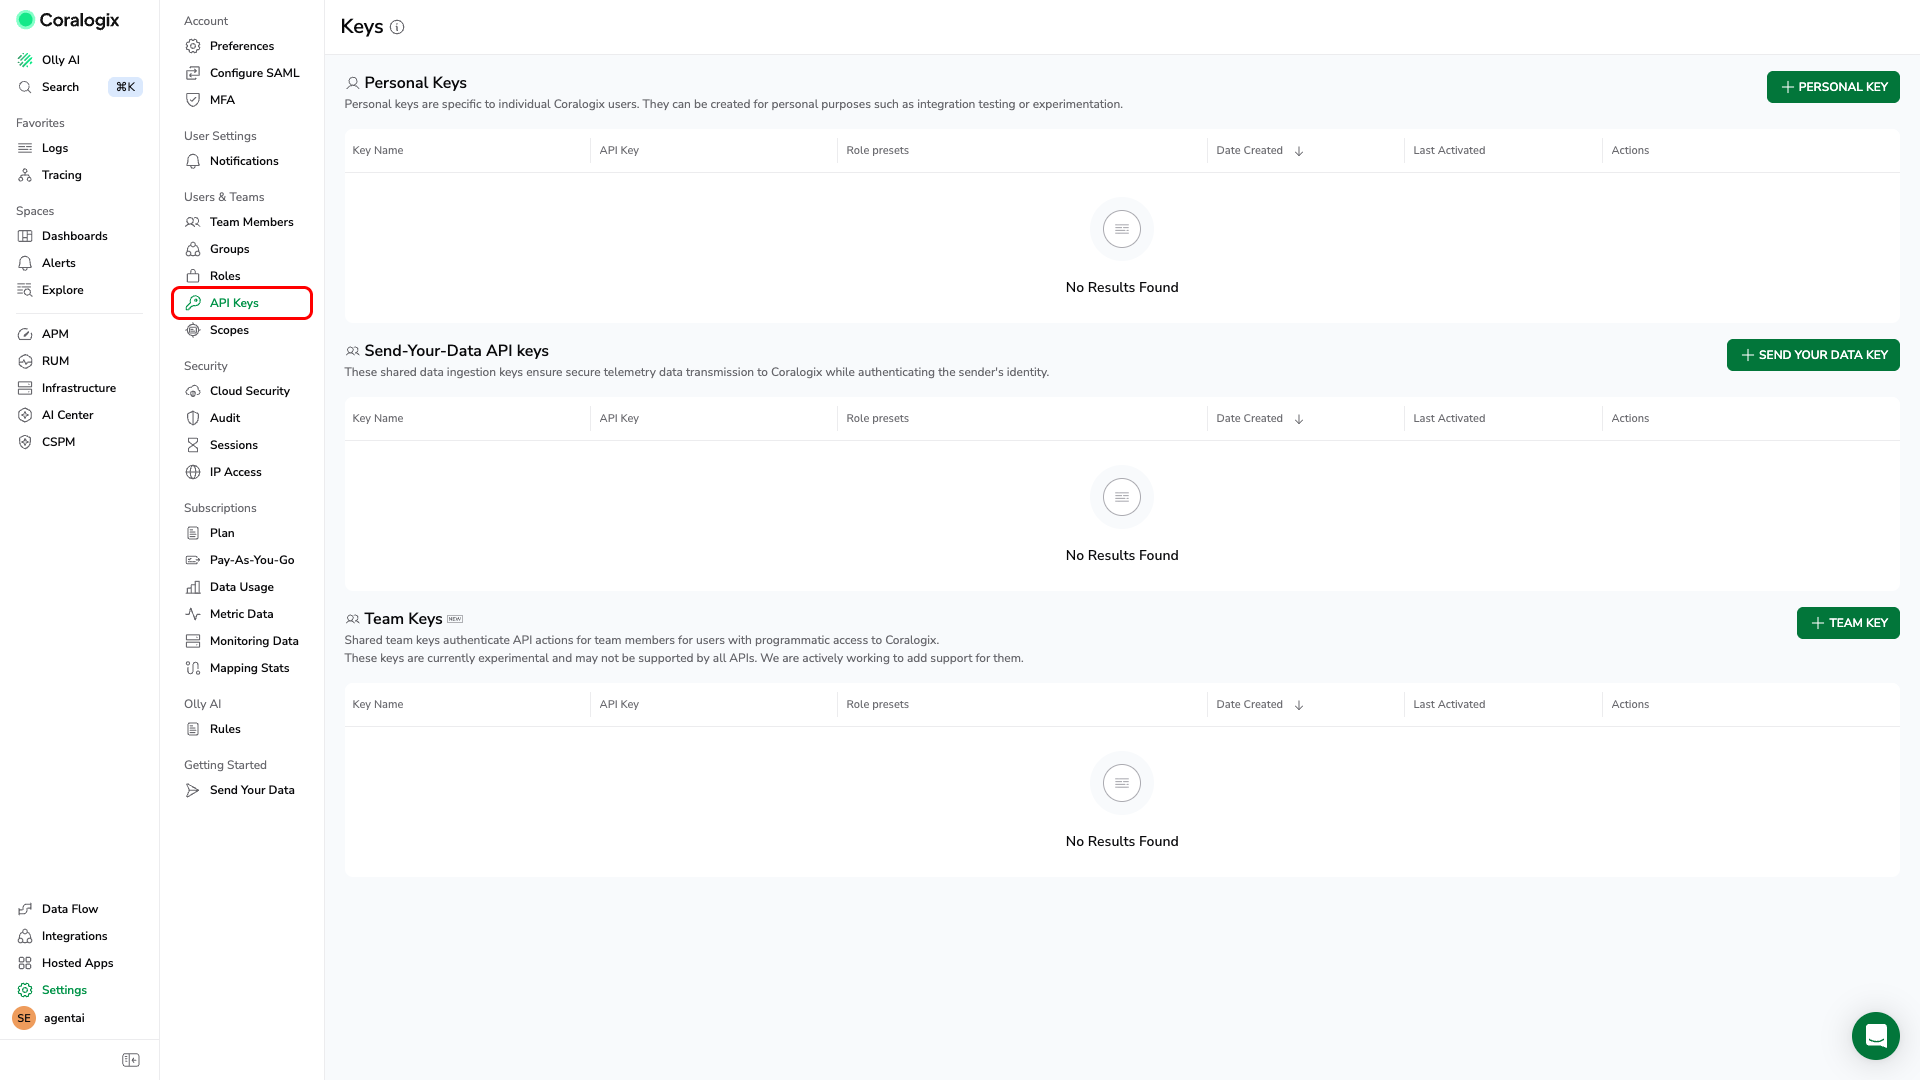
DataQuerying, or log queries will return zero rows) — create one under Settings → Users & Teams → API Keys → PERSONAL KEY
Coralogix's MCP setup page lists its own domain selector with regions US1, US2, US3, EU1, EU2, AP1, AP2, AP3, each mapping directly to a <region>.coralogix.com domain (for example eu2.coralogix.com). This can differ from the team login hostname pattern used elsewhere in Coralogix's docs (used for the In-house integration below) — if you're unsure which value to enter, check the domain selector on Coralogix's own MCP documentation page for your account's exact domain.
- In the Agen.co portal, go to Connectors → Marketplace, click Add connector, and filter Type to Official.
- Select Coralogix.
- Fill in the fields:
| Field | Required | Description |
|---|---|---|
| Instance Slug | No | Distinguishes multiple instances of this MCP connector — it prefixes each imported tool as slug__tool. Use lowercase kebab-case; leave empty for a single instance. This value is immutable after creation. |
| Coralogix domain | Yes | Your Coralogix region domain (for example, eu2.coralogix.com). Agen.co uses it to build the MCP endpoint for your region. |
- Under Authentication, choose how Agen.co connects:
| Method | Additional field | How it works |
|---|---|---|
| OAuth | — | You're redirected to Coralogix to sign in and click Authorize. No credentials are entered manually. |
| API token | API key (required) | Paste a personal Coralogix API key (starts with cxup_). The MCP server inherits whatever role presets that key was created with. |
- Click Connect.
Once connected, Coralogix appears under My connectors with tools spanning:
| Area | What it covers |
|---|---|
| Log queries | Running DataPrime or Lucene log queries — requires the DataQuerying role preset when using API token authentication |
| Dashboards | Reading, creating, and updating dashboards |
| Alerts & SLOs | Reading and managing alert definitions, alert events, and SLOs |
| Webhooks | Reading, creating, and testing outgoing webhooks |
Enabling the Coralogix connector isn't enough on its own. Tool calls remain denied until you create a policy that grants access to the specific tools you want to expose.
Coralogix is a cloud-native observability platform for logs, metrics, and traces. Integrating Coralogix with Frontegg allows your application to manage alerts, dashboards, SLOs, log queries, webhooks, API keys, teams, and roles on behalf of your users using a personal API key.
Prerequisites
Prerequisites
- A Coralogix account with admin access
- Your Coralogix team's login URL (for example,
your-team.coralogix.comfor EU1 oryour-team.eu2.coralogix.comfor EU2) — you need this to determine your region URL in Step 6
Log in to your Coralogix team. In the left navigation, click Settings, then under Users & Teams click API Keys.
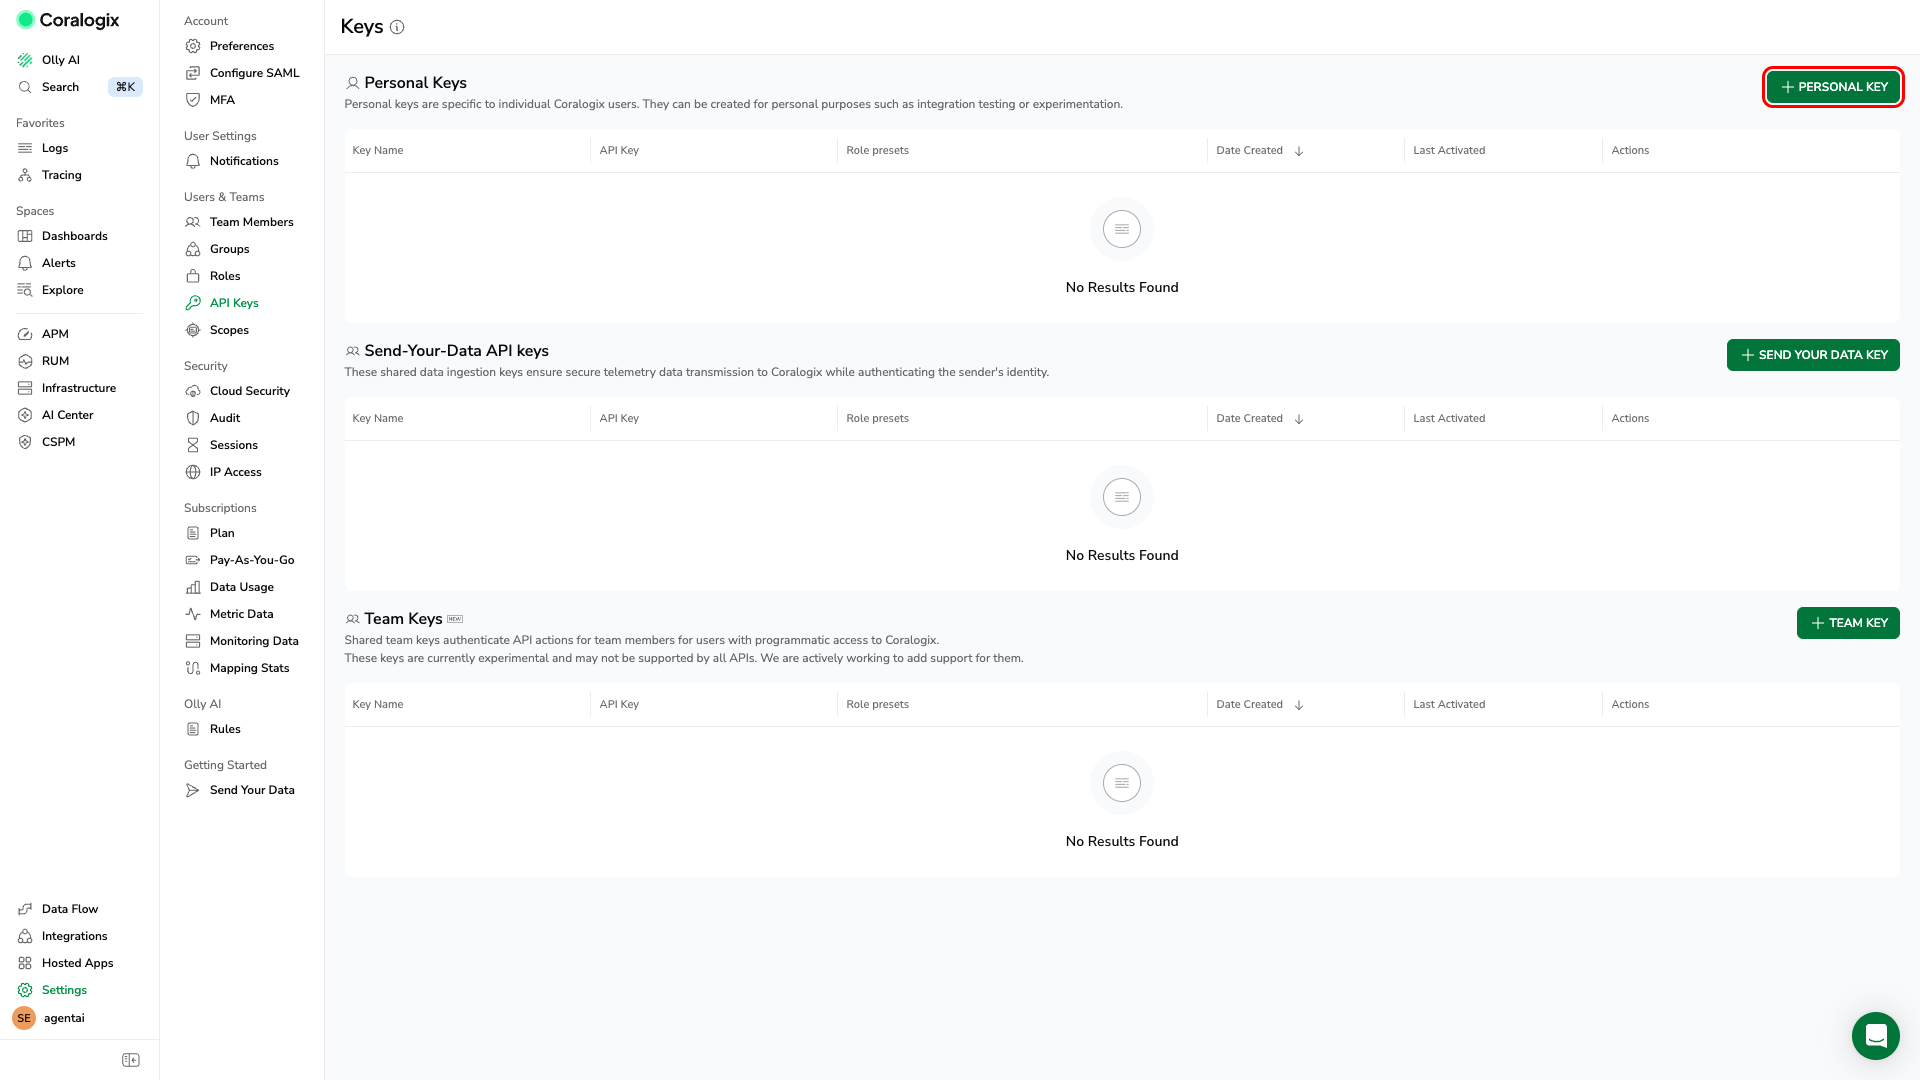
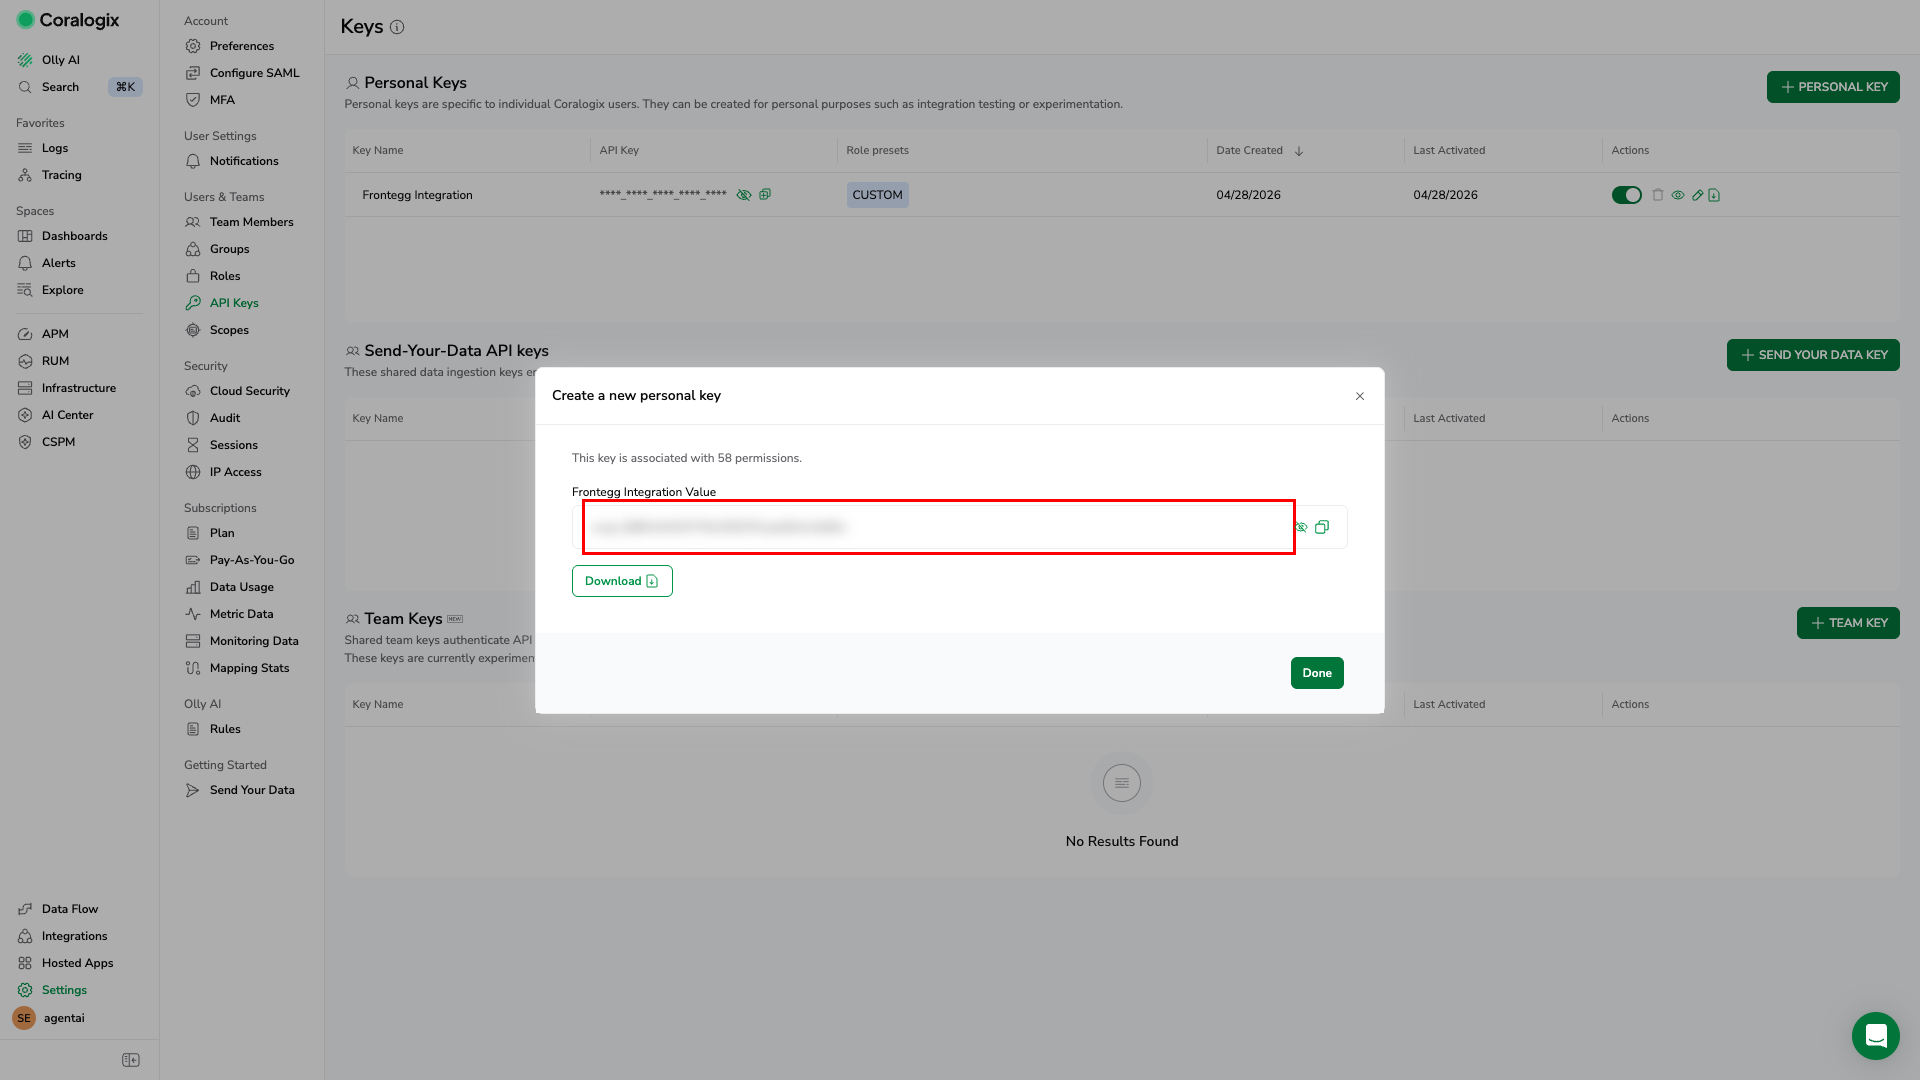
On the Keys page, click PERSONAL KEY to create a new personal API key.
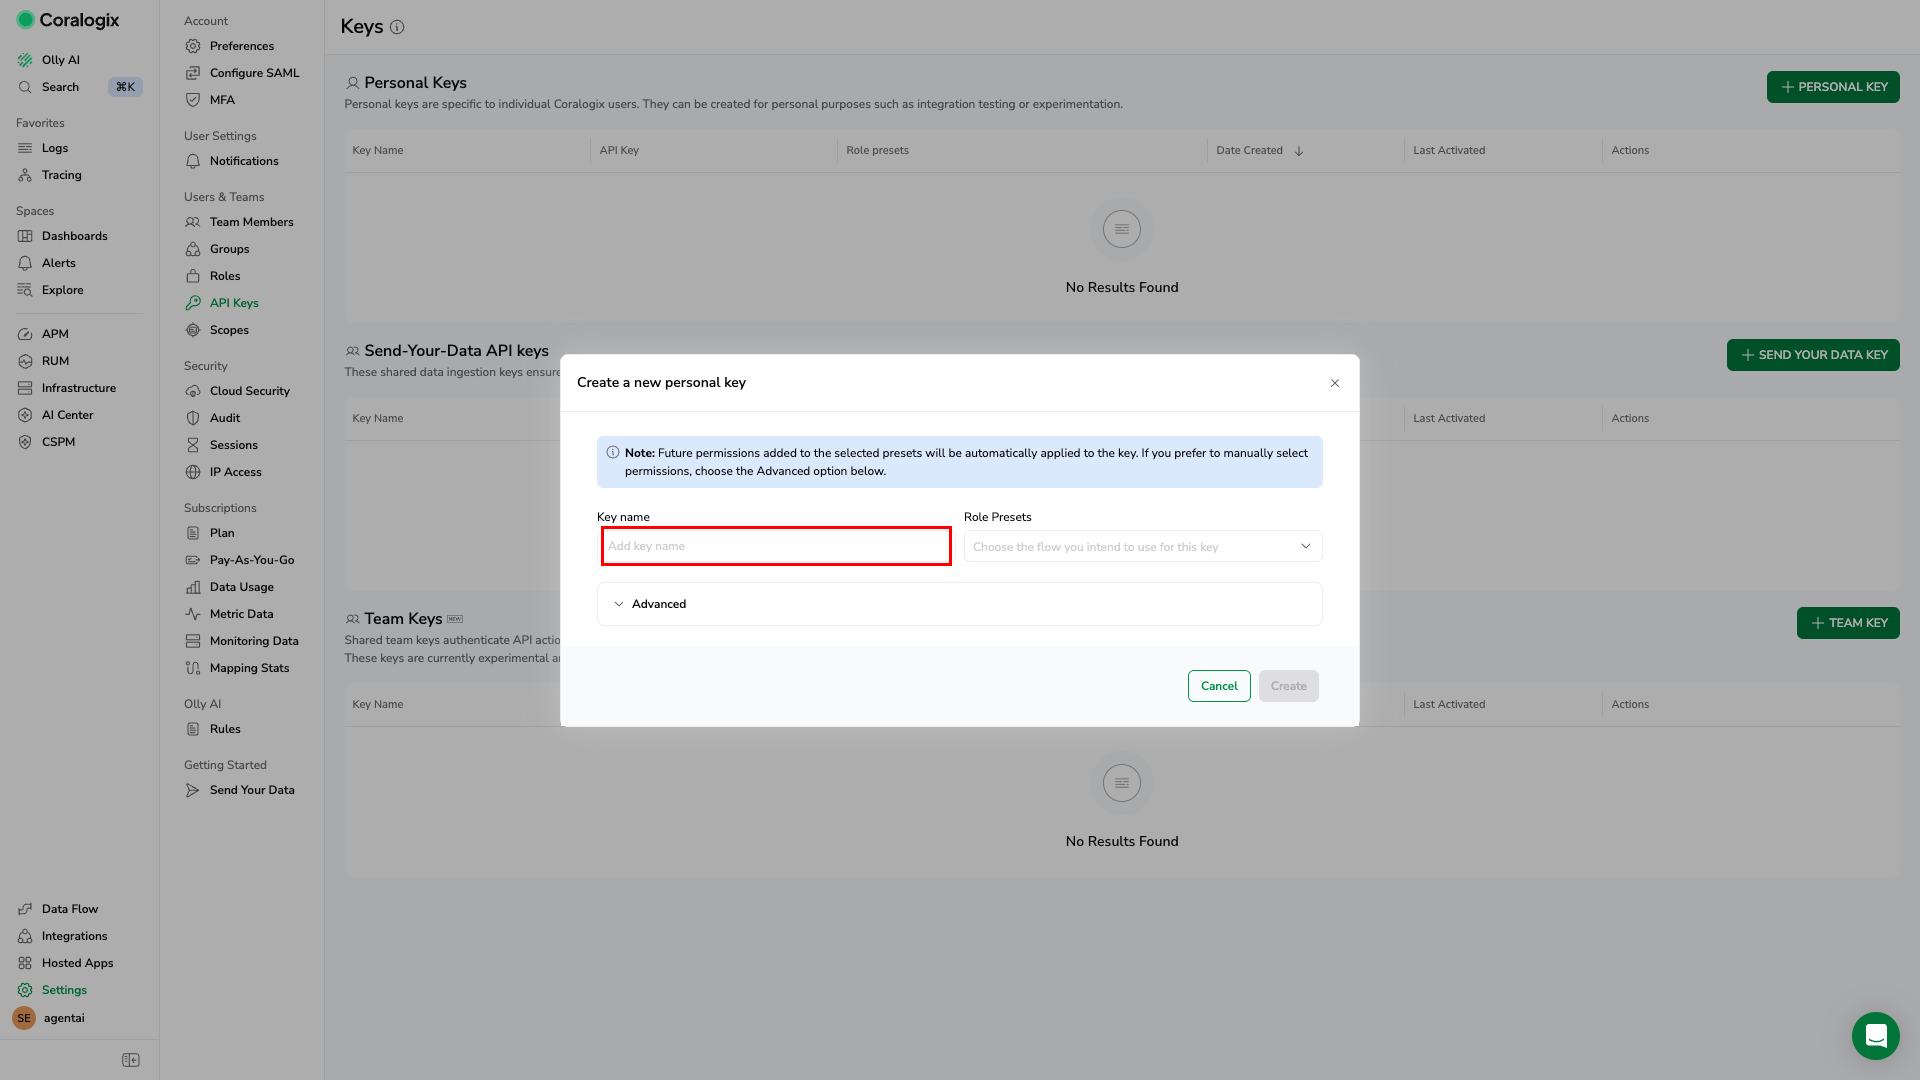
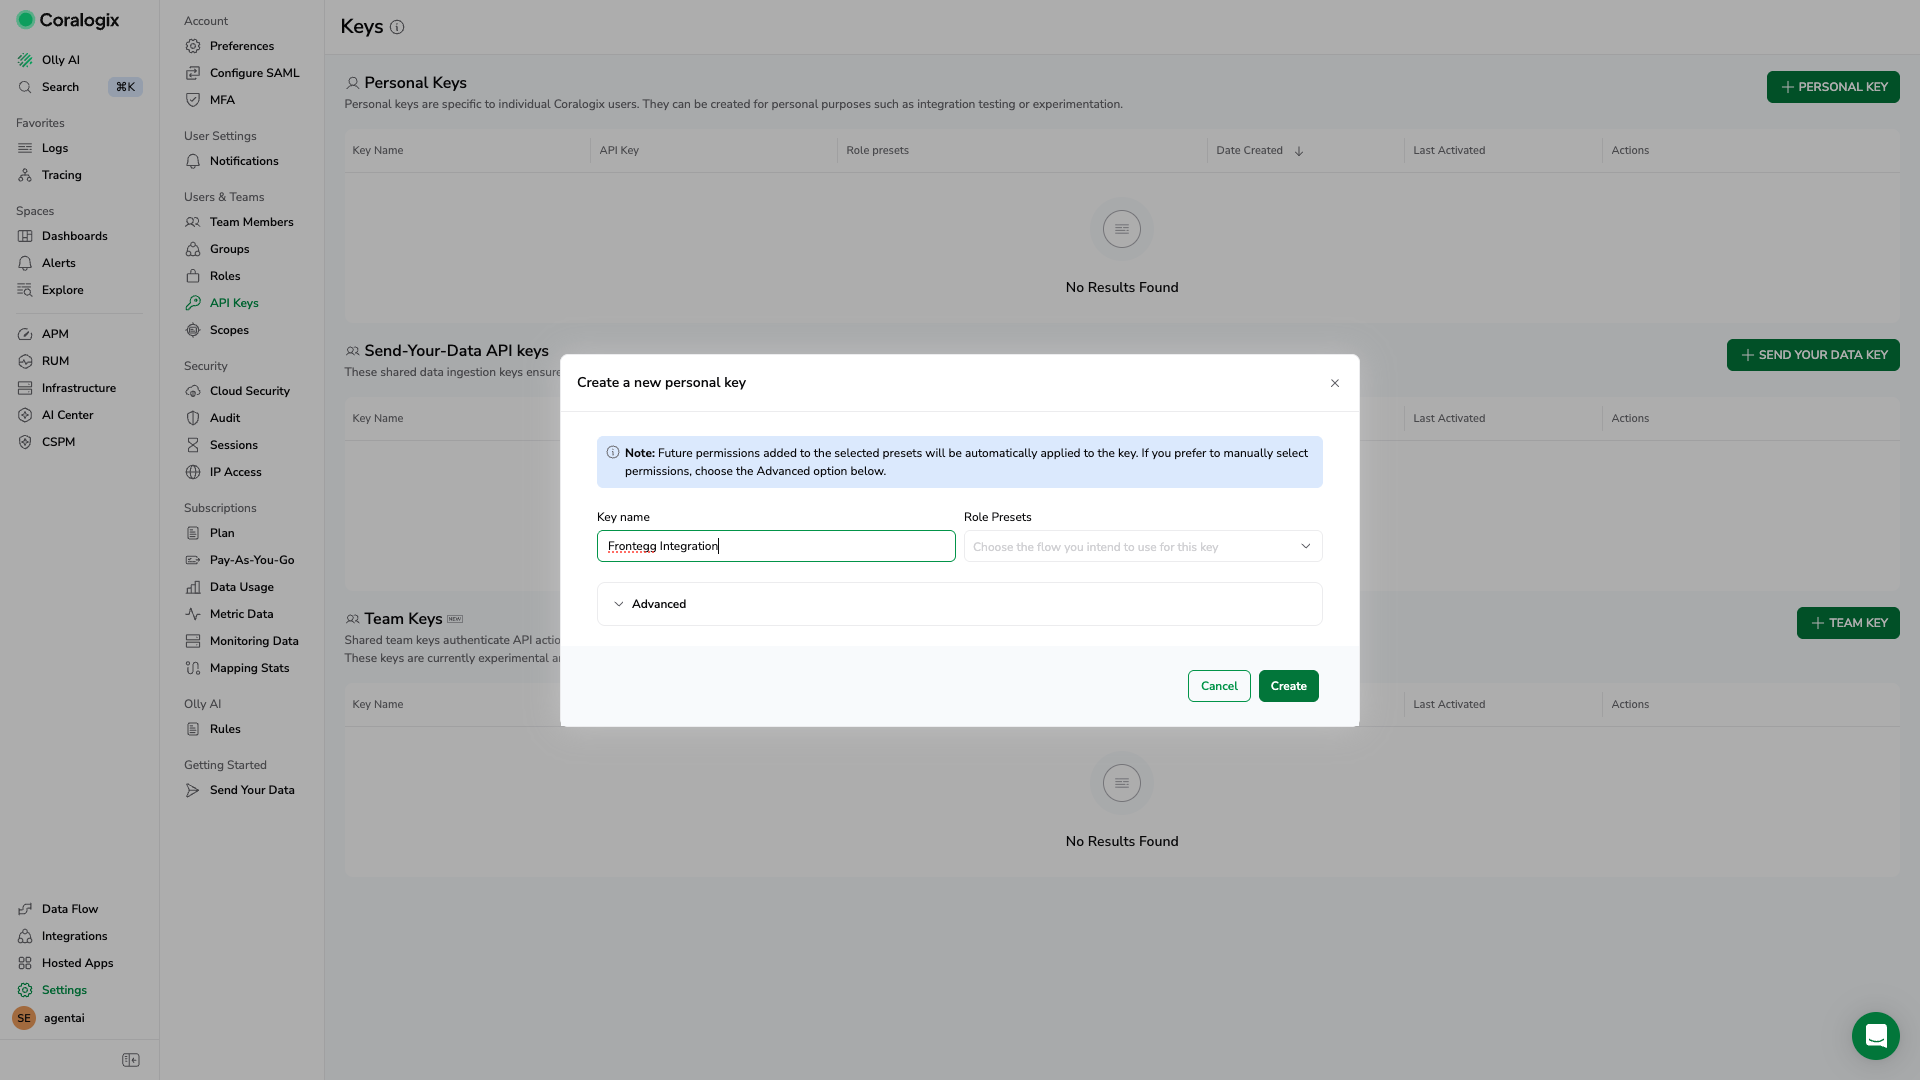
In the Create a new personal key dialog, enter a descriptive name in the Key name field — for example, Frontegg Integration.
Open the Role Presets dropdown and check the presets that correspond to the integration tools you plan to use. At minimum, select DataQuerying — without it the API key will authenticate but every log query will return zero rows.
| Role preset | Required for |
|---|---|
DataQuerying | Querying logs via DataPrime or Lucene (Query Logs, Background Query Logs) |
Dashboards | Reading, creating, updating, and deleting dashboards |
Incidents | Reading and managing alert definitions, alert events, and SLOs |
OutboundWebhooks | Reading, creating, testing, and deleting outgoing webhooks |
Personal keys cannot manage org-level resources
Personal keys cannot manage org-level resources
Personal API keys in Coralogix do not expose role presets for managing API keys, teams, members, or custom roles. If you need the Manage API Keys, Manage Teams, or Manage Roles tools, create a separate Team Admin key (Settings → API Keys → TEAM ADMIN KEY) and use it in a second Frontegg integration instance.
Click Create when all required presets are selected.
Coralogix displays the key value once — immediately after creation. Copy it now and store it securely.
One-time display
One-time display
The API key value is shown only at creation time. Download it or copy it before closing the dialog. If you lose it, you must create a new key.
The Frontegg integration requires the management API base URL for your Coralogix region. To identify your region, look at the host you use to sign in to the Coralogix UI (everything after the team name) and match it to the table below. The full canonical reference is the Coralogix endpoints page.
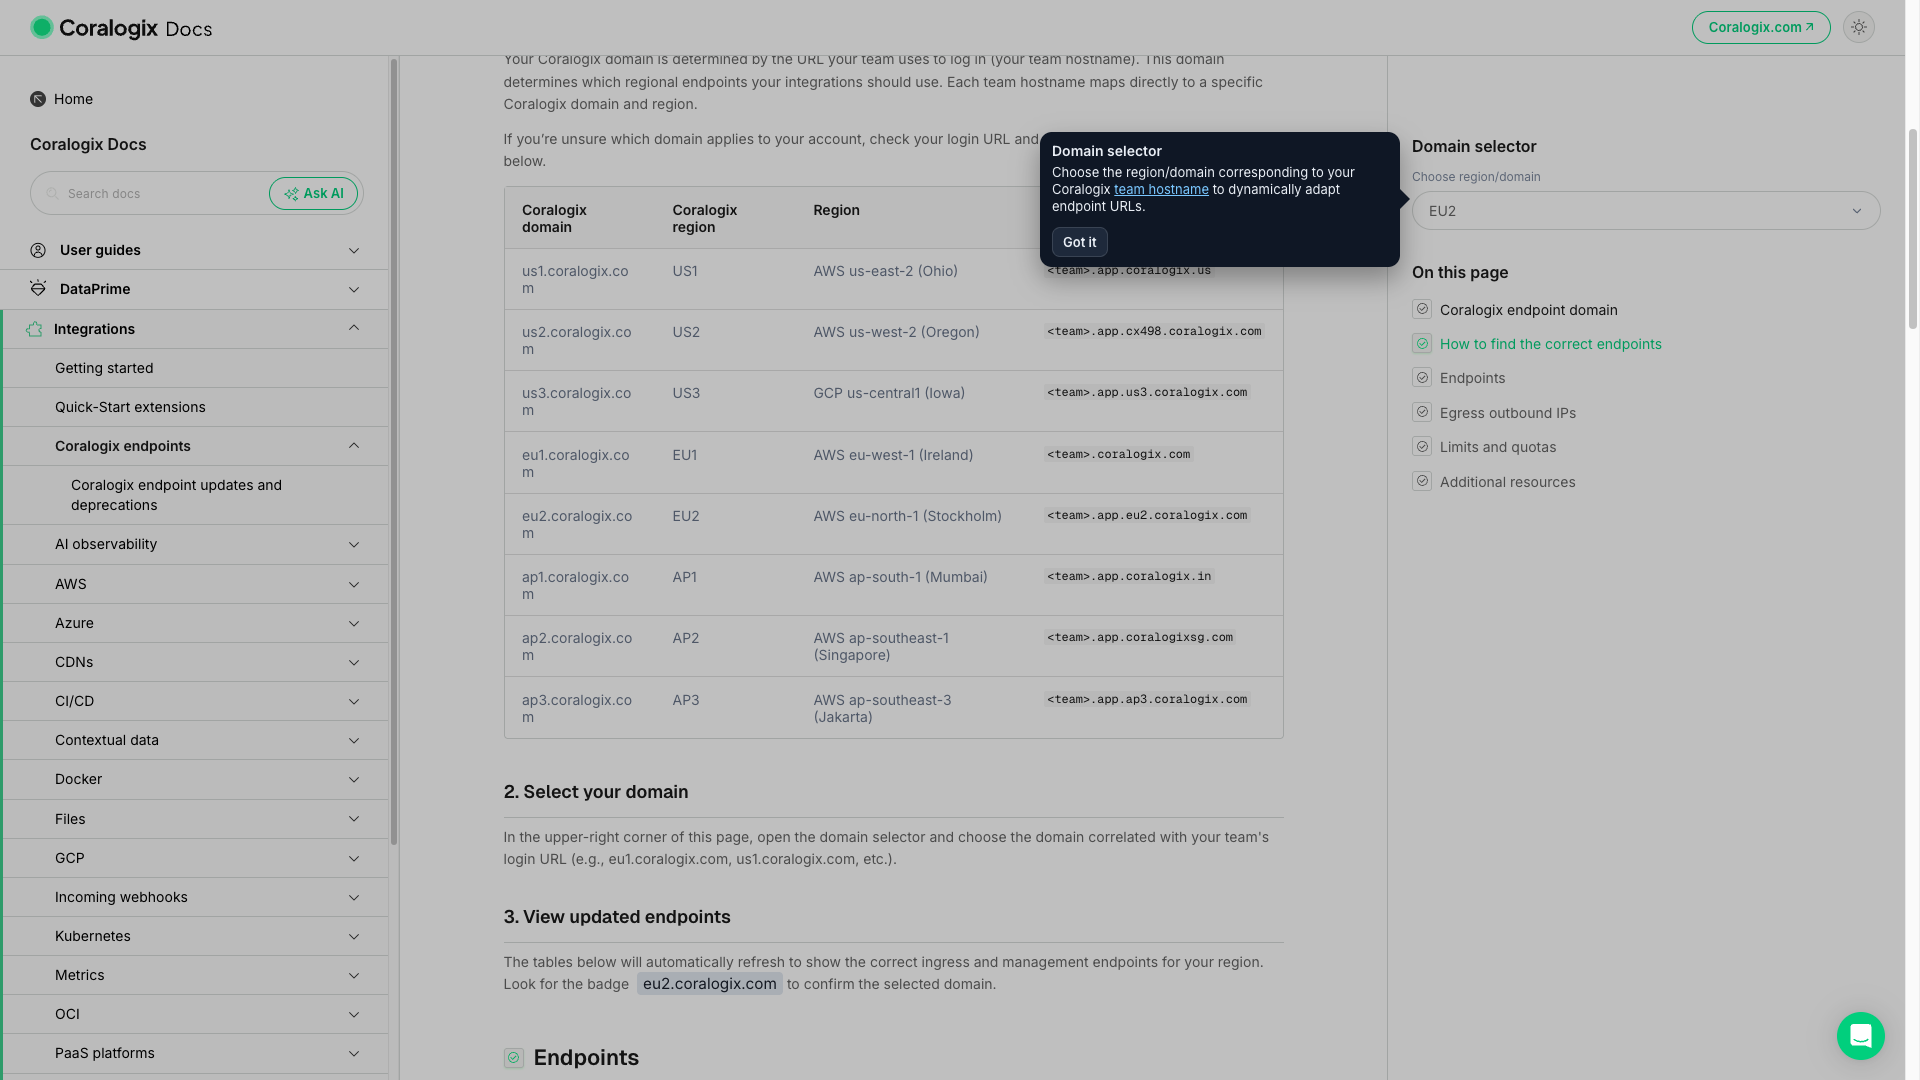
| Region | Team login domain | Region URL |
|---|---|---|
| EU1 (Ireland) | <team>.coralogix.com | https://api.coralogix.com |
| EU2 (Stockholm) | <team>.eu2.coralogix.com | https://api.eu2.coralogix.com |
| US1 (Ohio) | <team>.coralogix.us | https://api.coralogix.us |
| US2 (Oregon) | <team>.cx498.coralogix.com | https://api.cx498.coralogix.com |
| AP1 (Singapore) | <team>.coralogixsg.com | https://api.coralogixsg.com |
| AP2 (Mumbai) | <team>.coralogix.in | https://api.coralogix.in |
| AP3 (Sydney) | <team>.ap3.coralogix.com | https://api.ap3.coralogix.com |
EU1 has no region prefix
EU1 has no region prefix
Coralogix's EU1 region predates the regional naming scheme, so its team and API hostnames omit the eu1. prefix. If your sign-in URL looks like your-team.coralogix.com (no region segment), you are on EU1 and the region URL is https://api.coralogix.com.
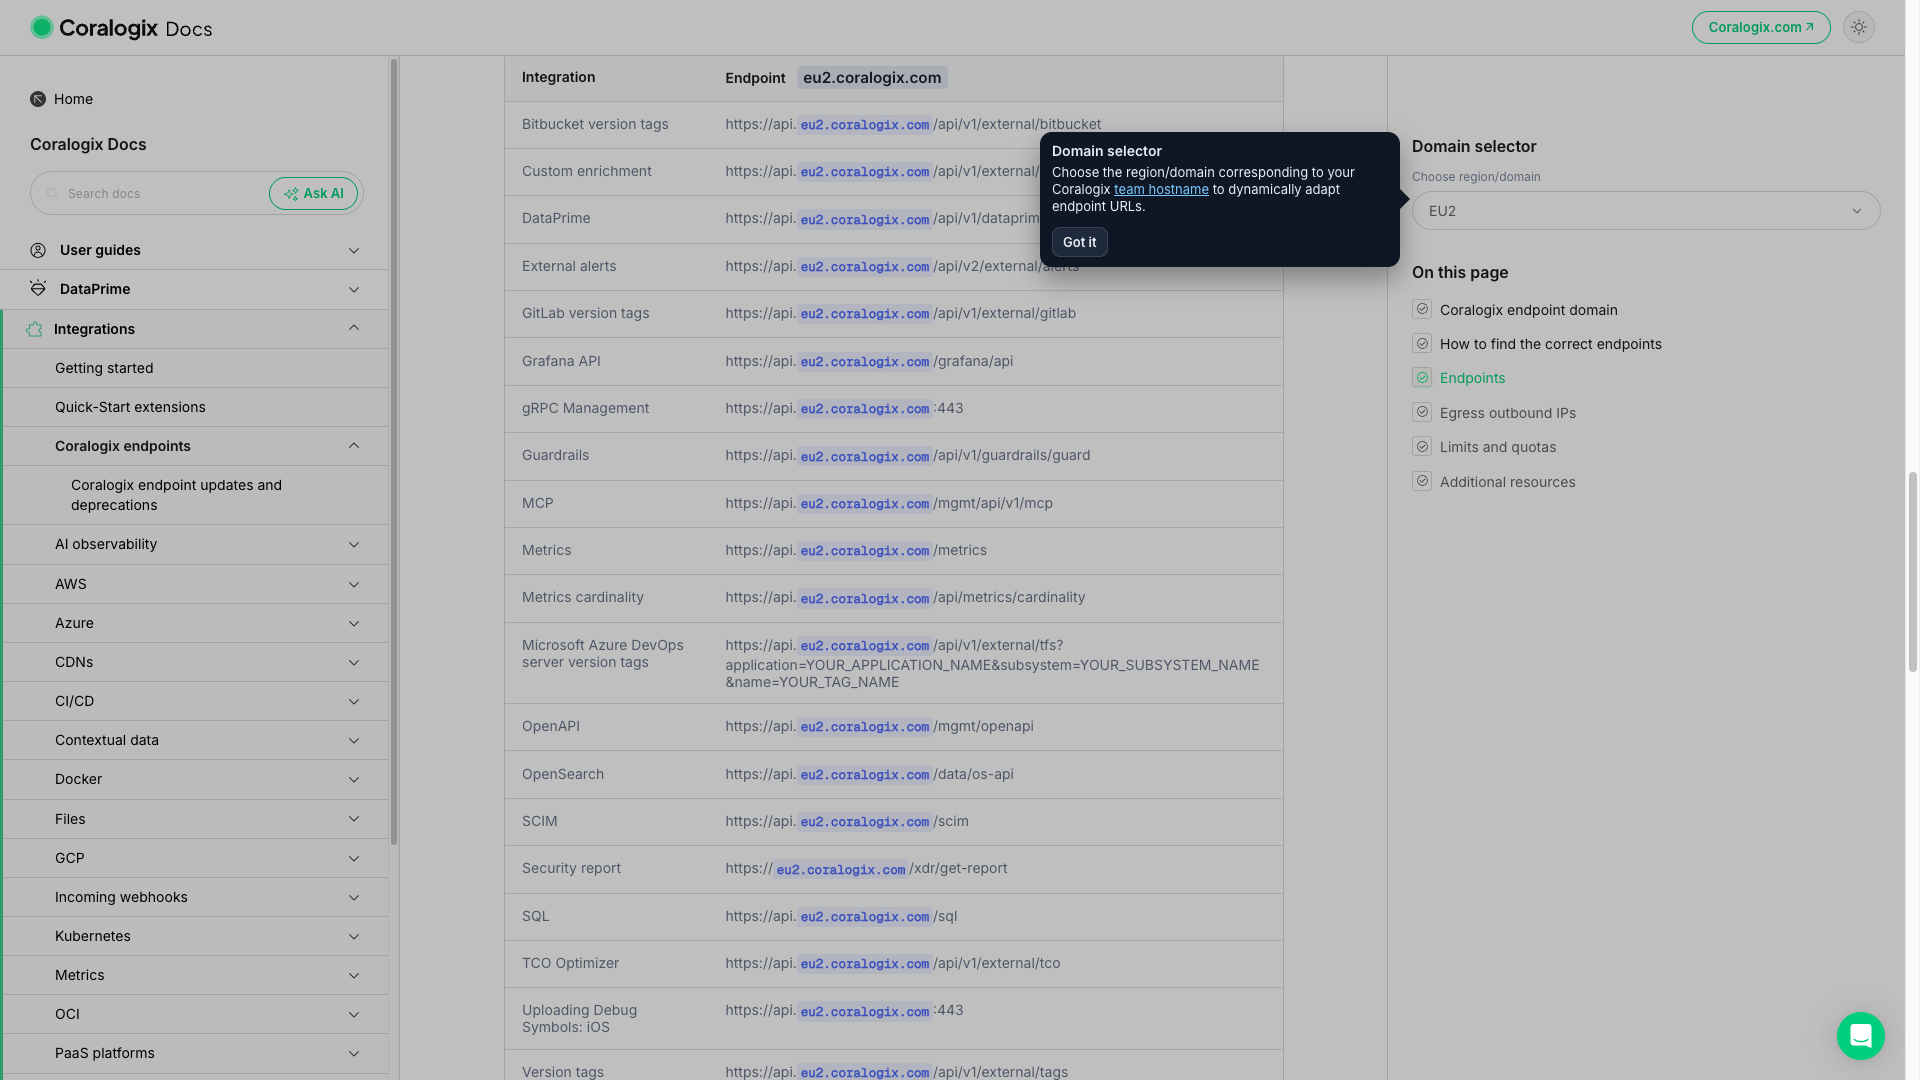
Once you have your API Key and region URL, configure the integration in the Frontegg portal:
- Open the Frontegg portal and navigate to [ENVIRONMENT] → Integrations → Coralogix.
- Enter the API Key you copied in the previous step.
- Enter the Coralogix region URL (for example,
https://api.eu2.coralogix.com) — no trailing slash. - Click Save.
Keep your API key secure
Keep your API key secure
Never share or commit your Coralogix API key to version control.