Getting started with login and sign-up
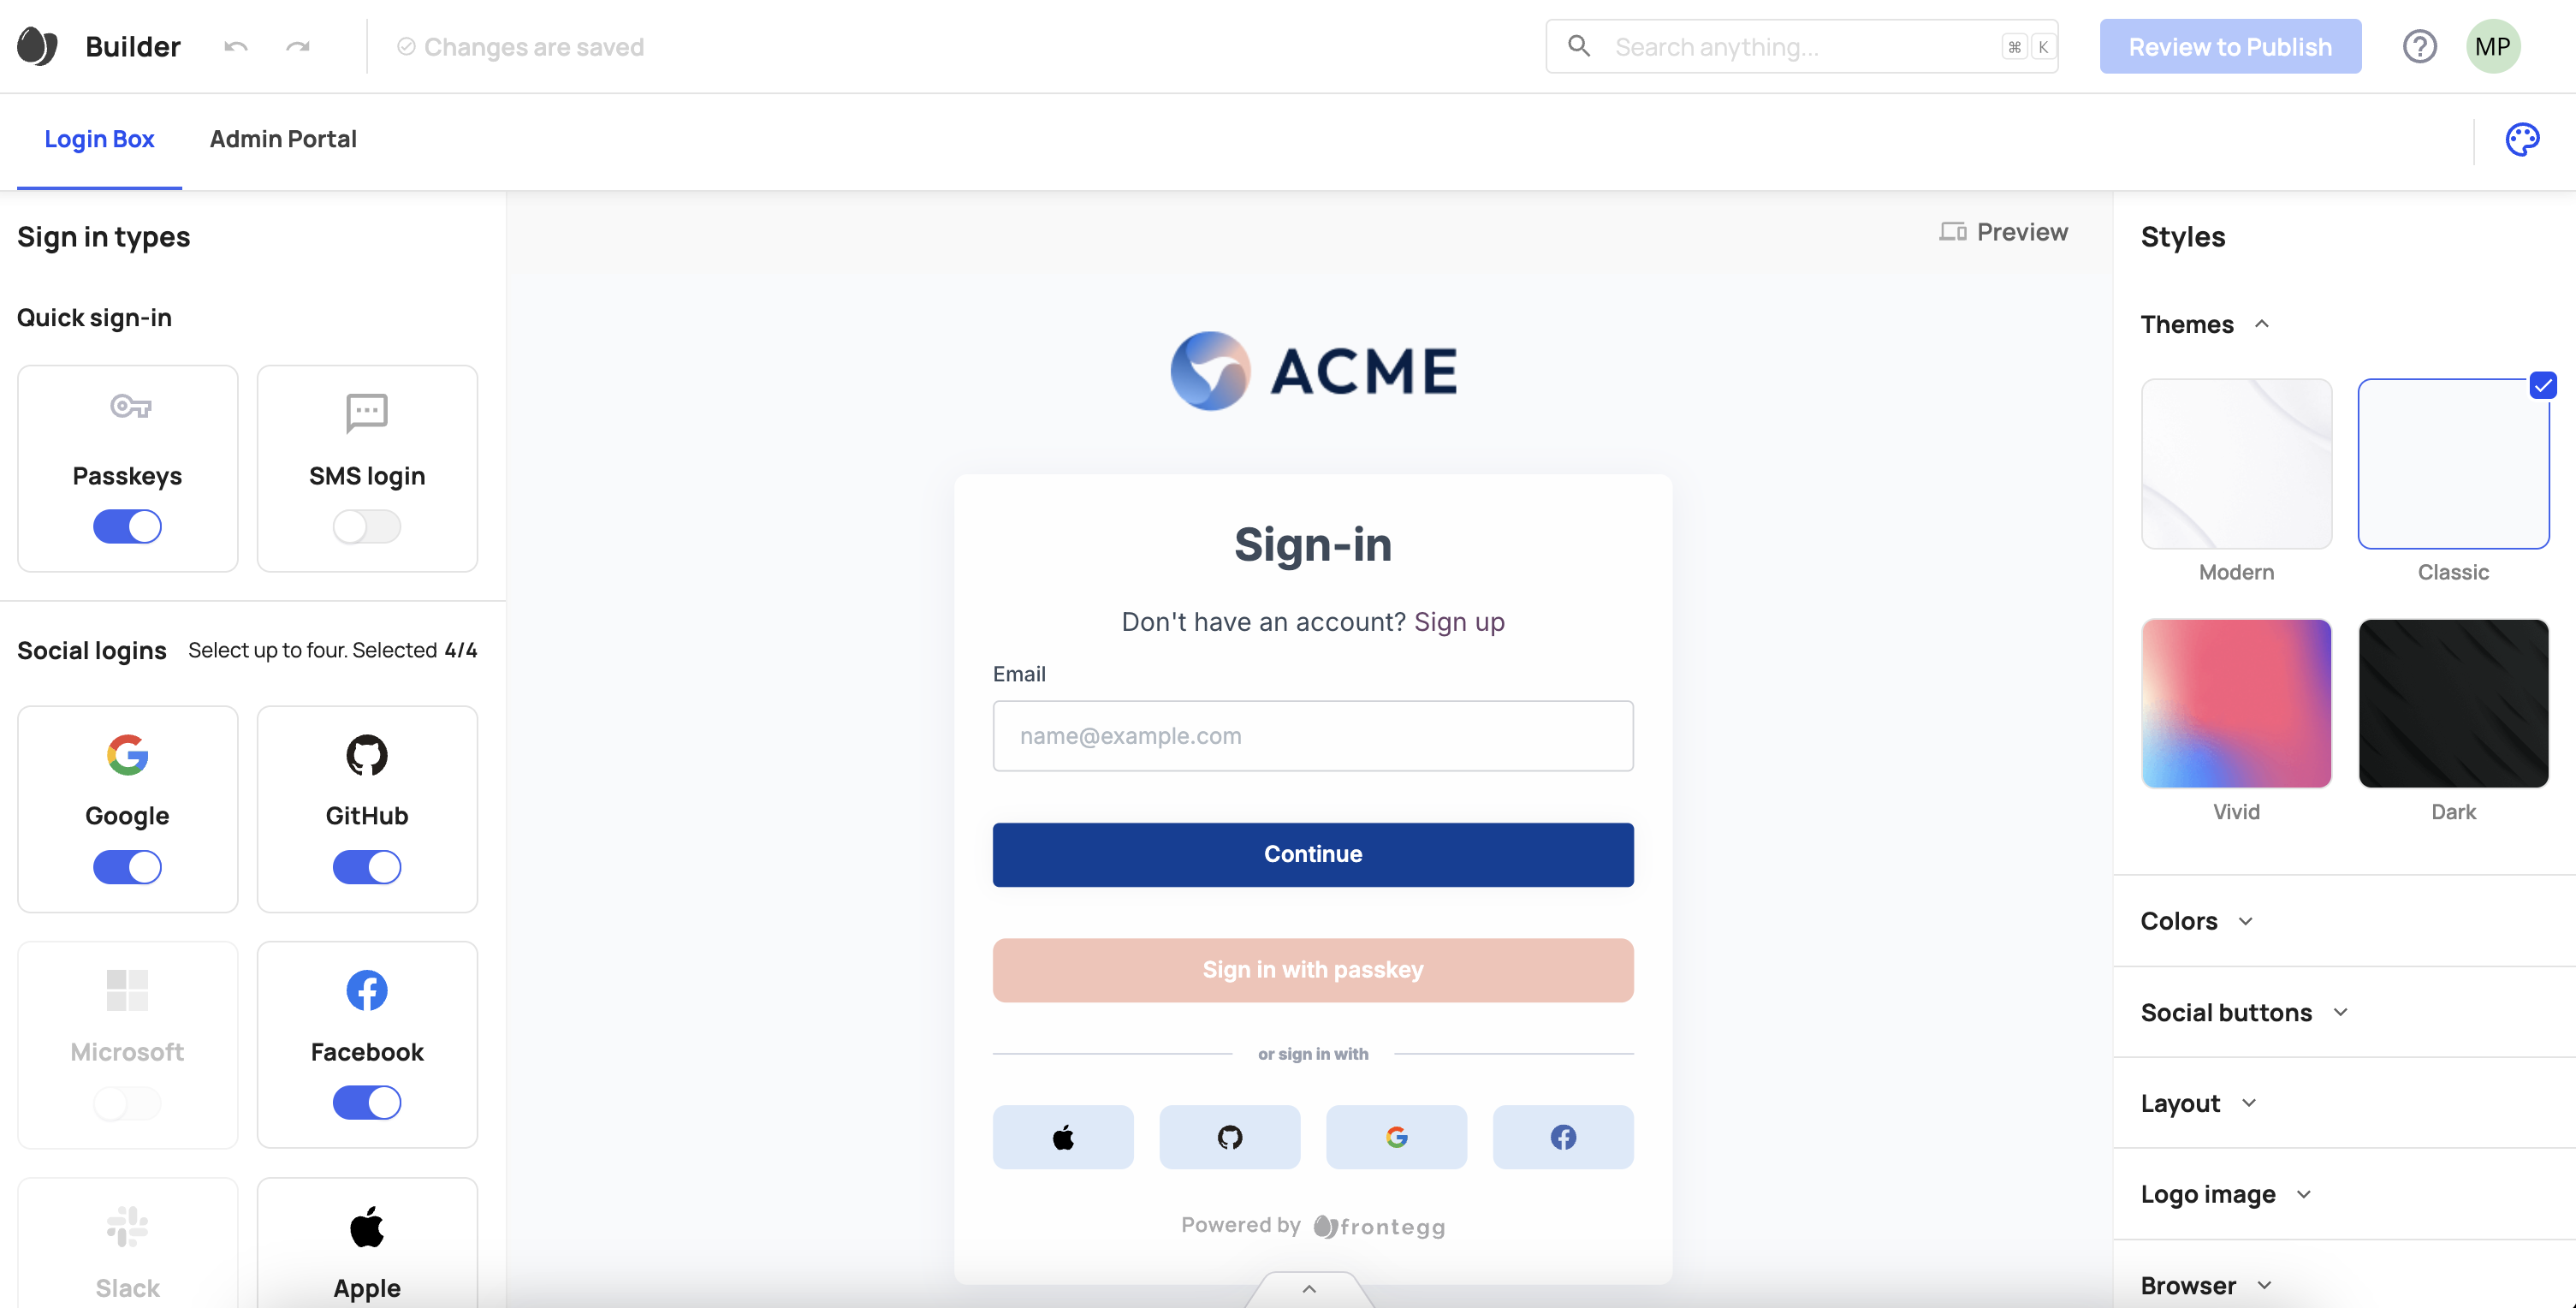
When you go to the Builder section in your Frontegg account, you will find your login box. The login box is the visual authentication element (box) that your users will see. You can control its visual elements, including social login options, a single sign-on button, and adapt its color theme to your liking.
How to access your Hosted login and sign-up page
The Frontegg Login Box is a fully hosted, pre-built login page for your app. Once you publish your Login Box in the Frontegg portal, Frontegg hosts it for you and provides a public URL such as https://[frontegg-domain]/oauth/account/login?.
This URL serves as your app’s login page. You can open this URL in a browser to preview your Login Box.
How do you use it
In your app, you typically add a "Login" button. When the user clicks this button, your application redirects them to your Hosted Login Box URL. The user then completes the login process, depending on how you have configured the Login Box. Once the login is successful, Frontegg redirects the user back to your app, to a URL you specify (this is called the redirectUri). When the user returns to your app via this redirect, your application receives an access token, indicating that the user is now authenticated and logged in.
After setting up your Login Box in the Builder, the next step is to integrate it into your application so that your users can sign in. Integration requires only a few simple steps, depending on your client-side stack — follow the dedicated guide for your architecture.
Integration options
You can integrate Frontegg’s authentication capabilities into your application in several ways, depending on your architecture and product experience. Below are the main options:
Client-side integration (Web applications)
You can embed Frontegg’s authentication flow directly in your web application using the Frontegg SDKs, such as the React SDK. This allows you to fully control the look and feel of the login experience within your app, without redirecting users to a separate hosted page.
Mobile integration
You can integrate Frontegg authentication flows into your mobile applications using the Mobile SDKs. Typically, mobile apps use a browser-based login flow (via WebView or Custom Tab), which connects to your Frontegg-hosted Login Box and returns the authentication result back to the app. For native iOS and Android apps, you can implement standard OAuth or OIDC flows using native components.
Using Frontegg as an Identity Provider (IdP)
If you already have an existing product with its own login experience or identity architecture, you can use Frontegg purely as your Identity Provider (IdP). You connect your application to Frontegg using SAML or OIDC protocols. In this model, your app delegates authentication to Frontegg, which acts as the central authority for managing identities and tokens.
API-based integration (Custom login flows)
If you want to build a fully custom login experience from scratch — for example, using your own UI components — you can integrate directly with Frontegg’s Authentication API. This option requires more development effort but offers maximum flexibility, allowing you to fully control the authentication experience while still using Frontegg for backend identity management.
Using your own UI with Frontegg SDKs
As an alternative to Frontegg’s out-of-the-box UI, you can use your own custom UI while still leveraging the Frontegg SDKs for authentication and entitlements. This is done by enabling the customLoginBox option.
customLoginBox?: booleanIf you pass customLoginBox: true to the Frontegg SDK, it disables all built-in Frontegg pages and allows you to present your own UI components while maintaining full access to Frontegg’s backend logic and session handling. With this option enabled, you need to implement all user flows using Frontegg's APIs or SDK methods, as none of the hosted pages will be available.
Testing your integration
By default, the changes are published directly to your development environment. Once you've created additional environments, you can push changes across environments from within each one.
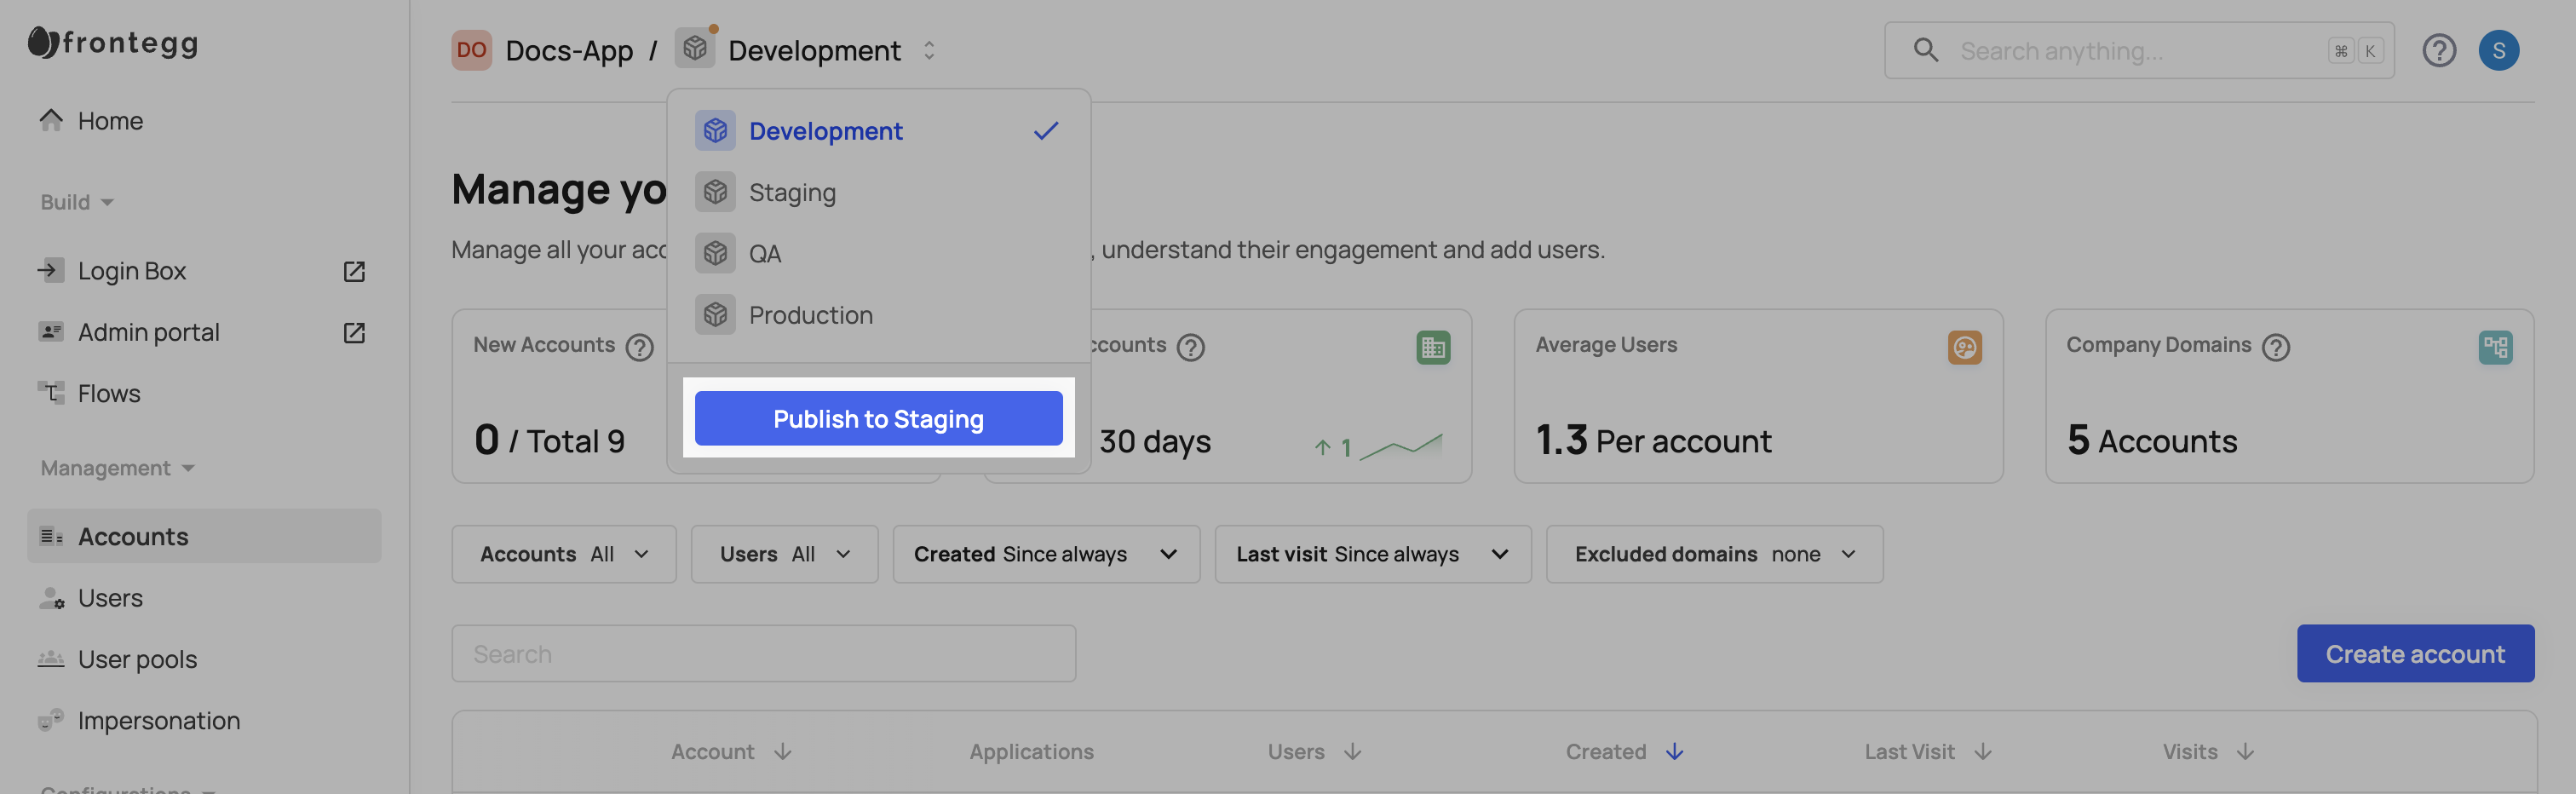
Publishing changes
Publishing changes
Note that you will only see the Publish to dev button if you have not yet integrated the Builder with your app. After integration, you should see a Publishing changes button instead.