To enable users to log in with Google, first activate Google login in the builder and then set up an application with Google to serve as the OAuth provider.
Follow these steps for a smooth integration.
- Navigate to Home and open the Login Box builder.
- In the left panel, toggle Google to on.
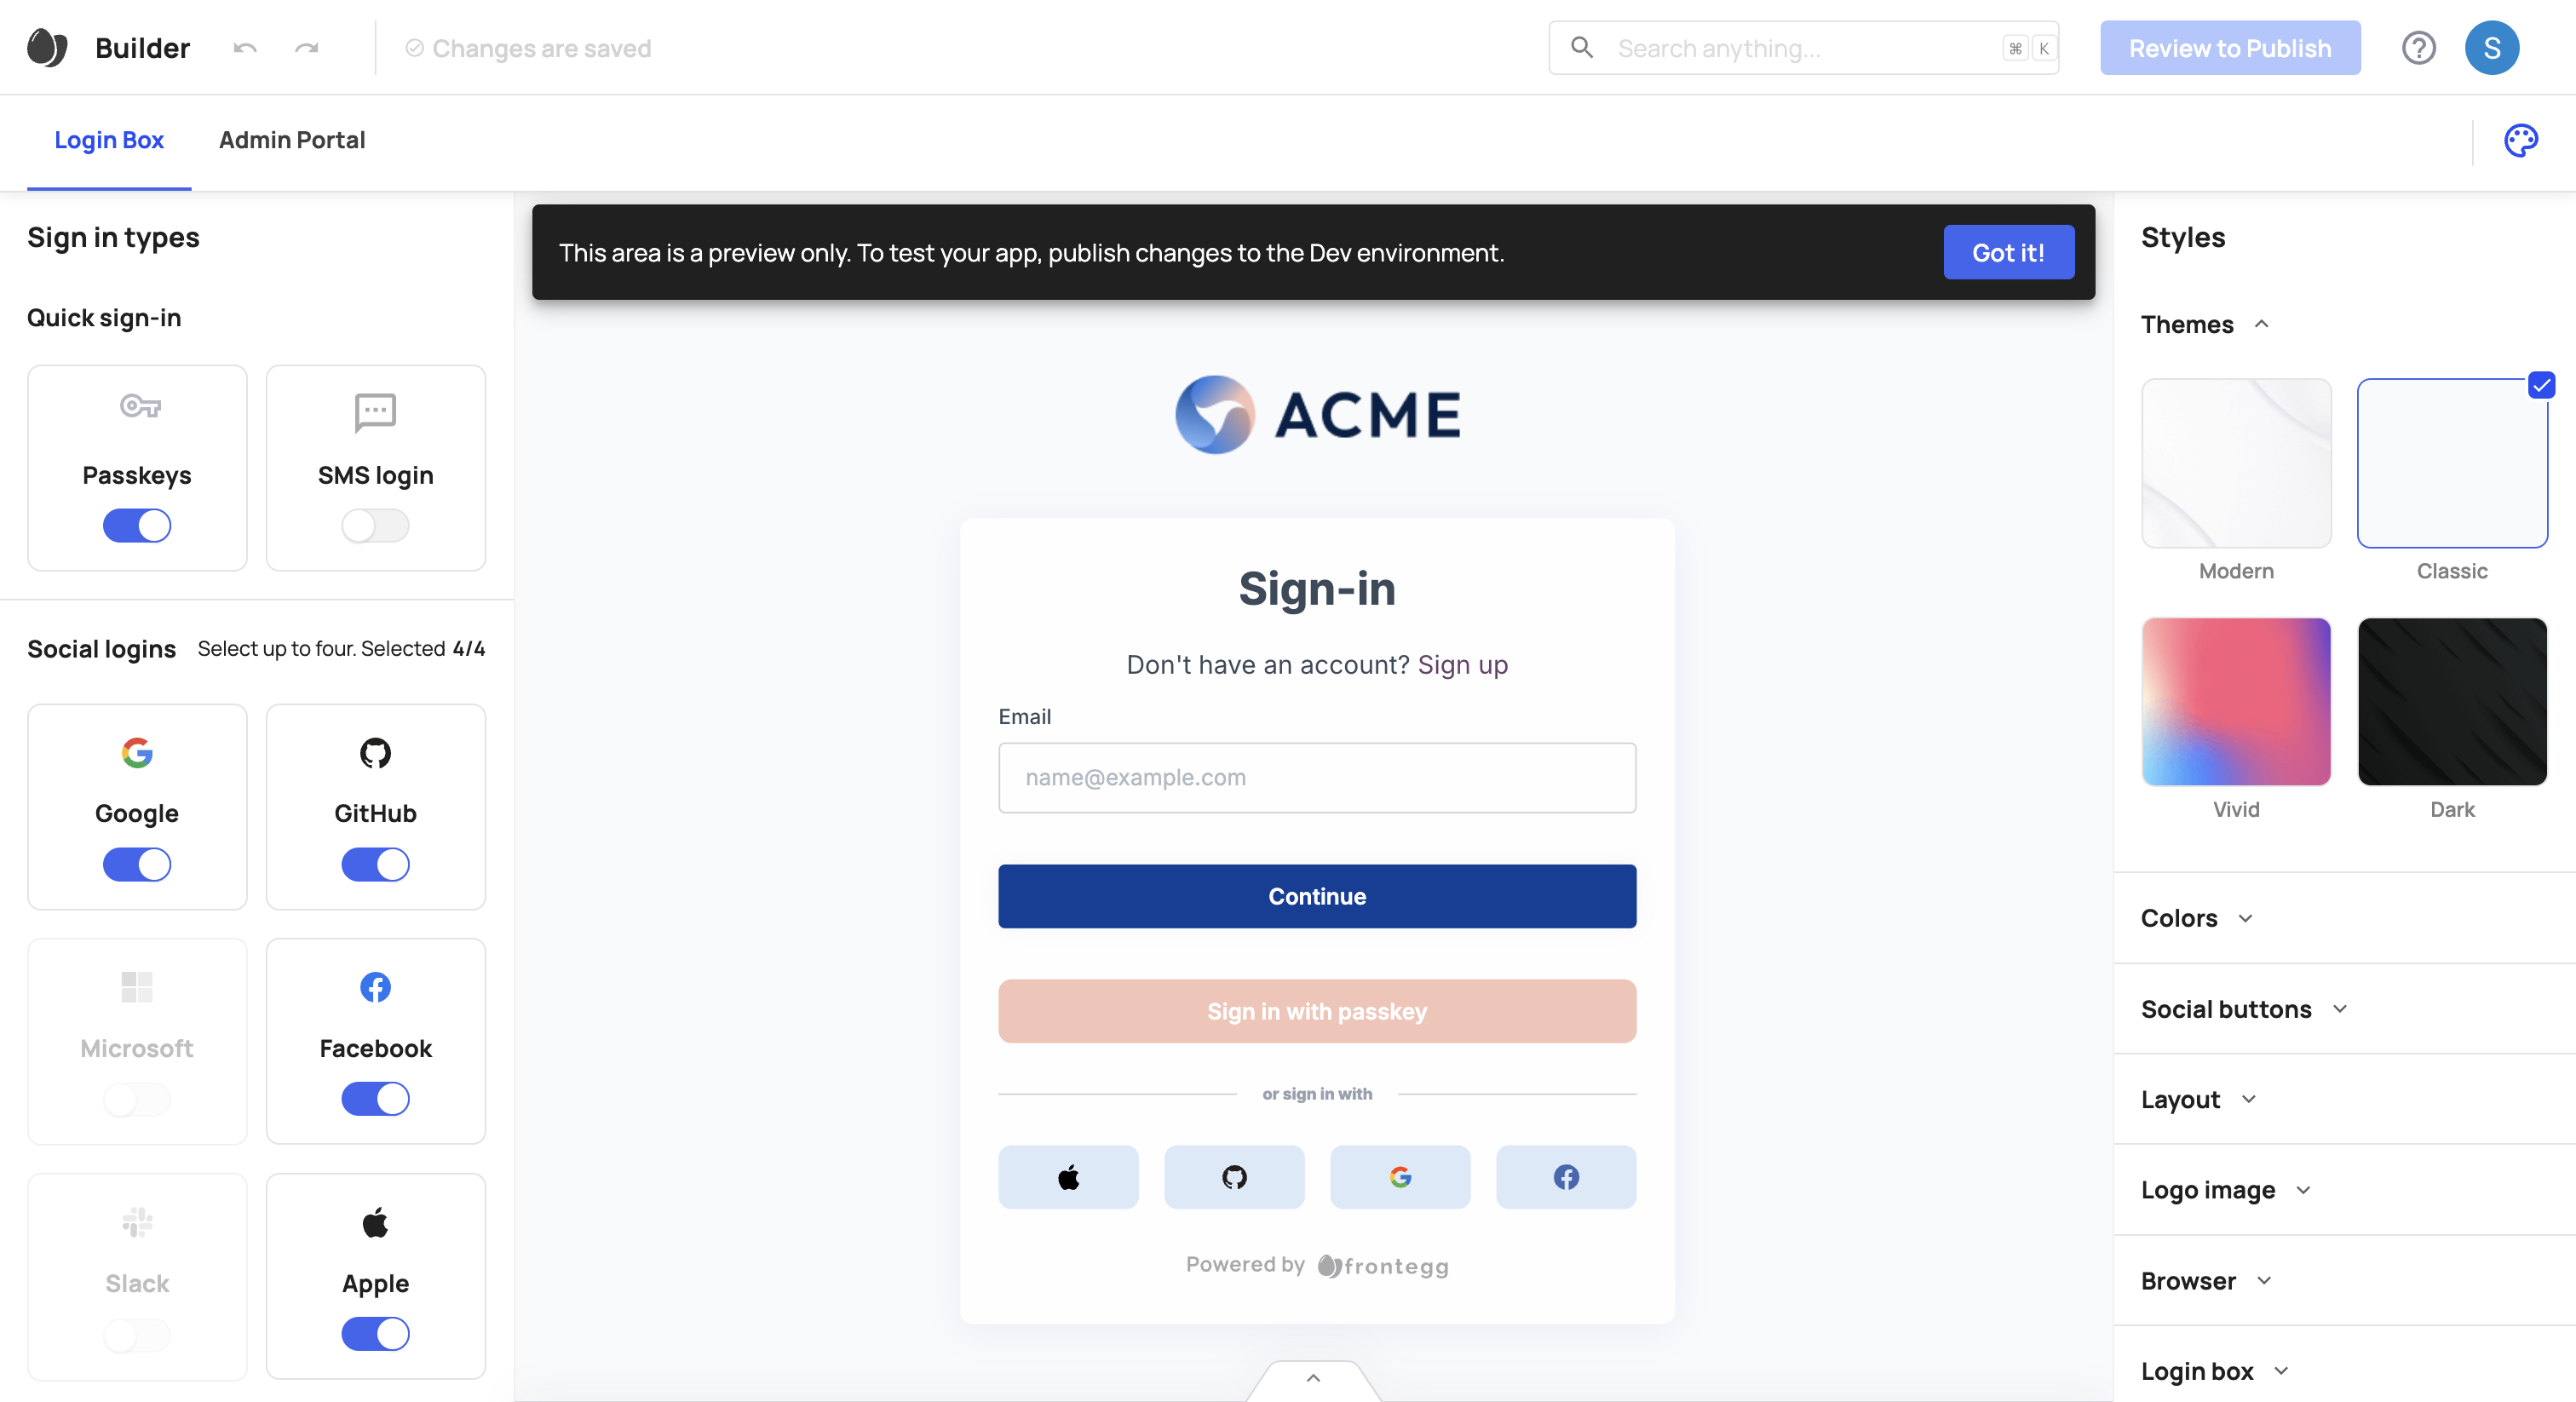
After modifying any settings, commit your changes and publish them to apply across your environments.
Complete the steps below to configure Google login.
Moving between environments
Moving between environments
When migrating a project between environments (e.g., from development to production), Frontegg automatically transfers your social login settings.
- Visit the Google Developers Console.
- In the top dropdown, select your project.
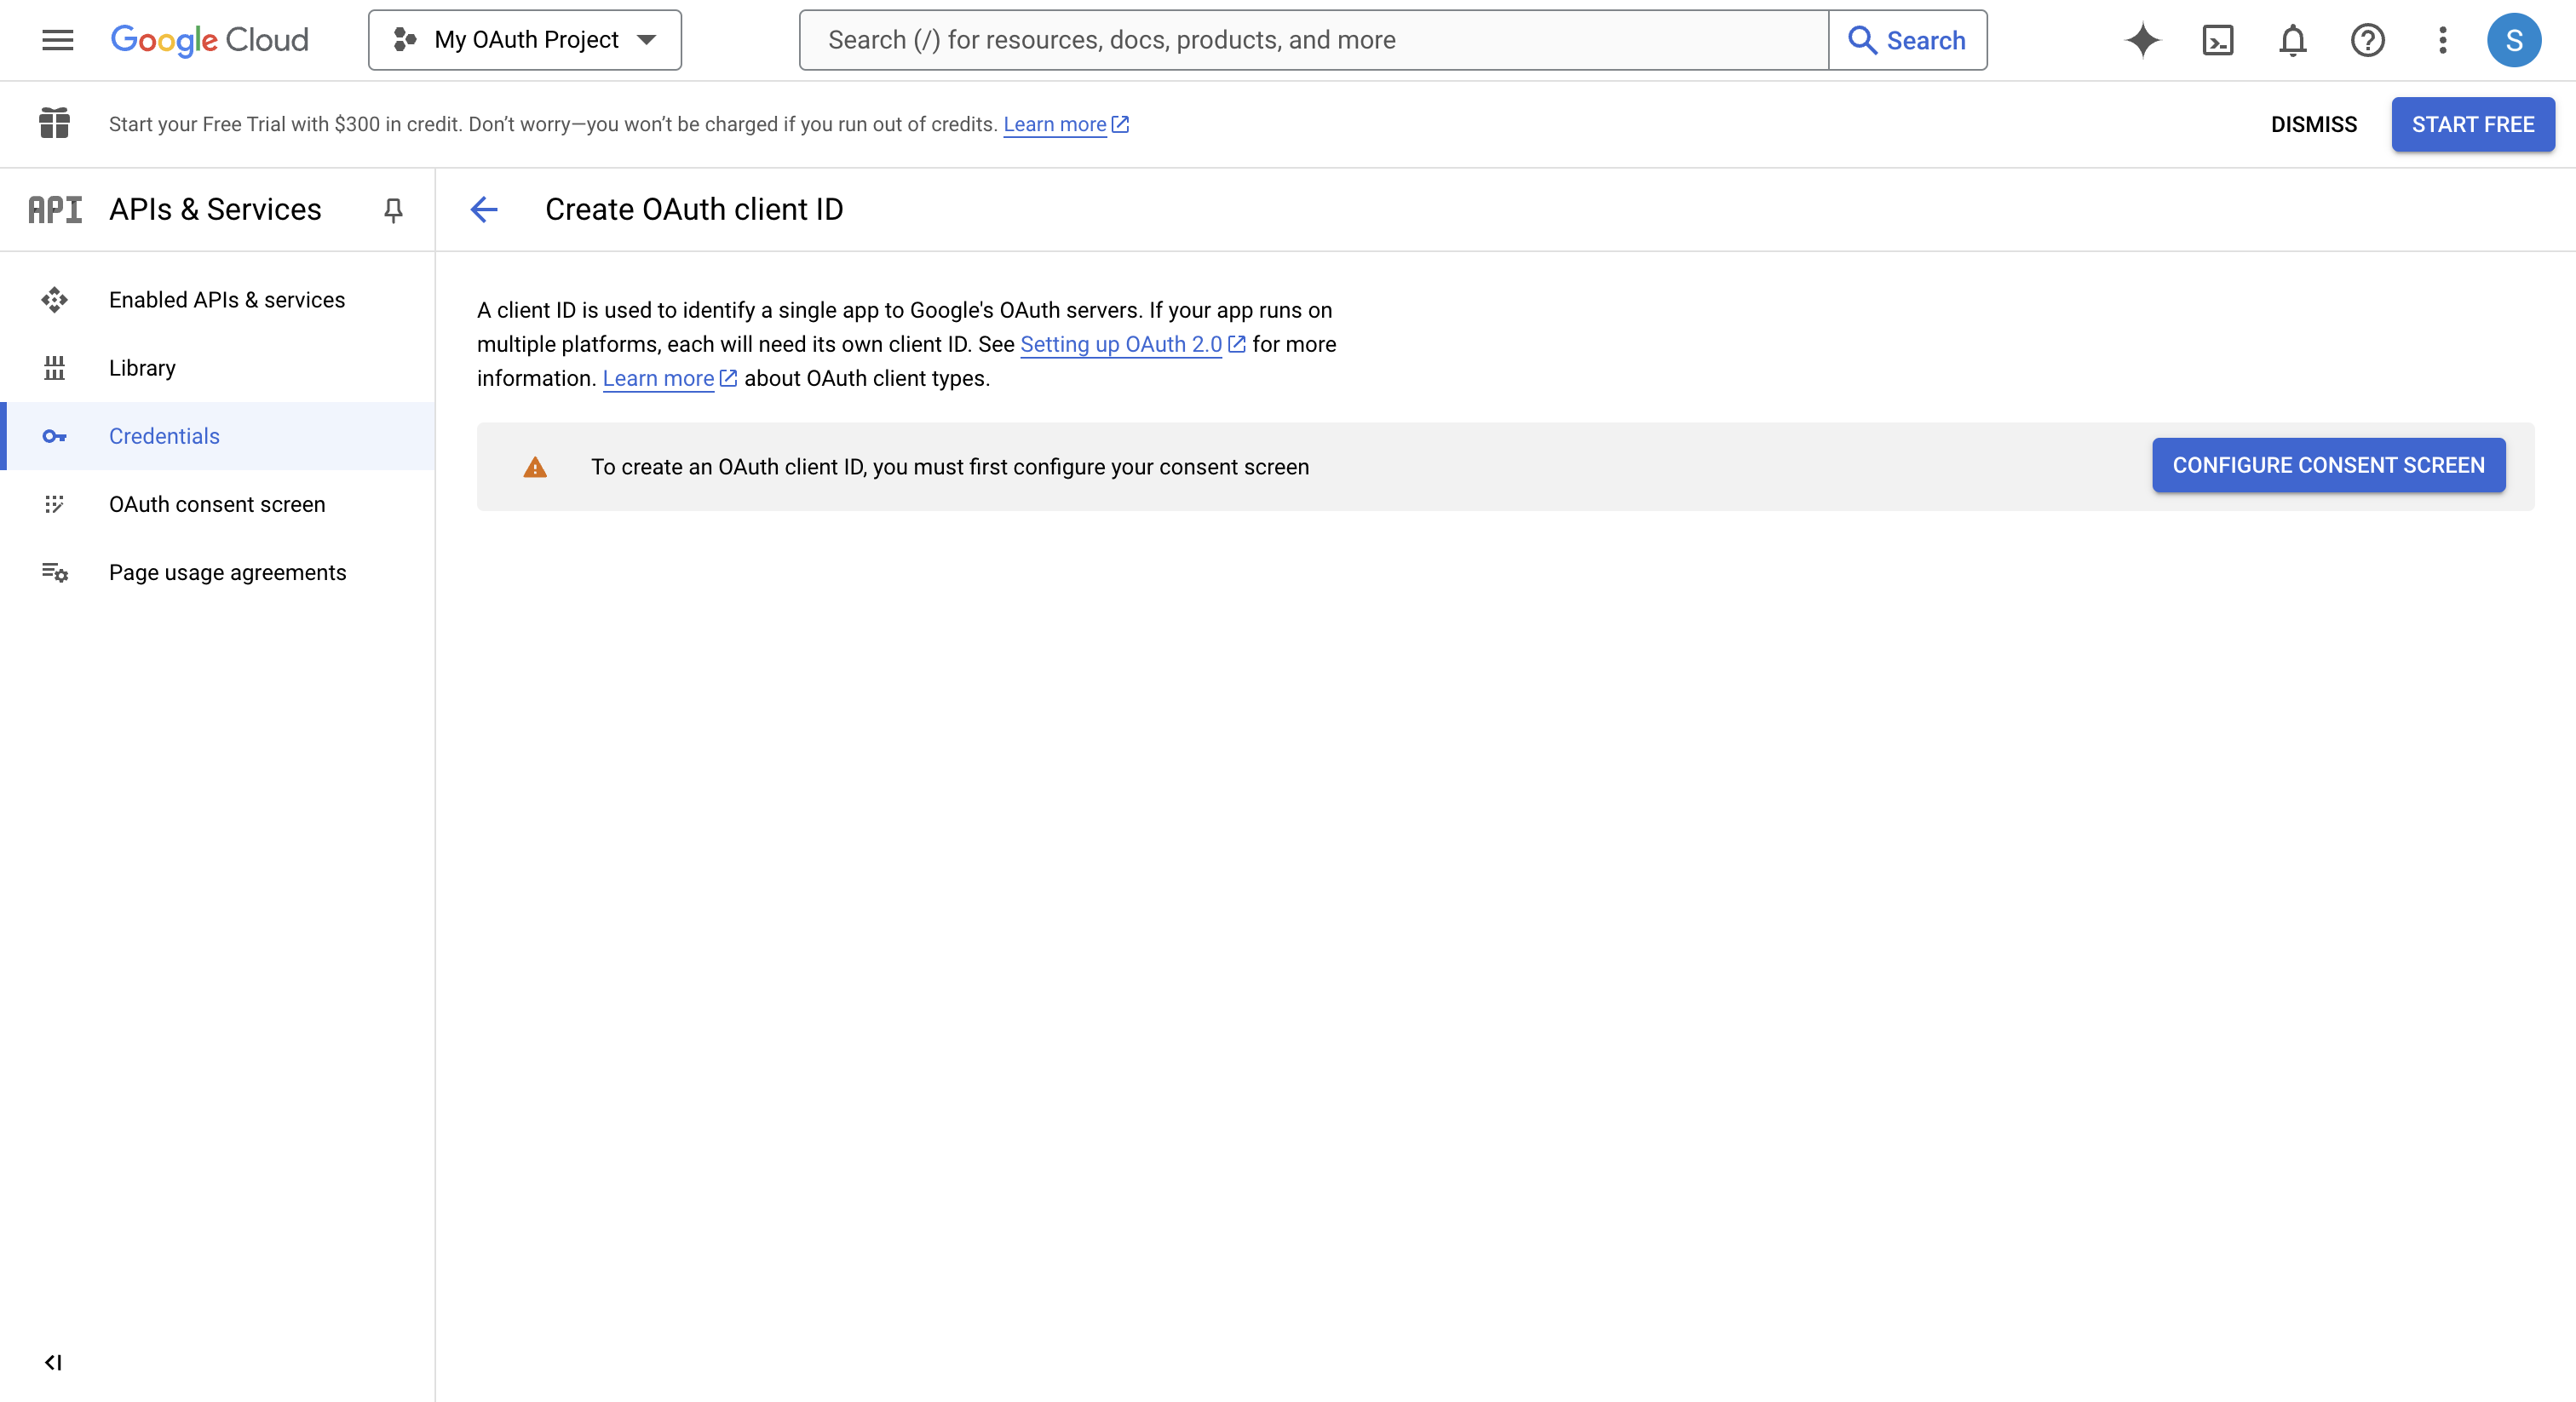
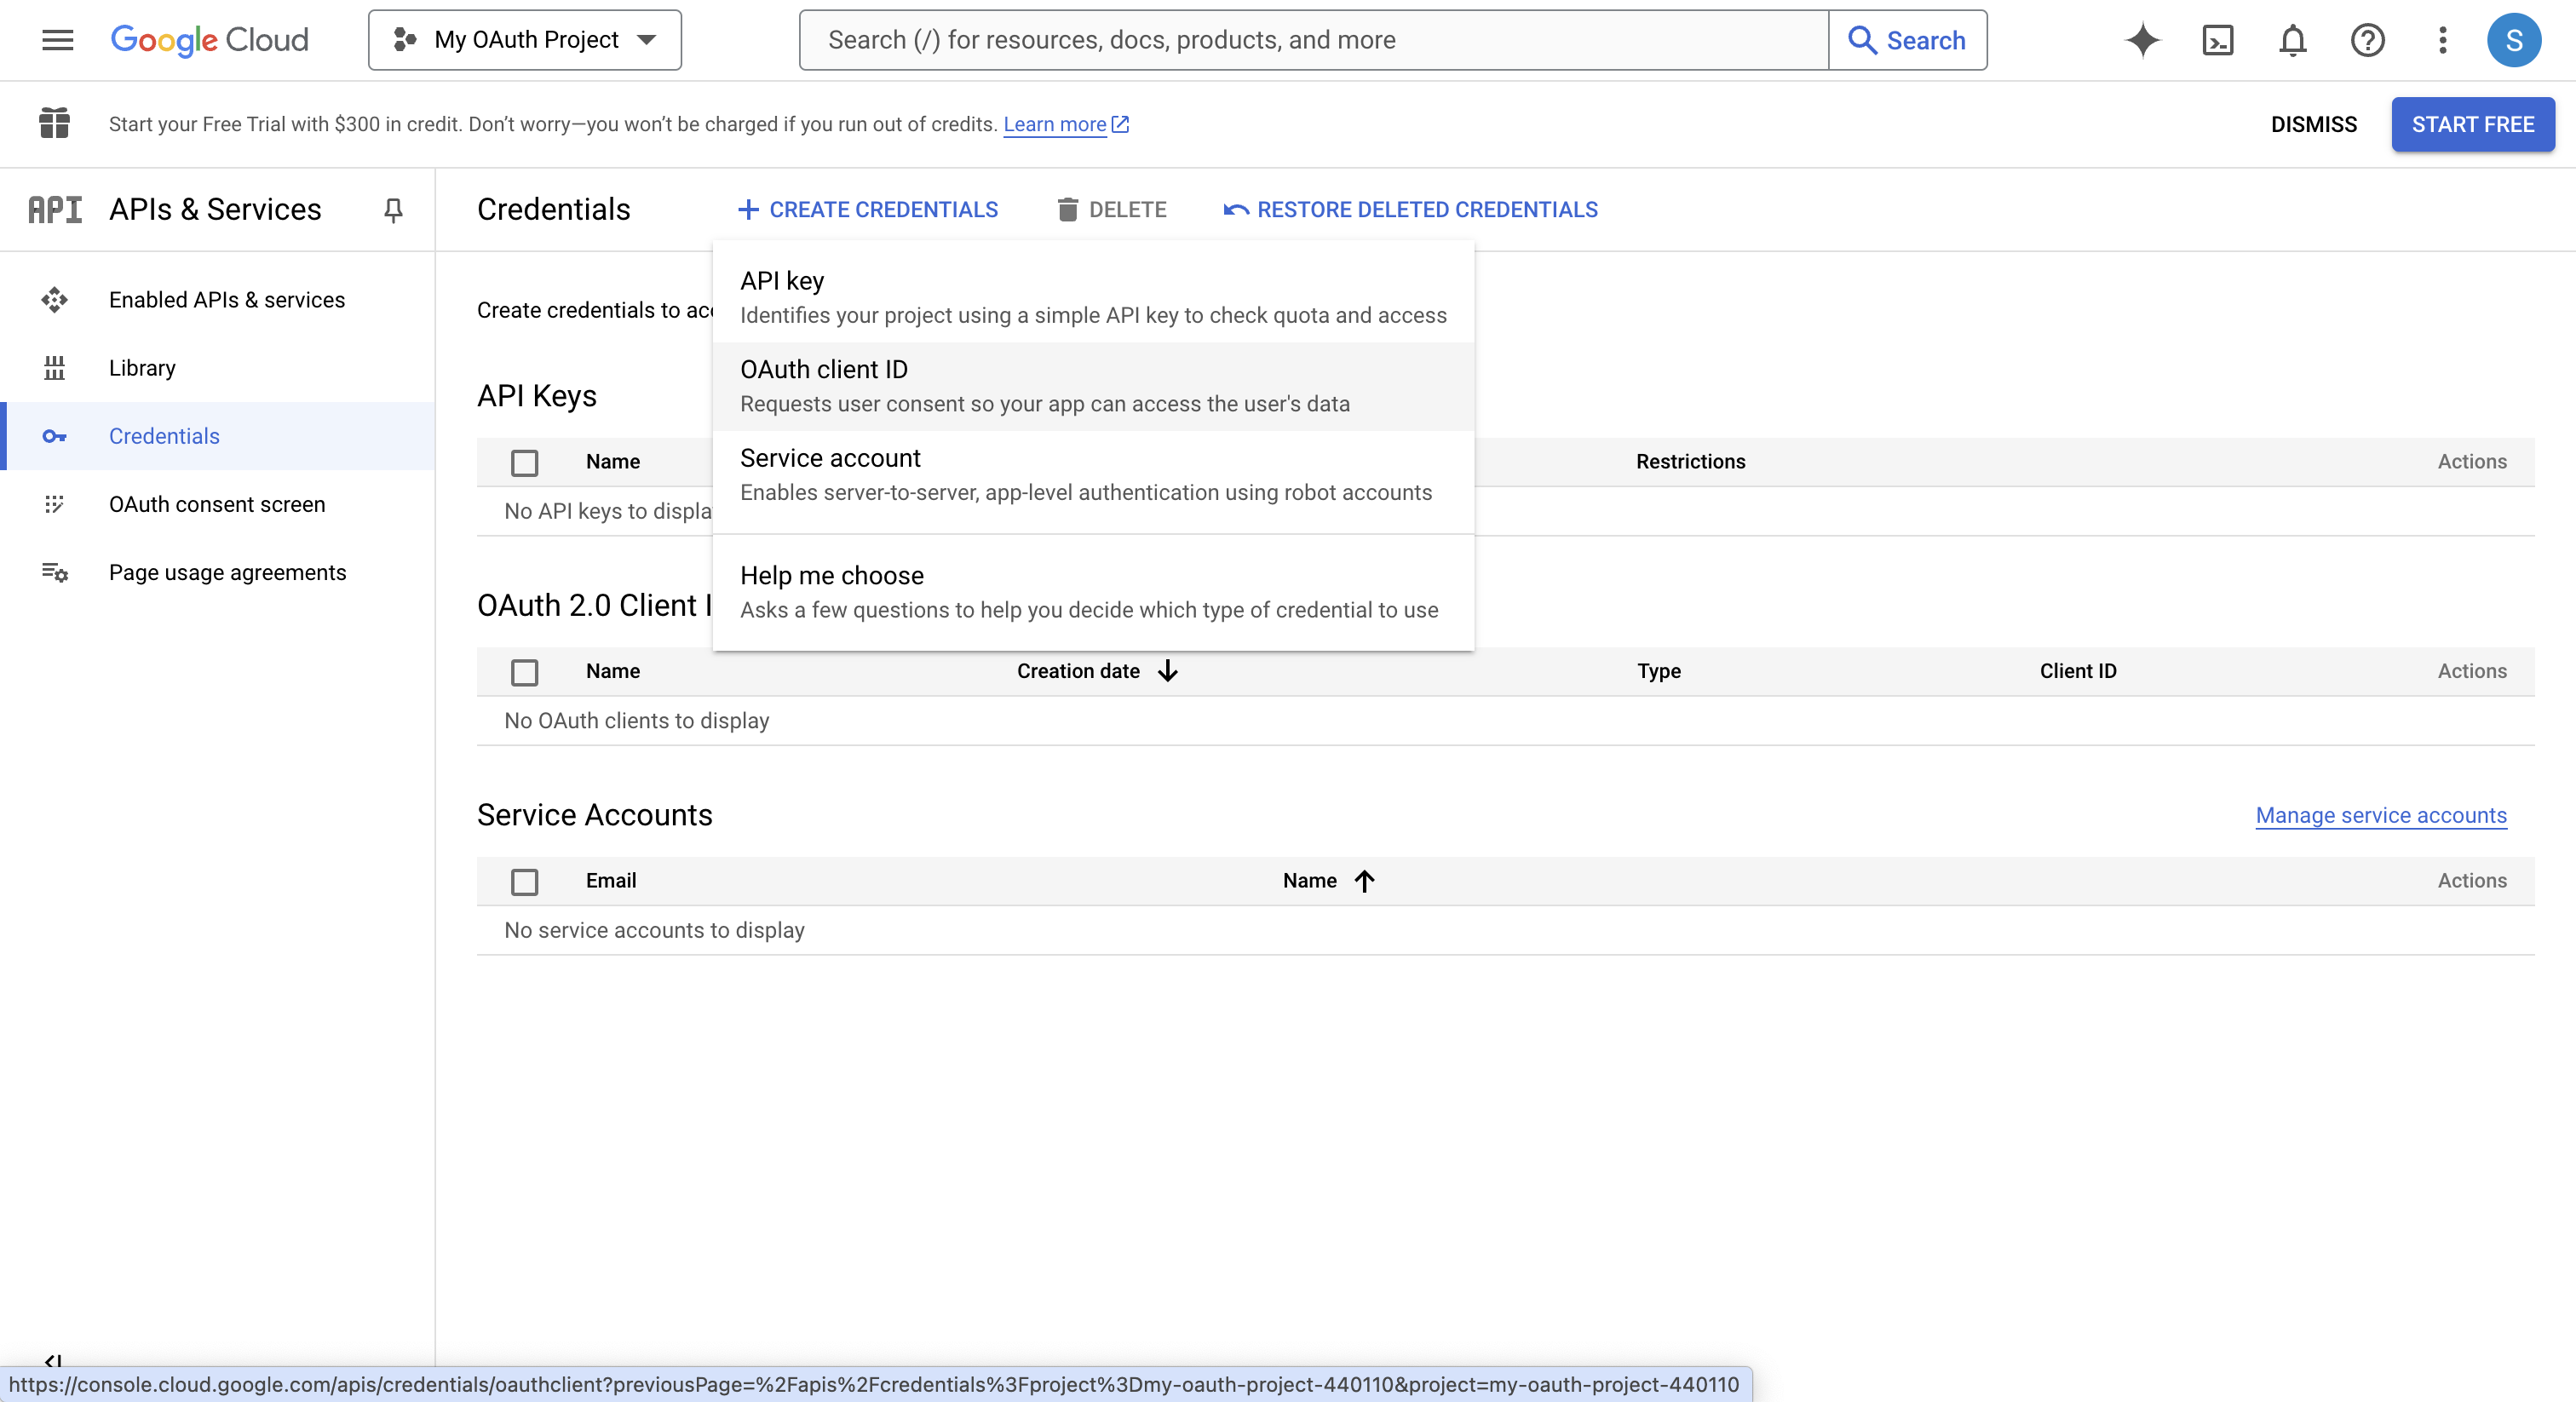
- Open the Credentials menu, select Create Credentials, and choose OAuth Client ID.
- Set up the consent screen by selecting your user type (if prompted), then click Create.
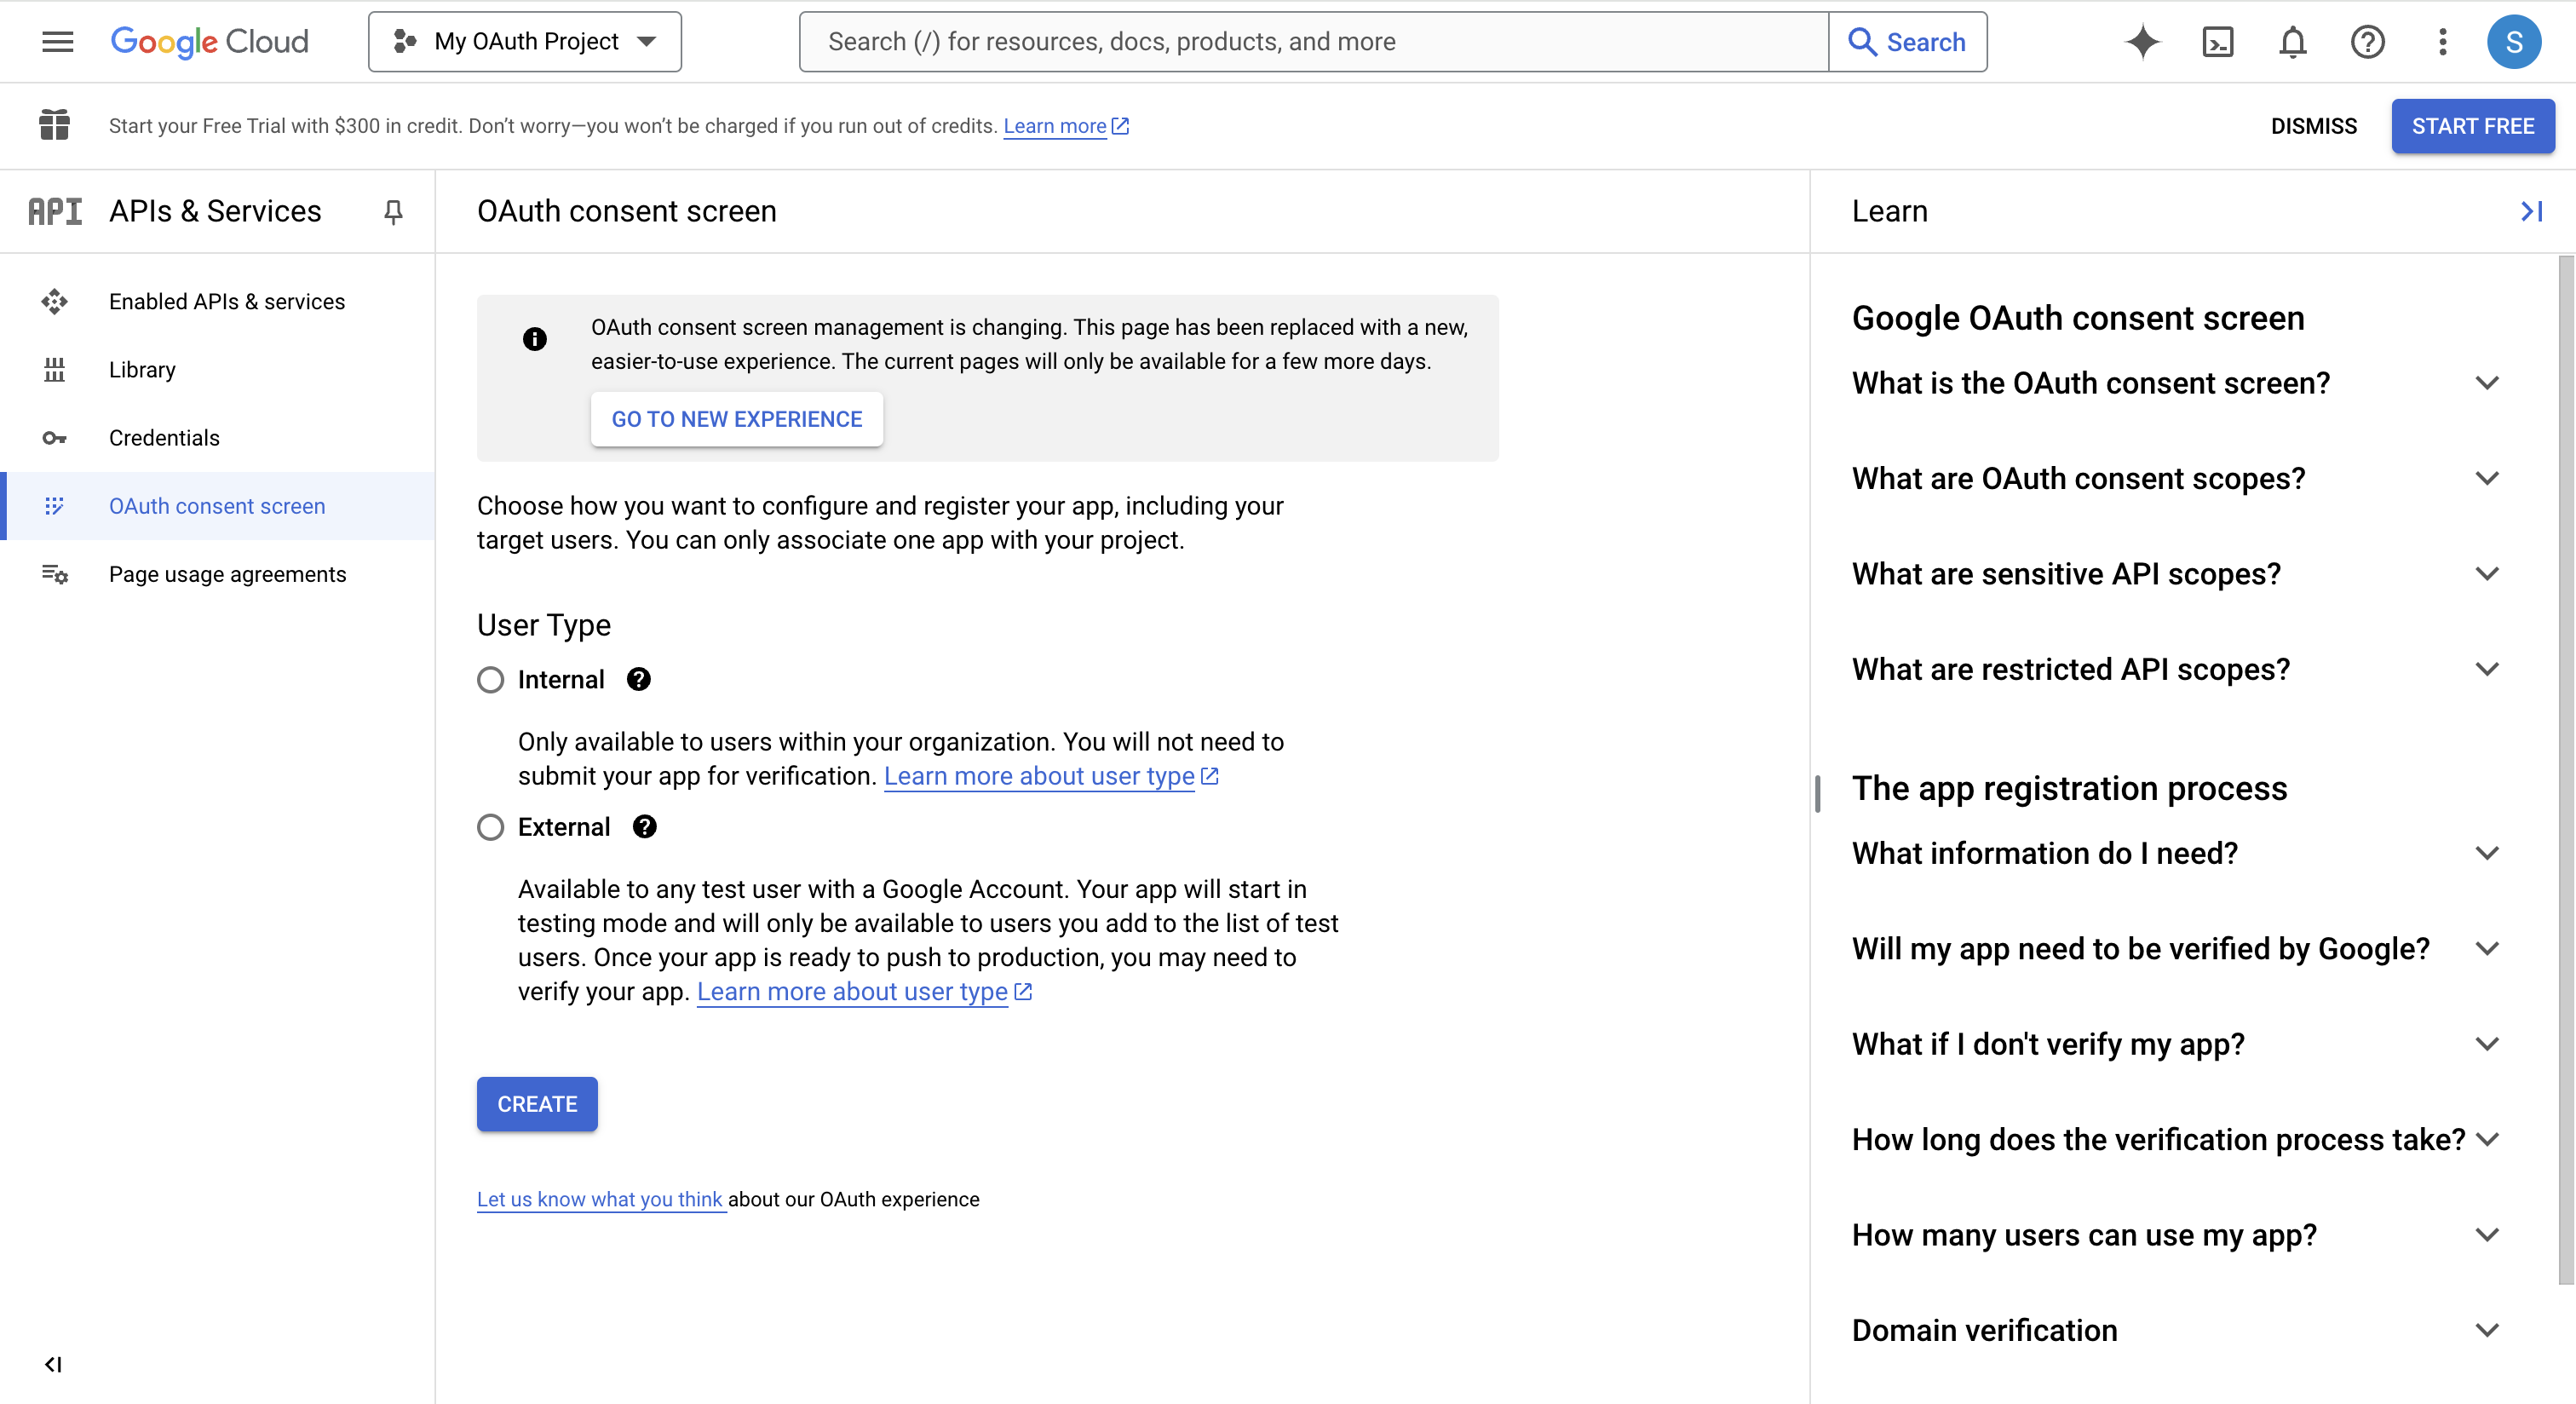
- On the App Information page, enter your application name, user support email, and developer contact email, completing the remaining required fields and sections.
Important
Important
If you’re using Frontegg’s hosted login without a custom domain, Google will show “to continue to frontegg.com” on the login screen. Using a custom domain or the embedded login feature displays "to continue to YOUR_APP_NAME."
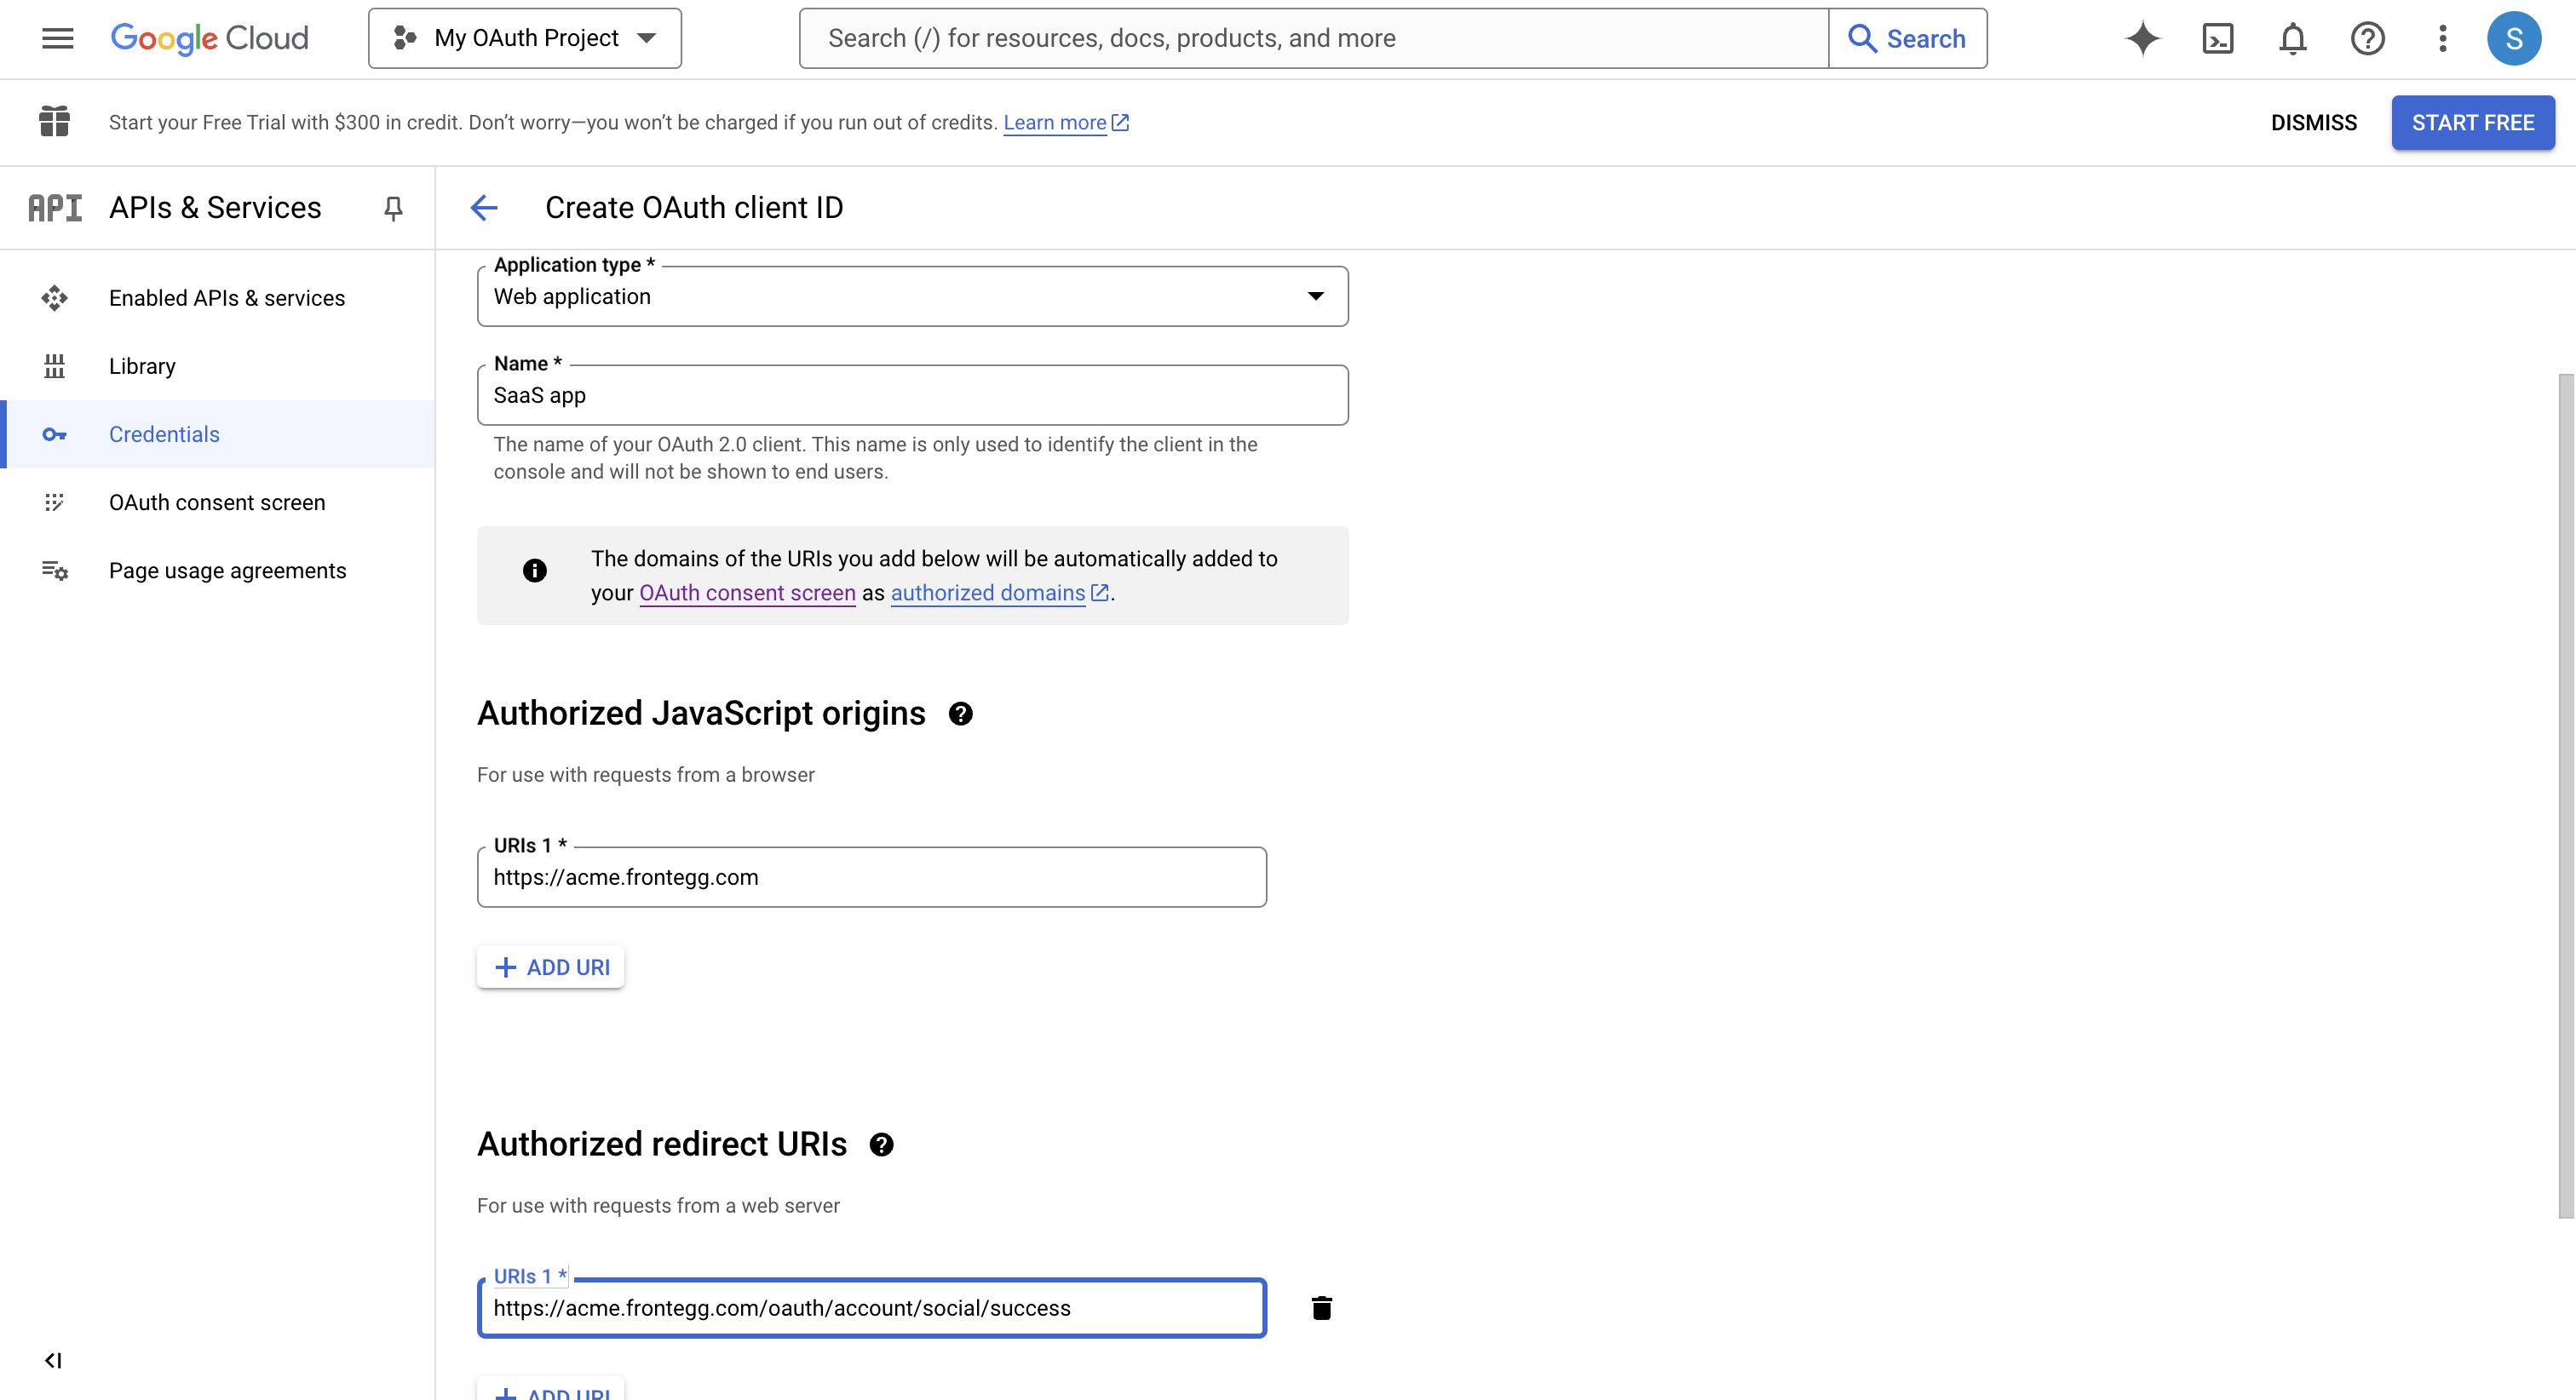
- Return to the Credentials menu to create an OAuth2 Client ID.
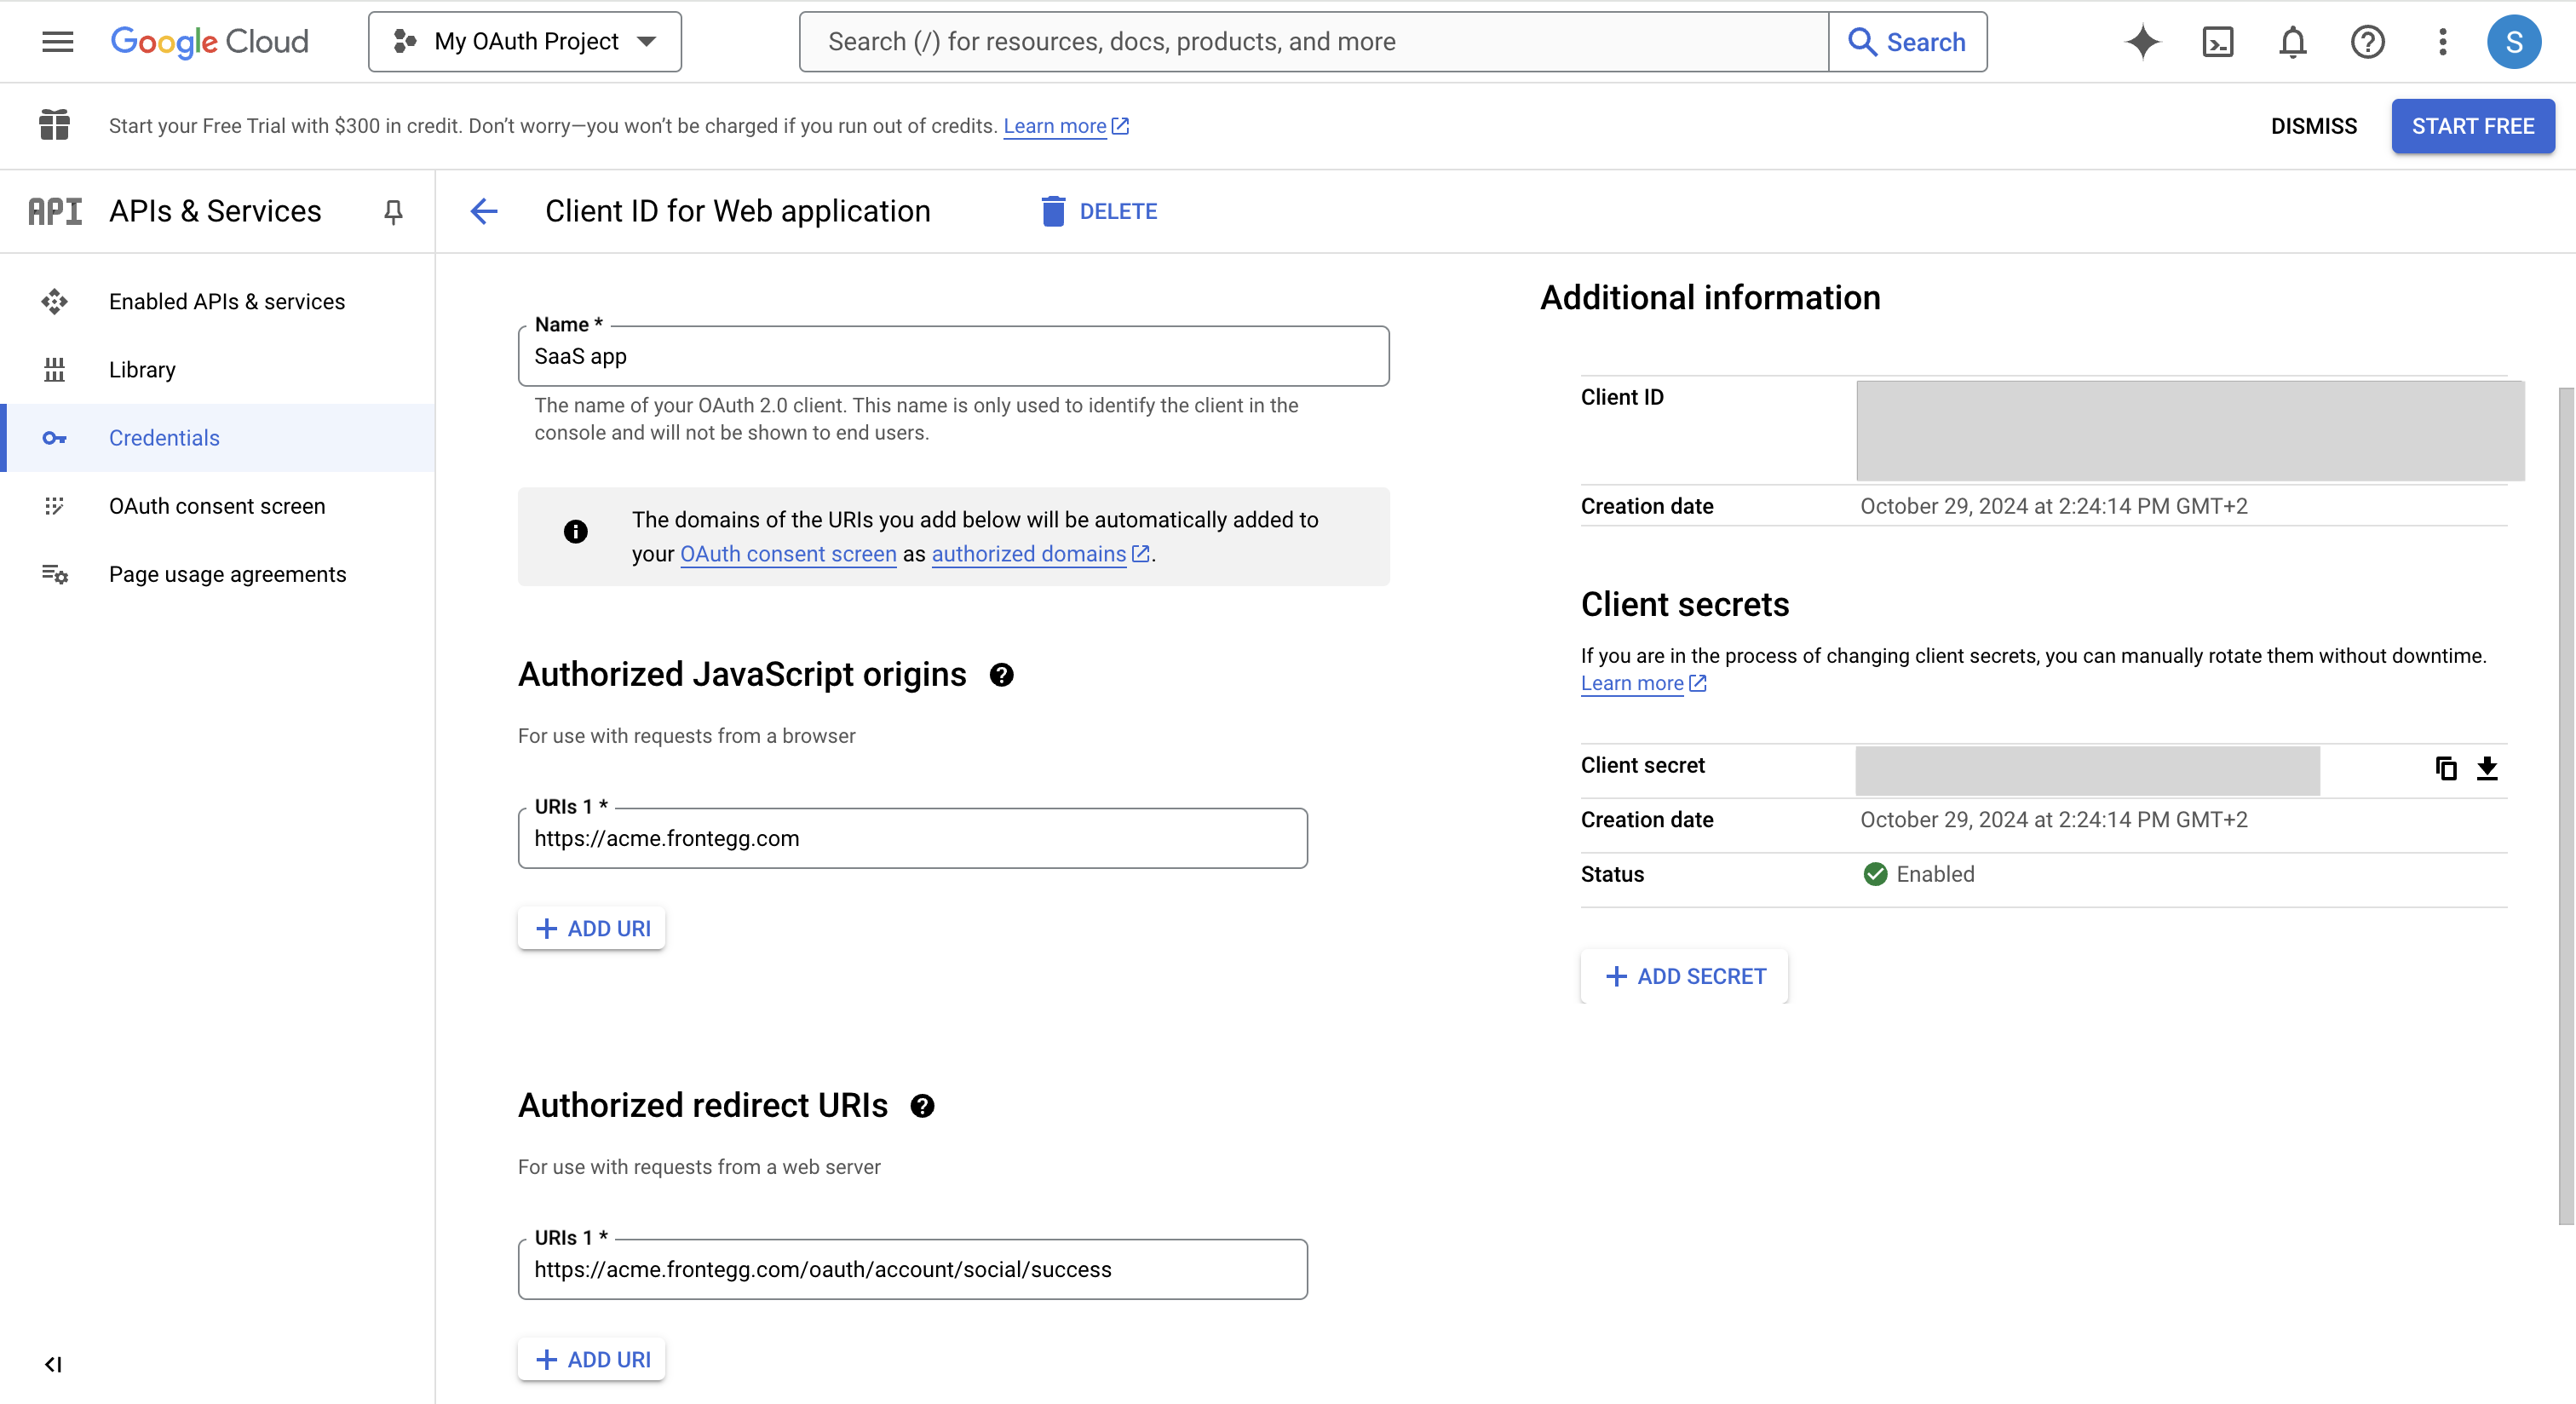
- Select Web Application as the Application Type.
- For Authorized JavaScript Origins, add your app’s URI (e.g.,
http://localhost:3000). - For Authorized redirect URIs:
- If you are using the Hosted login method, your Redirect URL should be:
https://[YOUR-FRONTEGG-DOMAIN].frontegg.com/oauth/account/social/success. - If you are using the Embedded Login method, the Redirect URL should be:
https://[YOUR-APP-URL]/account/social/success, for example:http://localhost:3000/account/social/success. - If you are using the Login per account (per-tenant SSO) method, also add:
https://[YOUR-FRONTEGG-DOMAIN].frontegg.com/identity/resources/auth/v2/user/sso/google/postlogin.
- If you are using the Hosted login method, your Redirect URL should be:
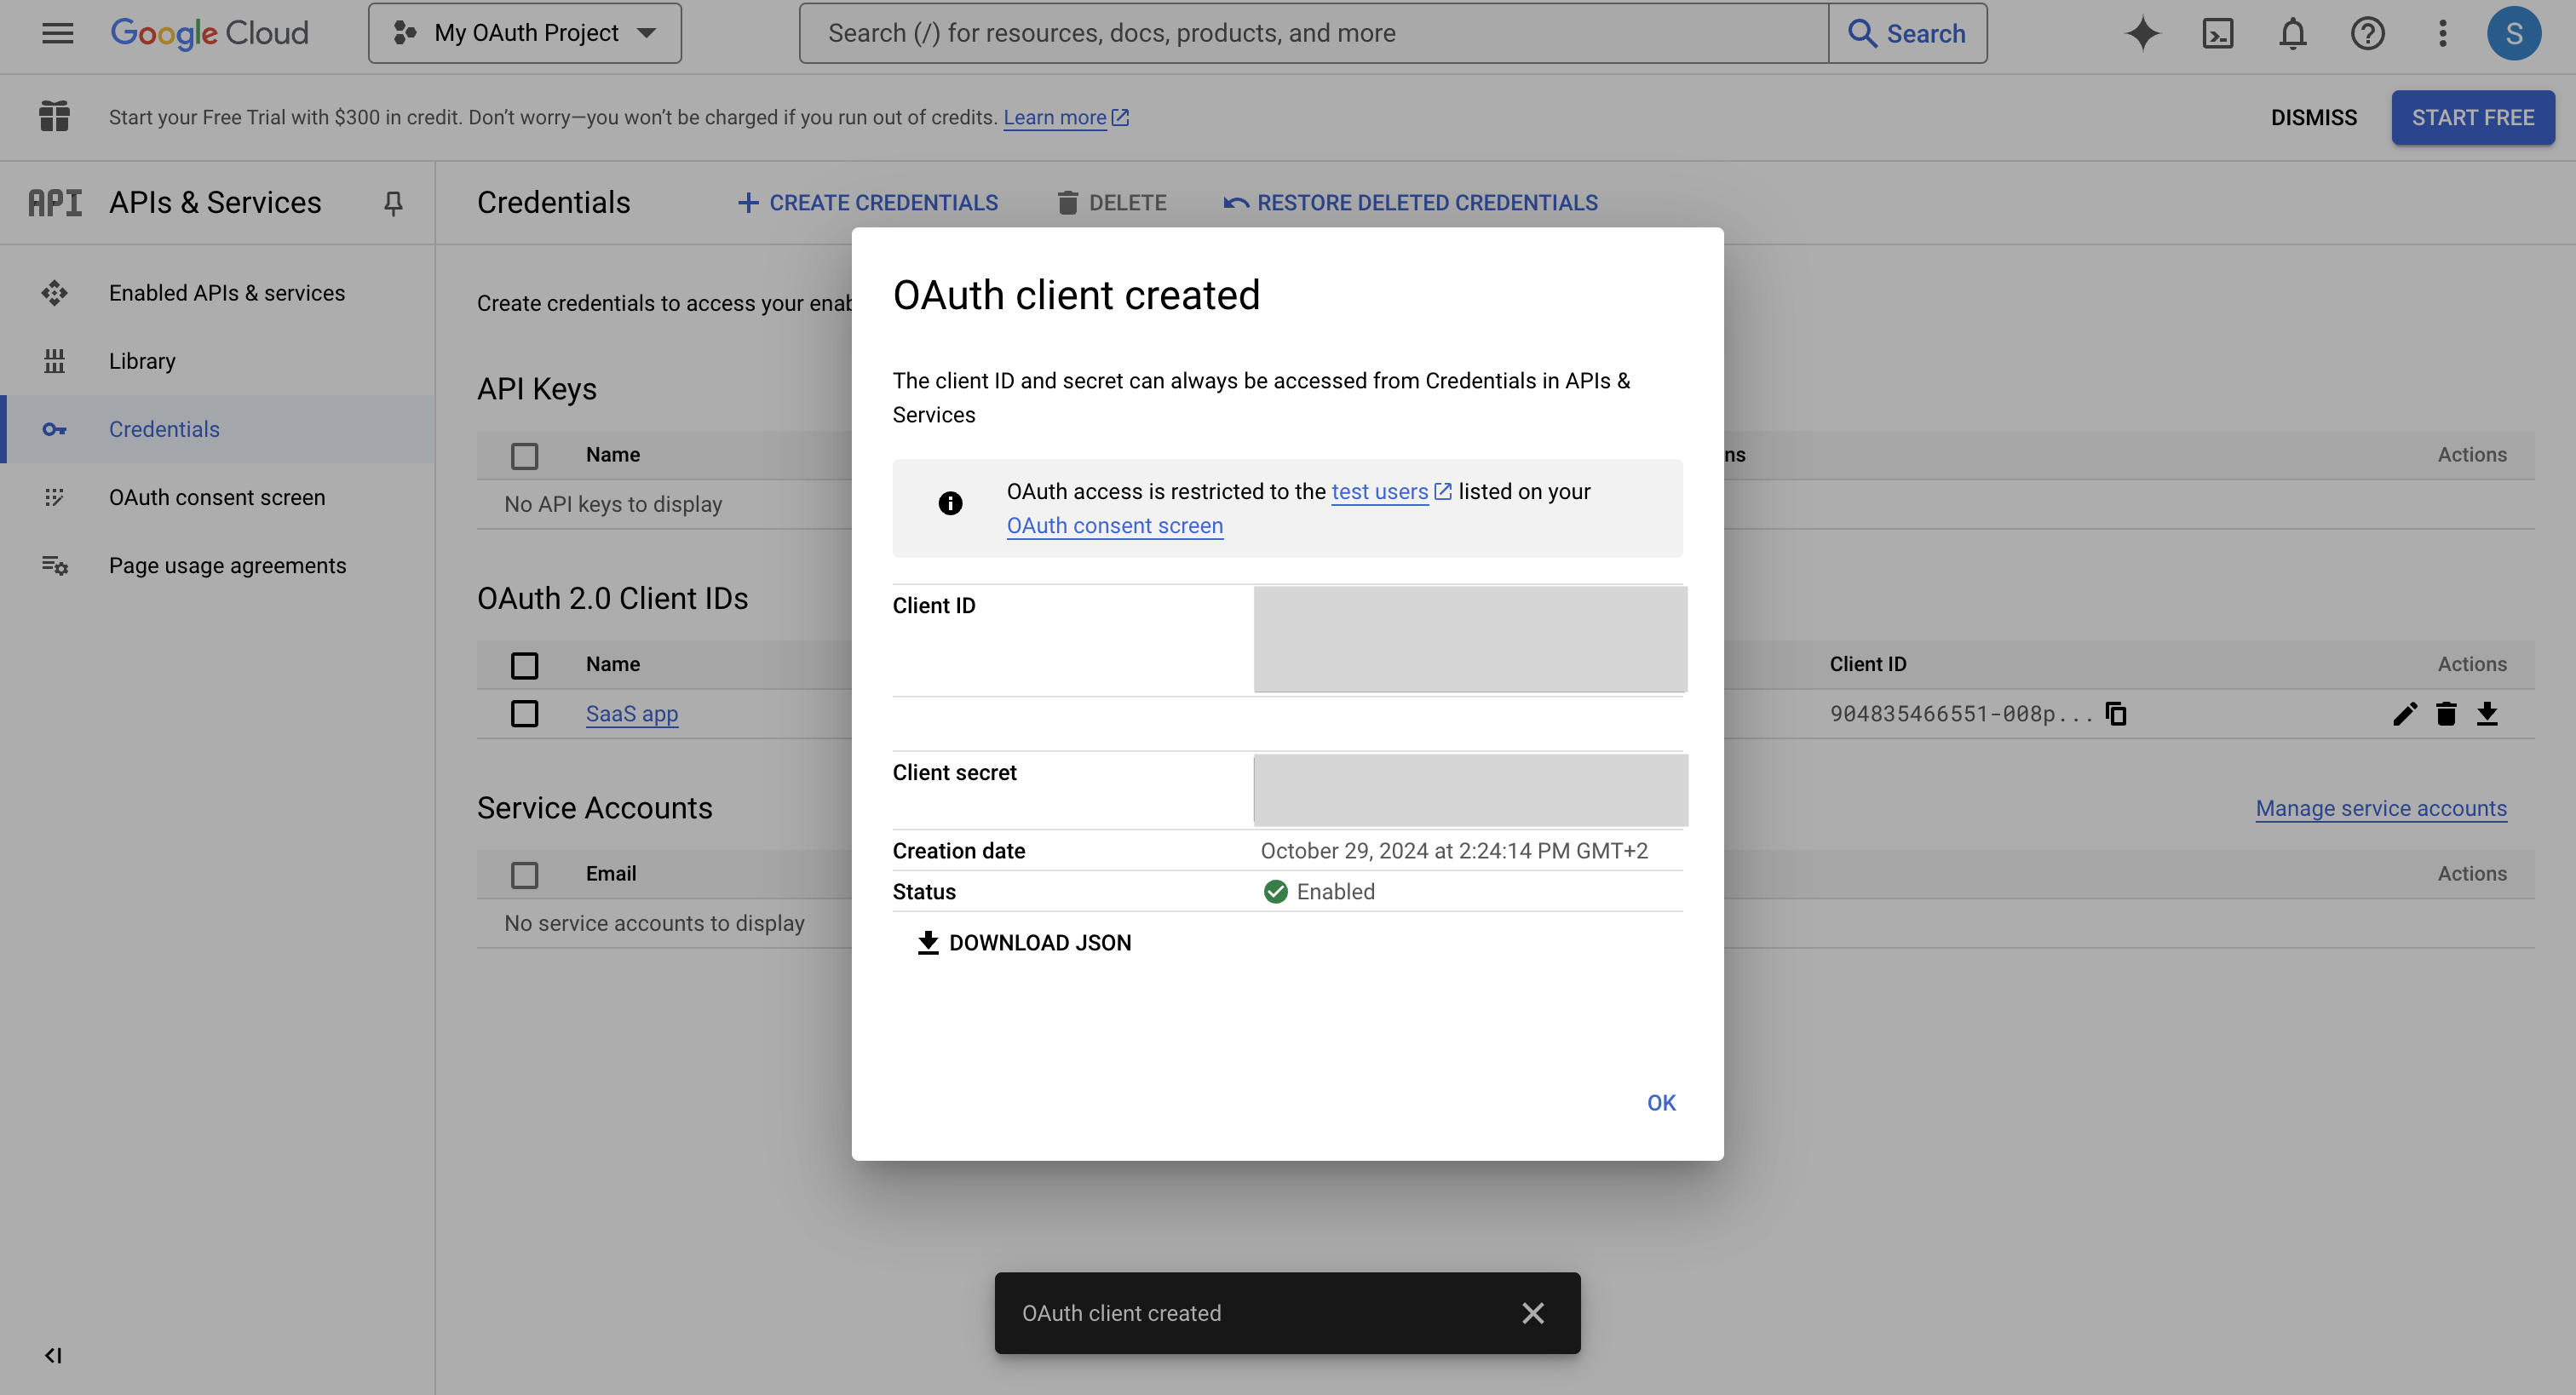
- Copy the Client ID and Client Secret from Google.
- Open the Frontegg portal.
- Navigate to [ENVIRONMENT] > Configurations > Authentication > Social logins in the sidebar.
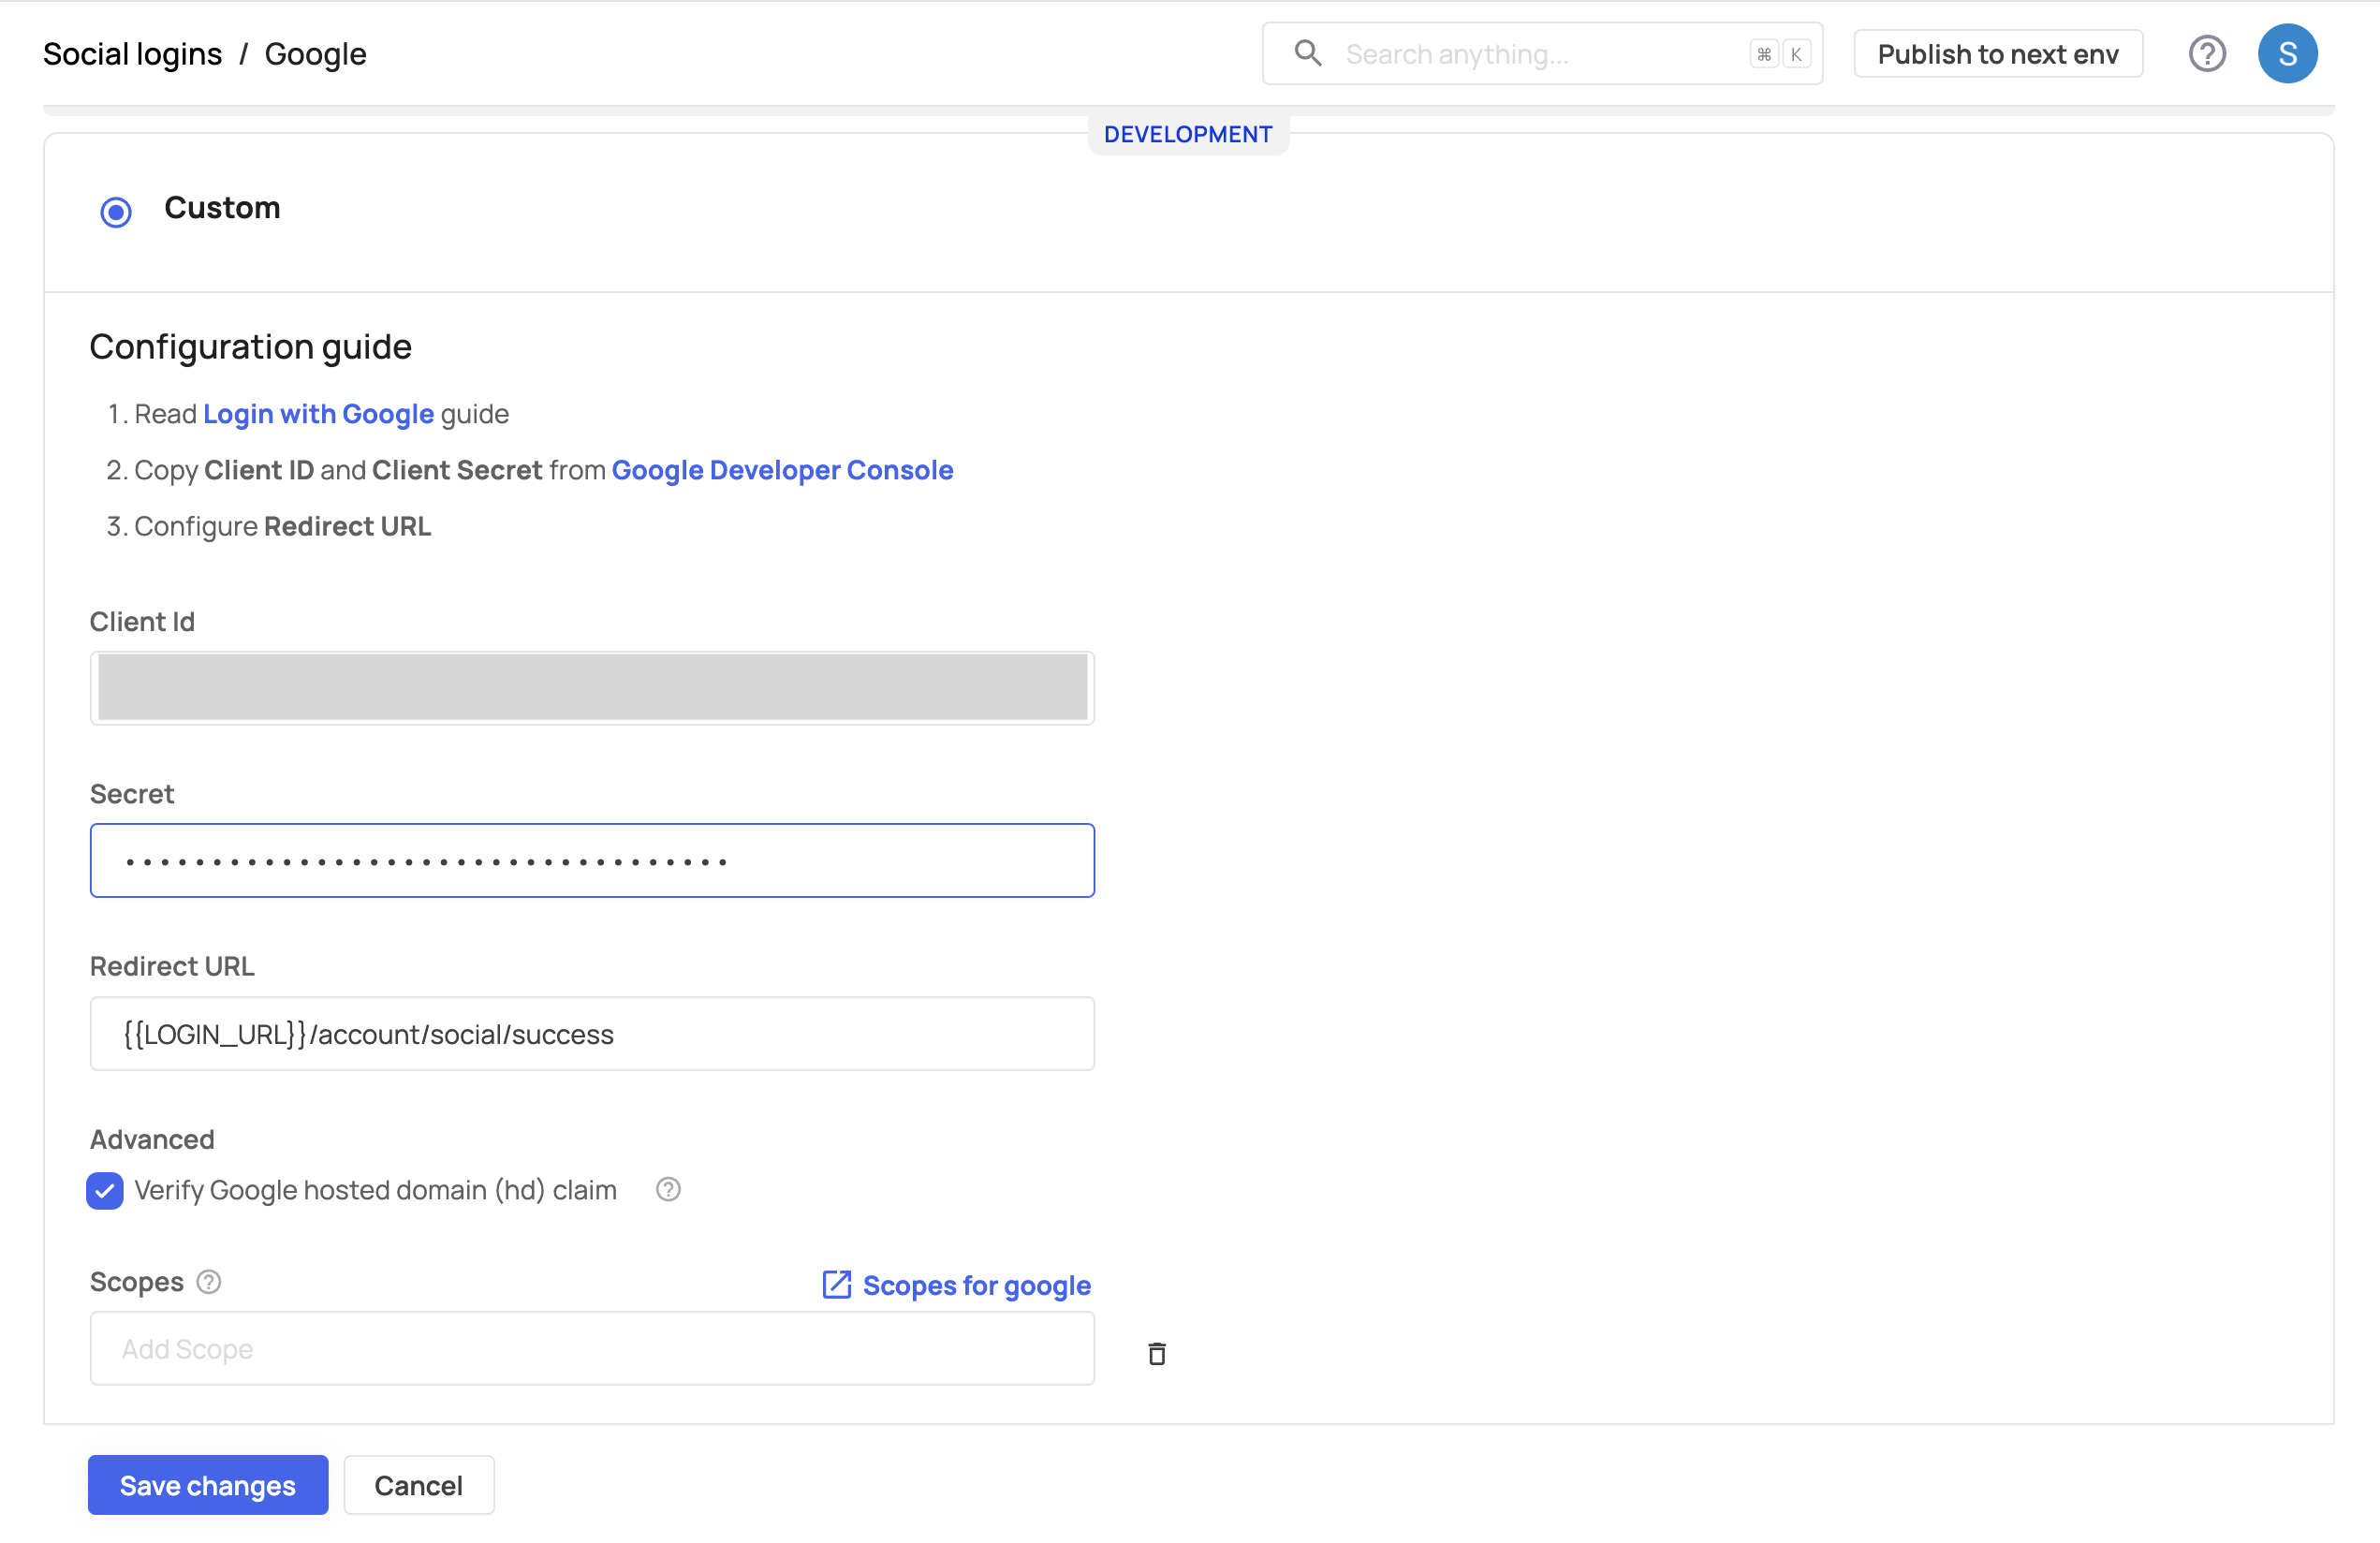
- Click the Manage button under Google, enter the Client ID, Client Secret, and Redirect URL, then save and publish your changes.
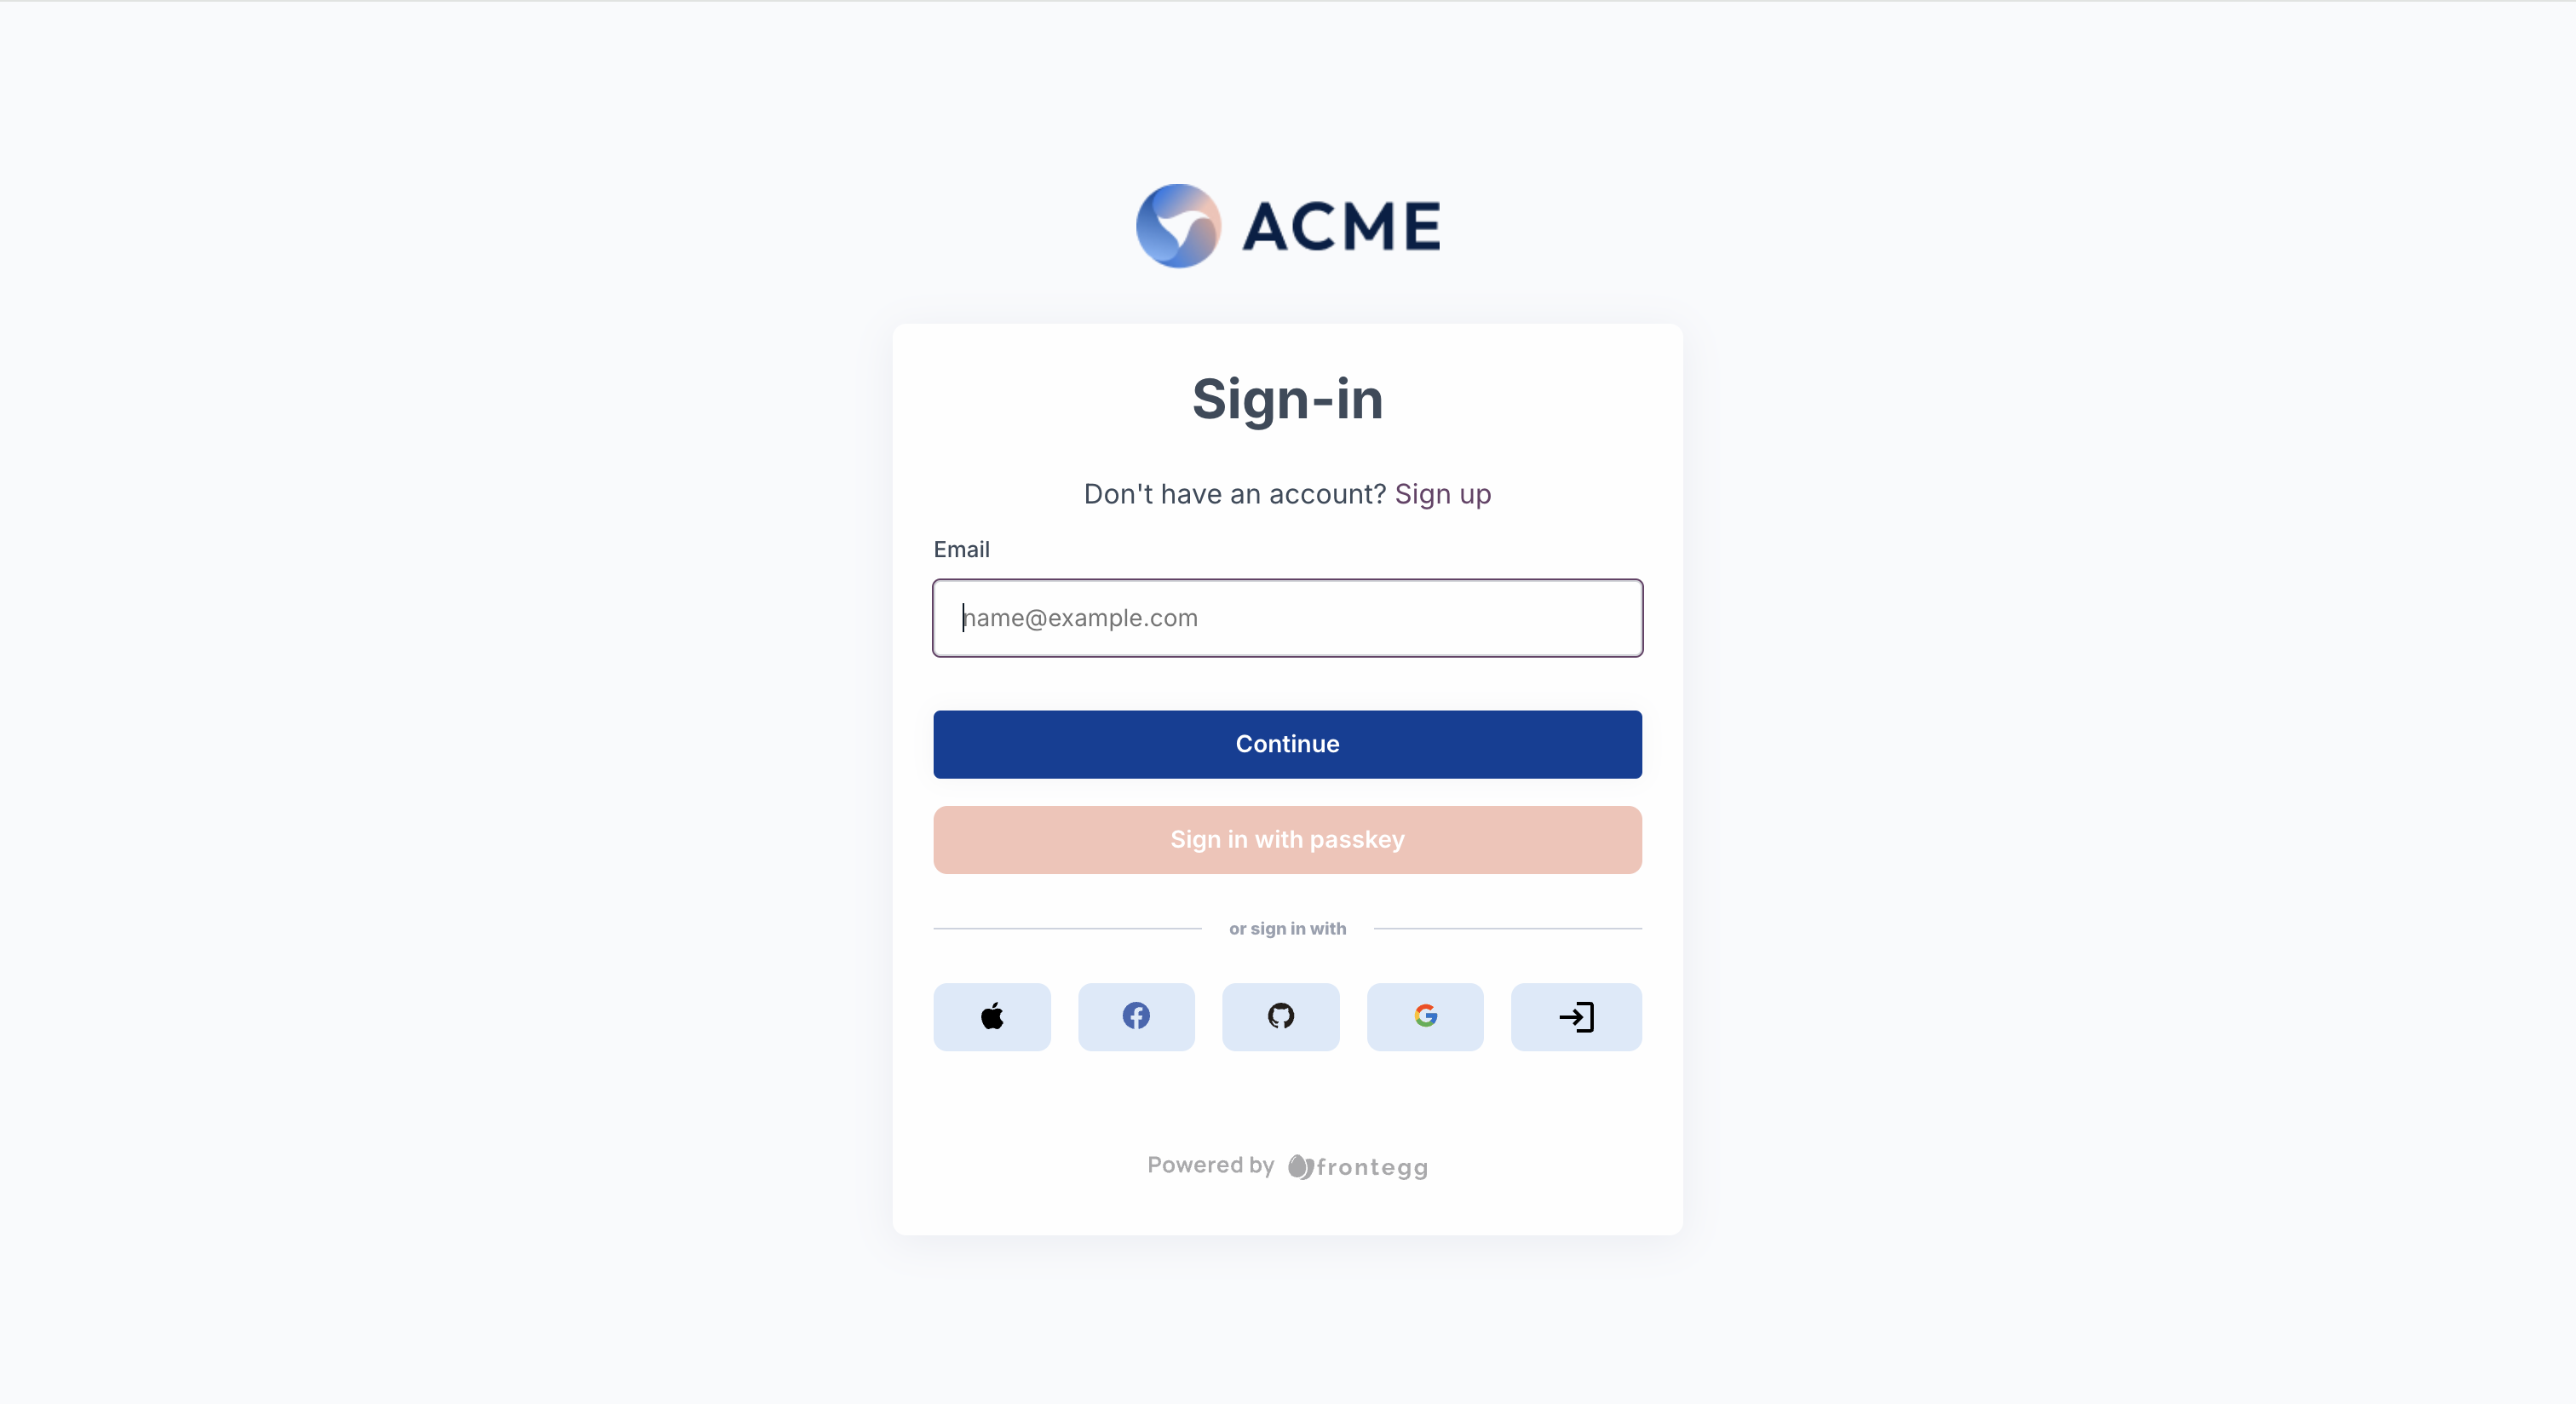
- On your login screen, confirm that the Google button appears and correctly redirects to the Google OAuth consent screen.
- Test it to ensure functionality.
Configuring Google Login Permissions
Configuring Google Login Permissions
By default, only invited users can log in with Google. To allow new users to sign up via Google, enable Allow Signup in the Login Box builder's left panel.
Scopes define what user information your application can access. Frontegg’s default scopes include user profile, email, and OpenID. To add more scopes:
- Open the Frontegg portal.
- Navigate to [ENVIRONMENT] > Configurations > Authentication > Social logins in the sidebar.
- Click the Google manage button, select Custom, and enter the additional scopes you need under Scopes.
- For a list of available options, refer to Google's supported scopes.
Frontegg’s login dialog supports Google One Tap on compatible browsers by default for both hosted and embedded login. To enable Google One Tap:
- Go to your Google Developers Console.
- In your OAuth project, add the following to Authorized JavaScript Origins:
- For hosted login mode:
https://[YOUR-FRONTEGG-DOMAIN] - For embedded login mode:
https://[YOUR-APP-URL] - For local testing, add
http://localhost(e.g.,http://localhost:[PORT]).
- For hosted login mode: