SendGrid (Twilio SendGrid) is an email delivery and marketing platform. Integrating SendGrid with Frontegg lets your application send email, look up which sender addresses are verified, and read and manage marketing contacts on behalf of your users — all through Frontegg's integration layer (SendGrid v3 API). SendGrid authenticates with a static API key sent on every request, so there is no OAuth flow.
Prerequisites
Prerequisites
- A Twilio SendGrid account
- Access to Settings → API Keys in the SendGrid app to create an API key
- At least one verified Sender Identity — the "from" address you intend to send from. Create it under Settings → Sender Authentication and confirm it from the email SendGrid sends you.
SendGrid authenticates API requests with a static API key, sent on every request as the Authorization: Bearer <key> header. You create the key in the SendGrid app and choose its permission level.
Sign in to SendGrid and go to Settings → API Keys. Click Create API Key.
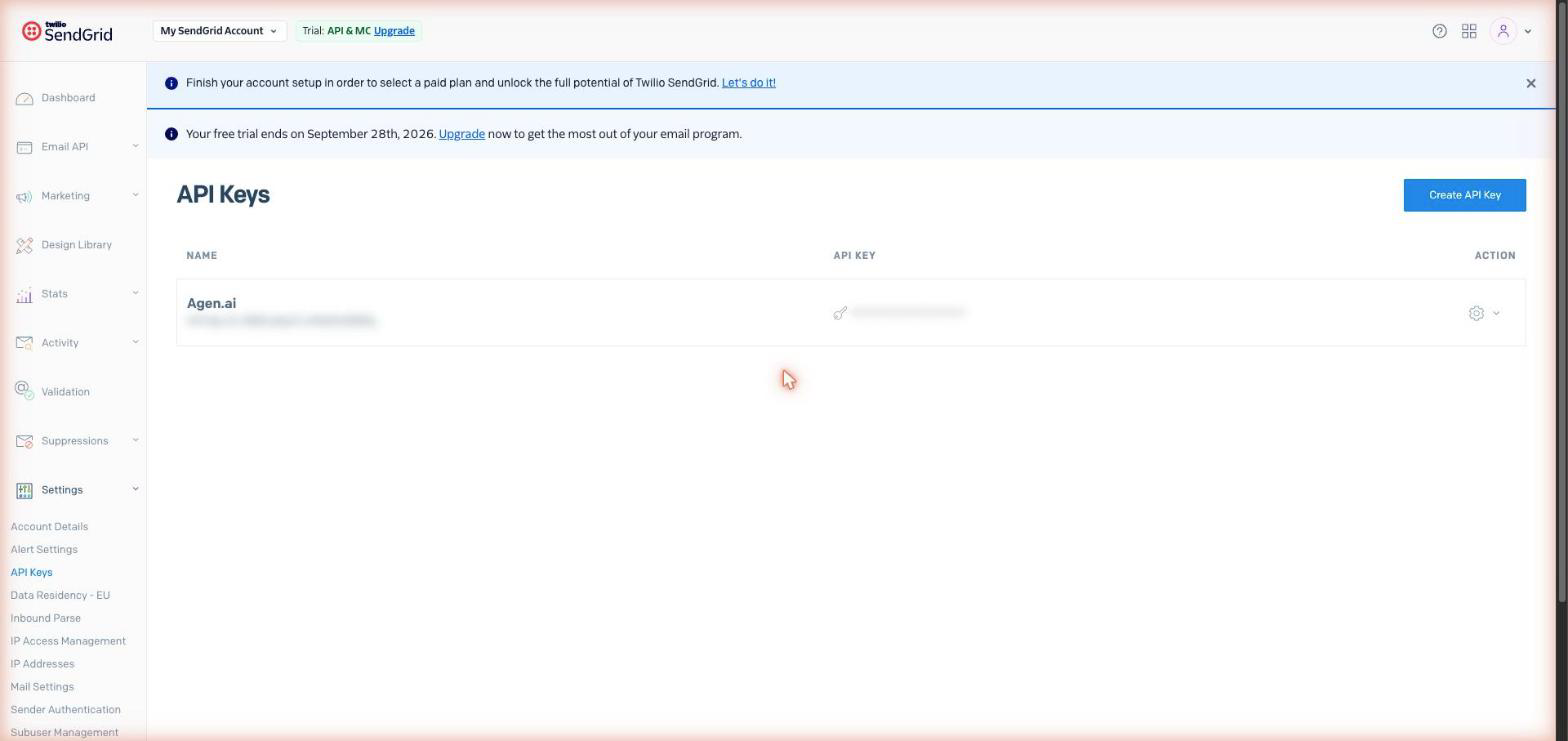
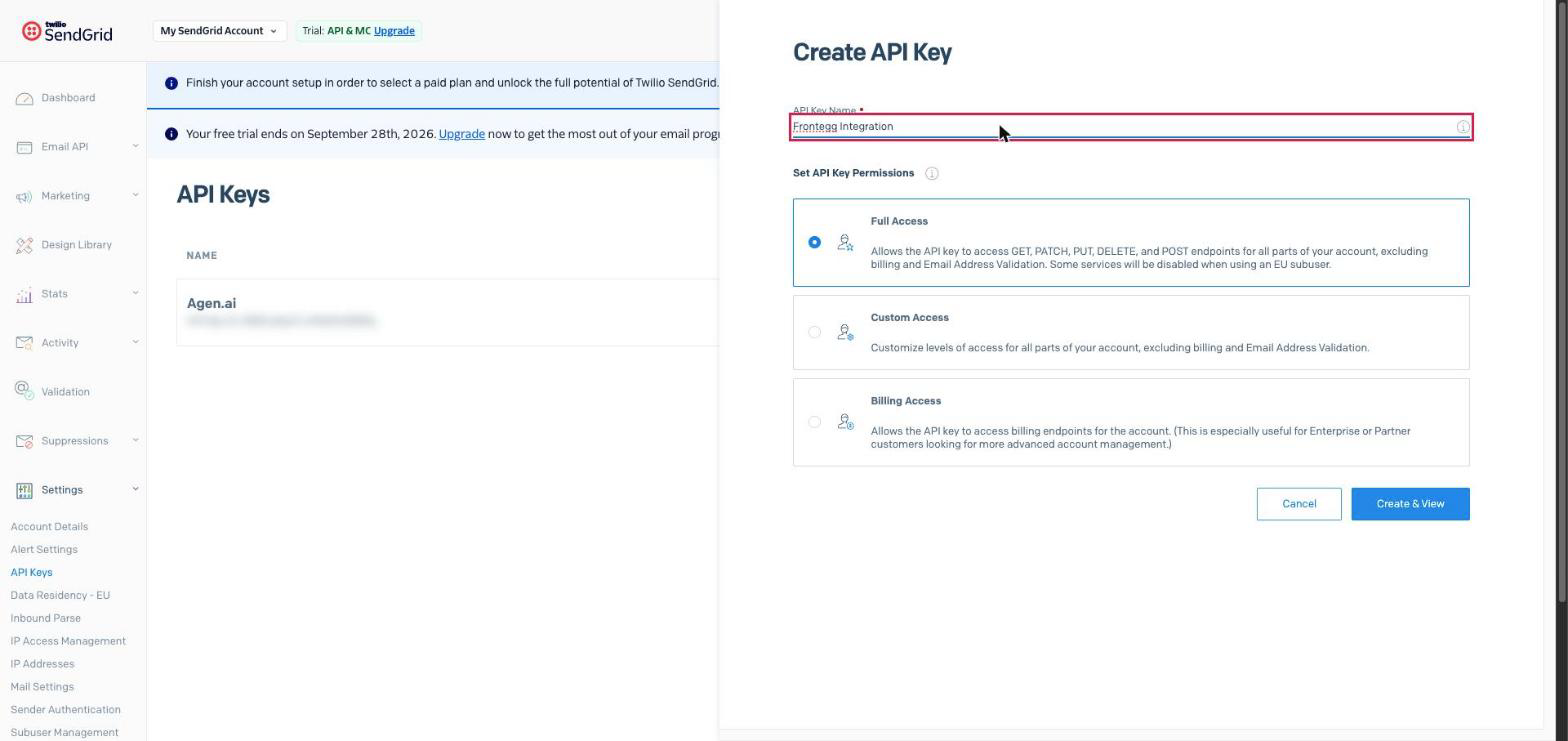
Fill in the key details:
- API Key Name — A descriptive name, for example
Frontegg Integration. - API Key Permissions — Choose Full Access, or Custom Access to scope the key down. For this integration the key needs Mail Send, plus Marketing — set Marketing to Full Access if you want the integration to add, update, or delete contacts, or Read Access if reading them is enough.
Click Create & View and copy the key value.
Copy your key now
Copy your key now
The API key is shown only once, right after you create it. Copy it immediately and store it securely — treat it like a password. If it is exposed or lost, delete it and create a new one on the same API Keys page.
Once you have your API key, configure the integration in the Frontegg portal:
- Open the Frontegg portal and navigate to [ENVIRONMENT] → Integrations → SendGrid.
- Paste the key into the API Key field.
- Click Save.
The key needs permission covering:
| Scope | Description |
|---|---|
mail.send | Send email |
marketing.read | Read marketing contacts |
Writing contacts is governed by the key's Marketing permission, granted when you create the key rather than by a separate scope.
Adding, updating, or deleting marketing contacts is asynchronous — SendGrid accepts the request immediately and applies it in the background, so a newly added contact can take up to a minute to appear in contact search.
Keep your credentials secure
Keep your credentials secure
Never share or commit your API key to version control.
SendGrid rejects any message whose from address is not a verified Sender Identity, with a 403 response — the API key alone is not enough. In the SendGrid app, go to Settings → Sender Authentication, add the address you want to send from, and click the confirmation link SendGrid emails to it. You can verify a single address, or authenticate a whole domain if you send from many.