QuickBooks Online is a cloud-based accounting platform for small and medium businesses that handles invoicing, expense tracking, payments, and financial reporting. Integrating QuickBooks with Frontegg allows your application to manage customers, invoices, payments, vendors, bills, accounts, items, estimates, purchase orders, sales receipts, employees, and time activities on behalf of your users using OAuth 2.0.
Prerequisites
Prerequisites
- An Intuit account
- Access to the Intuit Developer portal
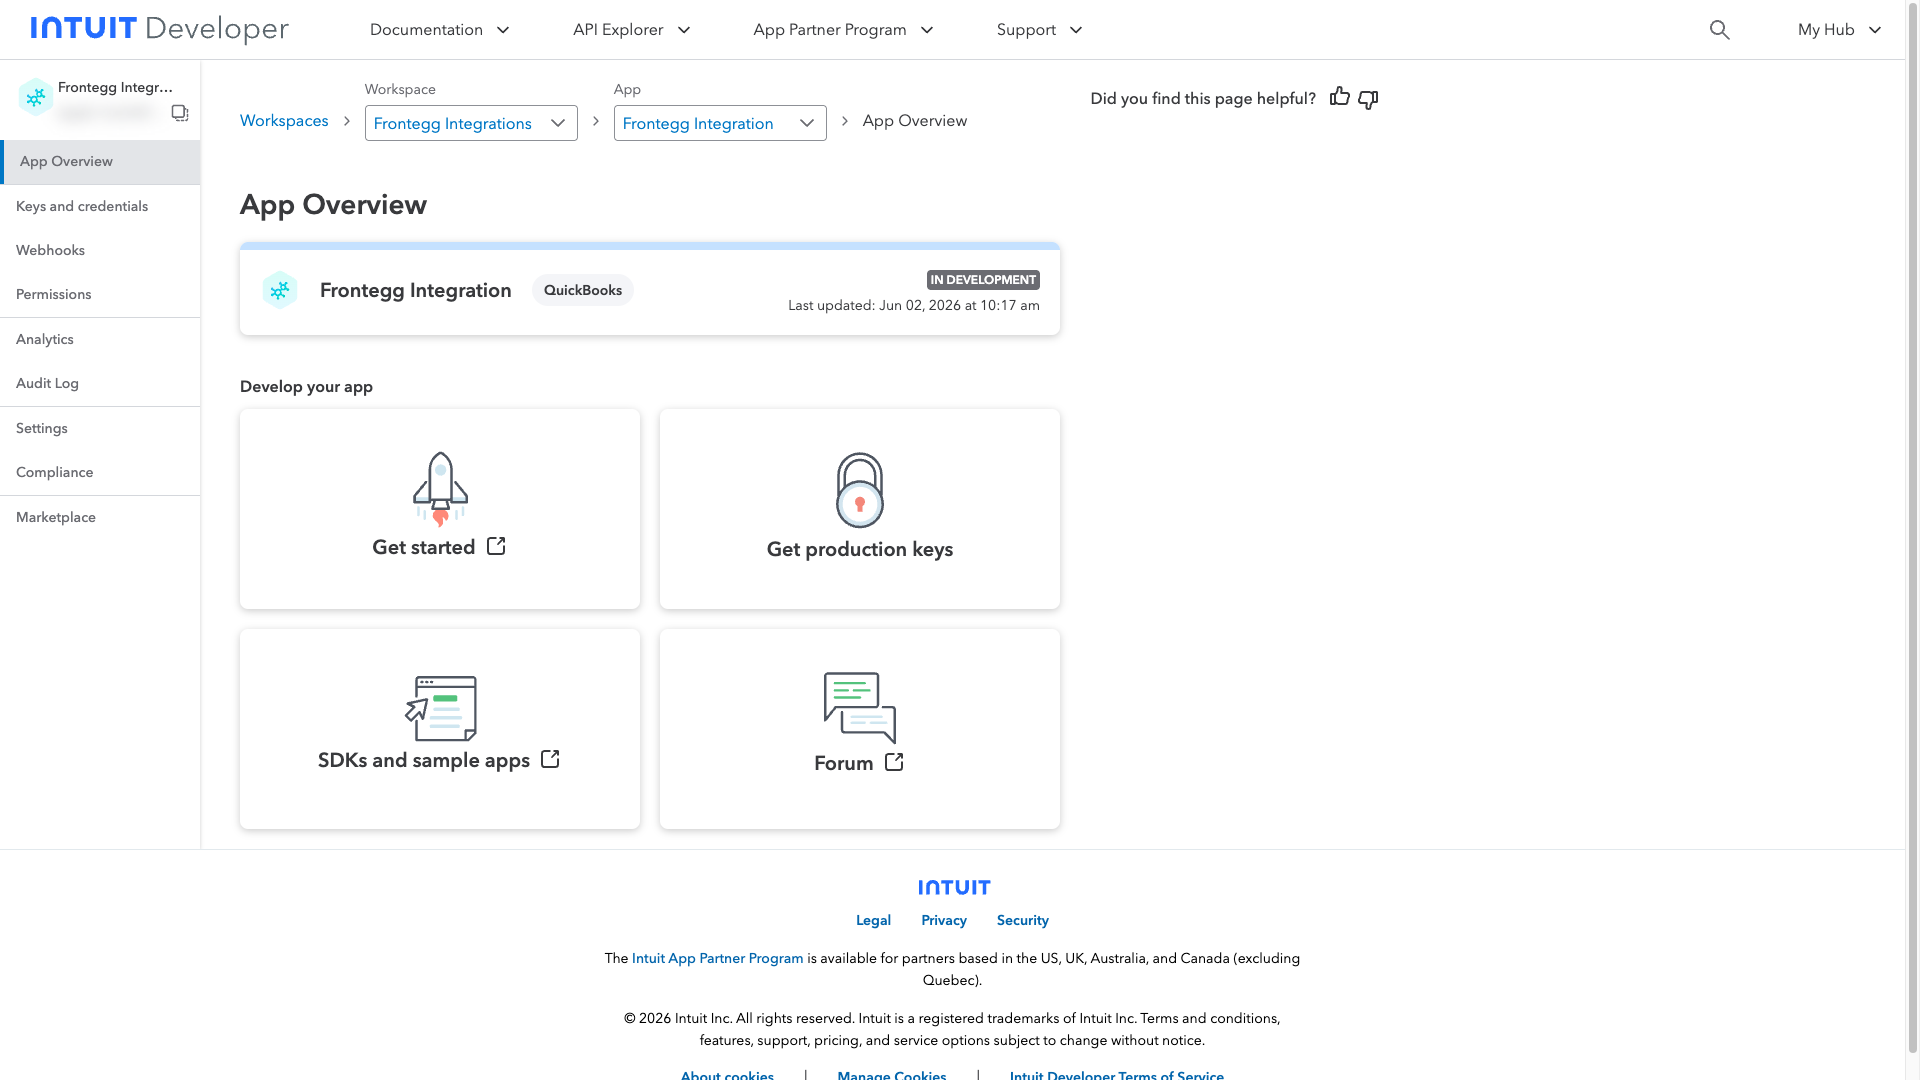
Navigate to developer.intuit.com and sign in, or create an Intuit account if you don't have one. Complete the short onboarding (your role, a workspace name, and company information), then create an app for the QuickBooks Online and Payments platform and give it a descriptive name, for example Frontegg Integration.
After the app is created, you land on the App Overview page, which confirms the app exists and shows its current status.
In the left menu, click Keys and credentials. Select the environment that matches how you will connect:
- Development — keys for testing against QuickBooks sandbox companies.
- Production — keys for live company data (available after your app is approved for production).
Toggle Show credentials to reveal the Client ID and Client secret, then copy both — you will need them when configuring the Frontegg portal.
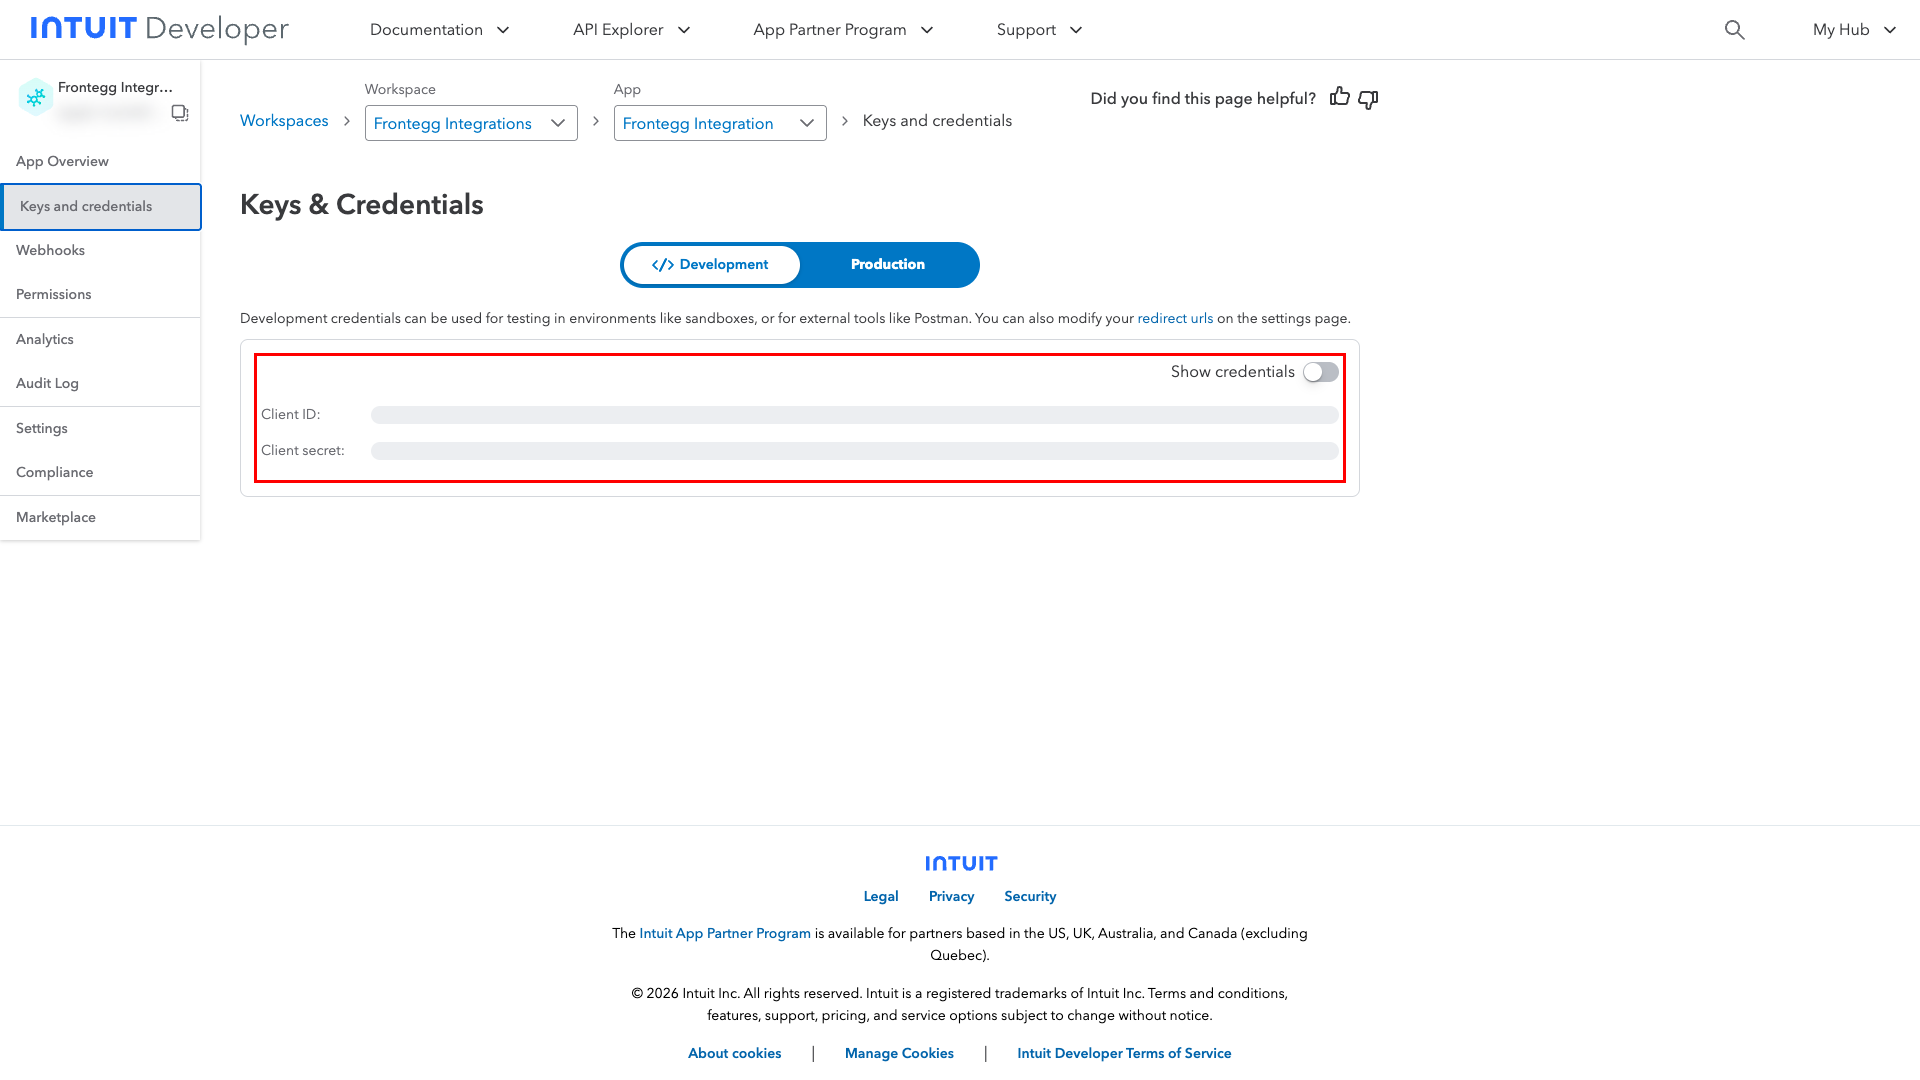
Keep your credentials secure
Keep your credentials secure
The Client Secret is sensitive. Copy it directly from the Intuit Developer portal into the Frontegg portal, and never share it or commit it to version control.
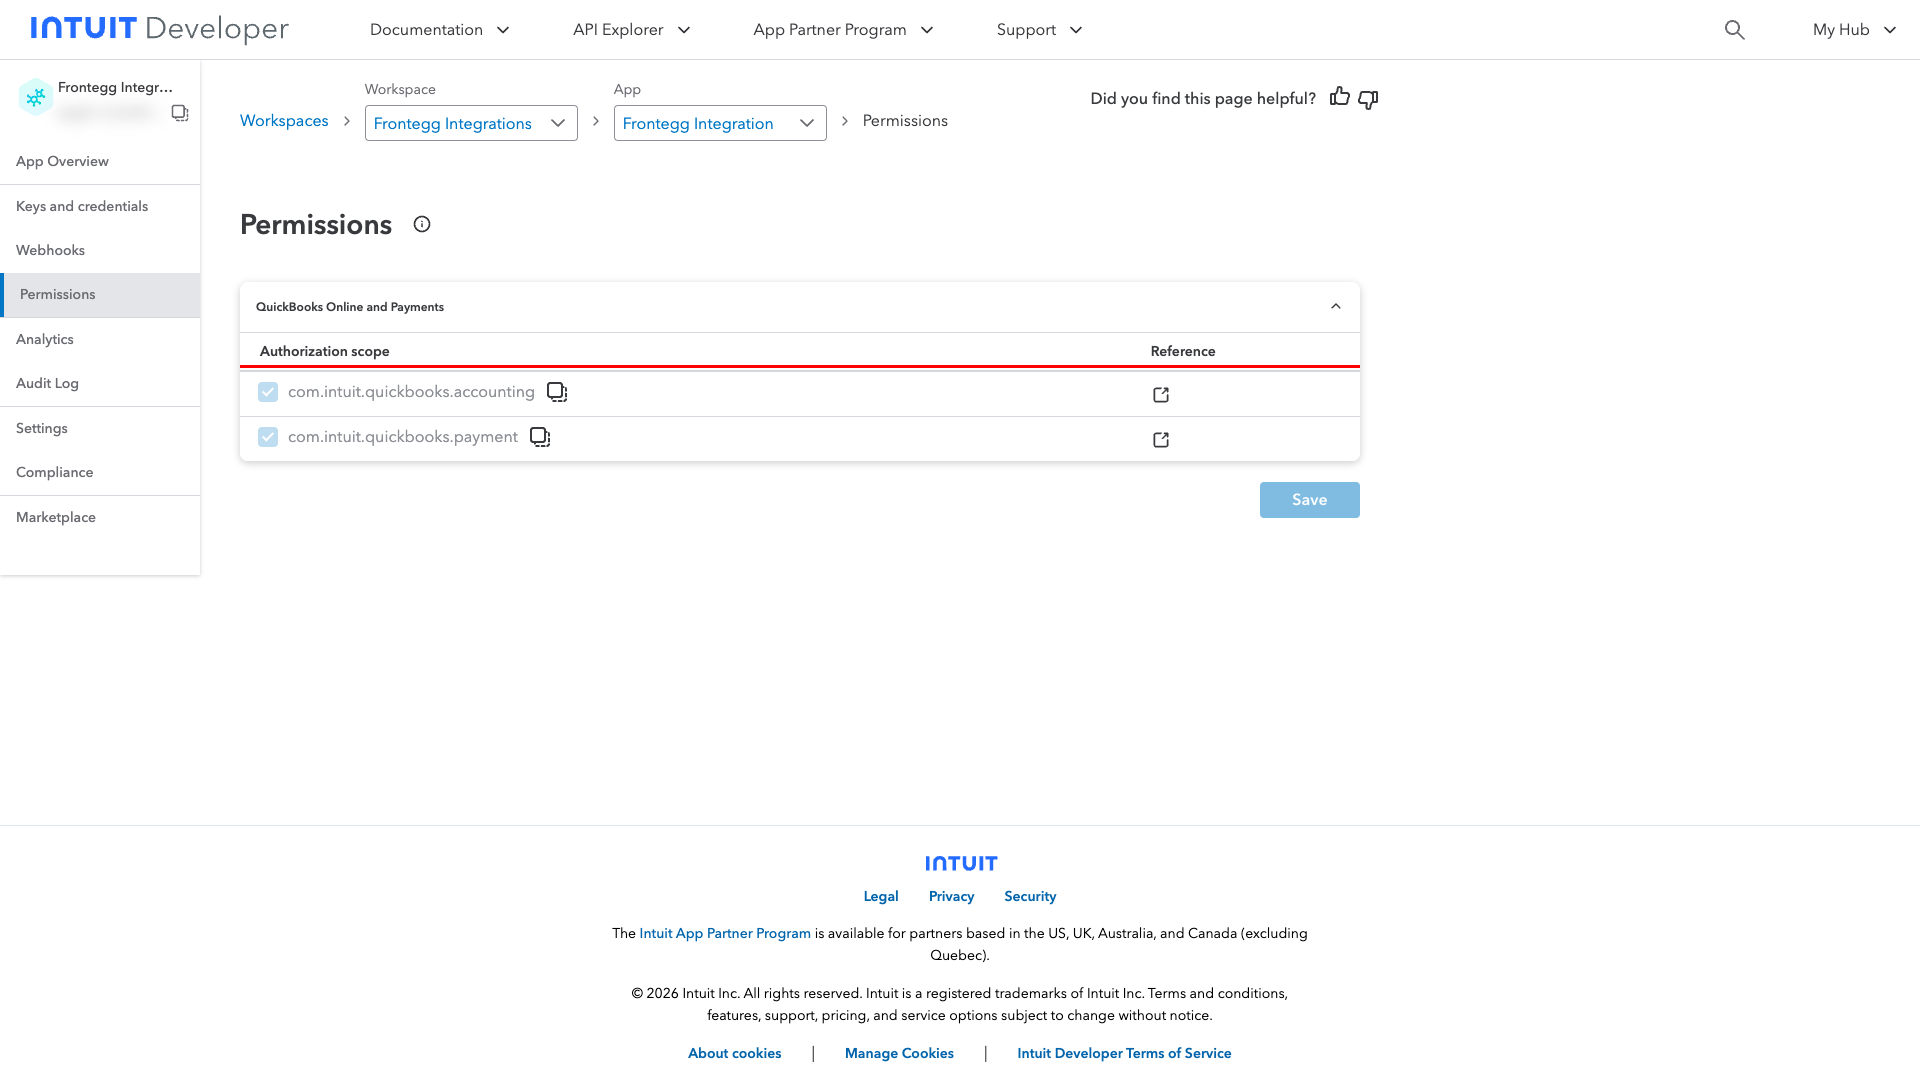
Click Permissions in the left menu. QuickBooks apps request OAuth scopes that determine which data your integration can access. By default, the QuickBooks Online and Payments platform grants the accounting and payments scopes:
| Scope | Description |
|---|---|
com.intuit.quickbooks.accounting | Read and write accounting data — customers, invoices, vendors, bills, accounts, items, and more |
com.intuit.quickbooks.payment | Read and write payment data |
Minimum required scope
Minimum required scope
For basic functionality, you need com.intuit.quickbooks.accounting.
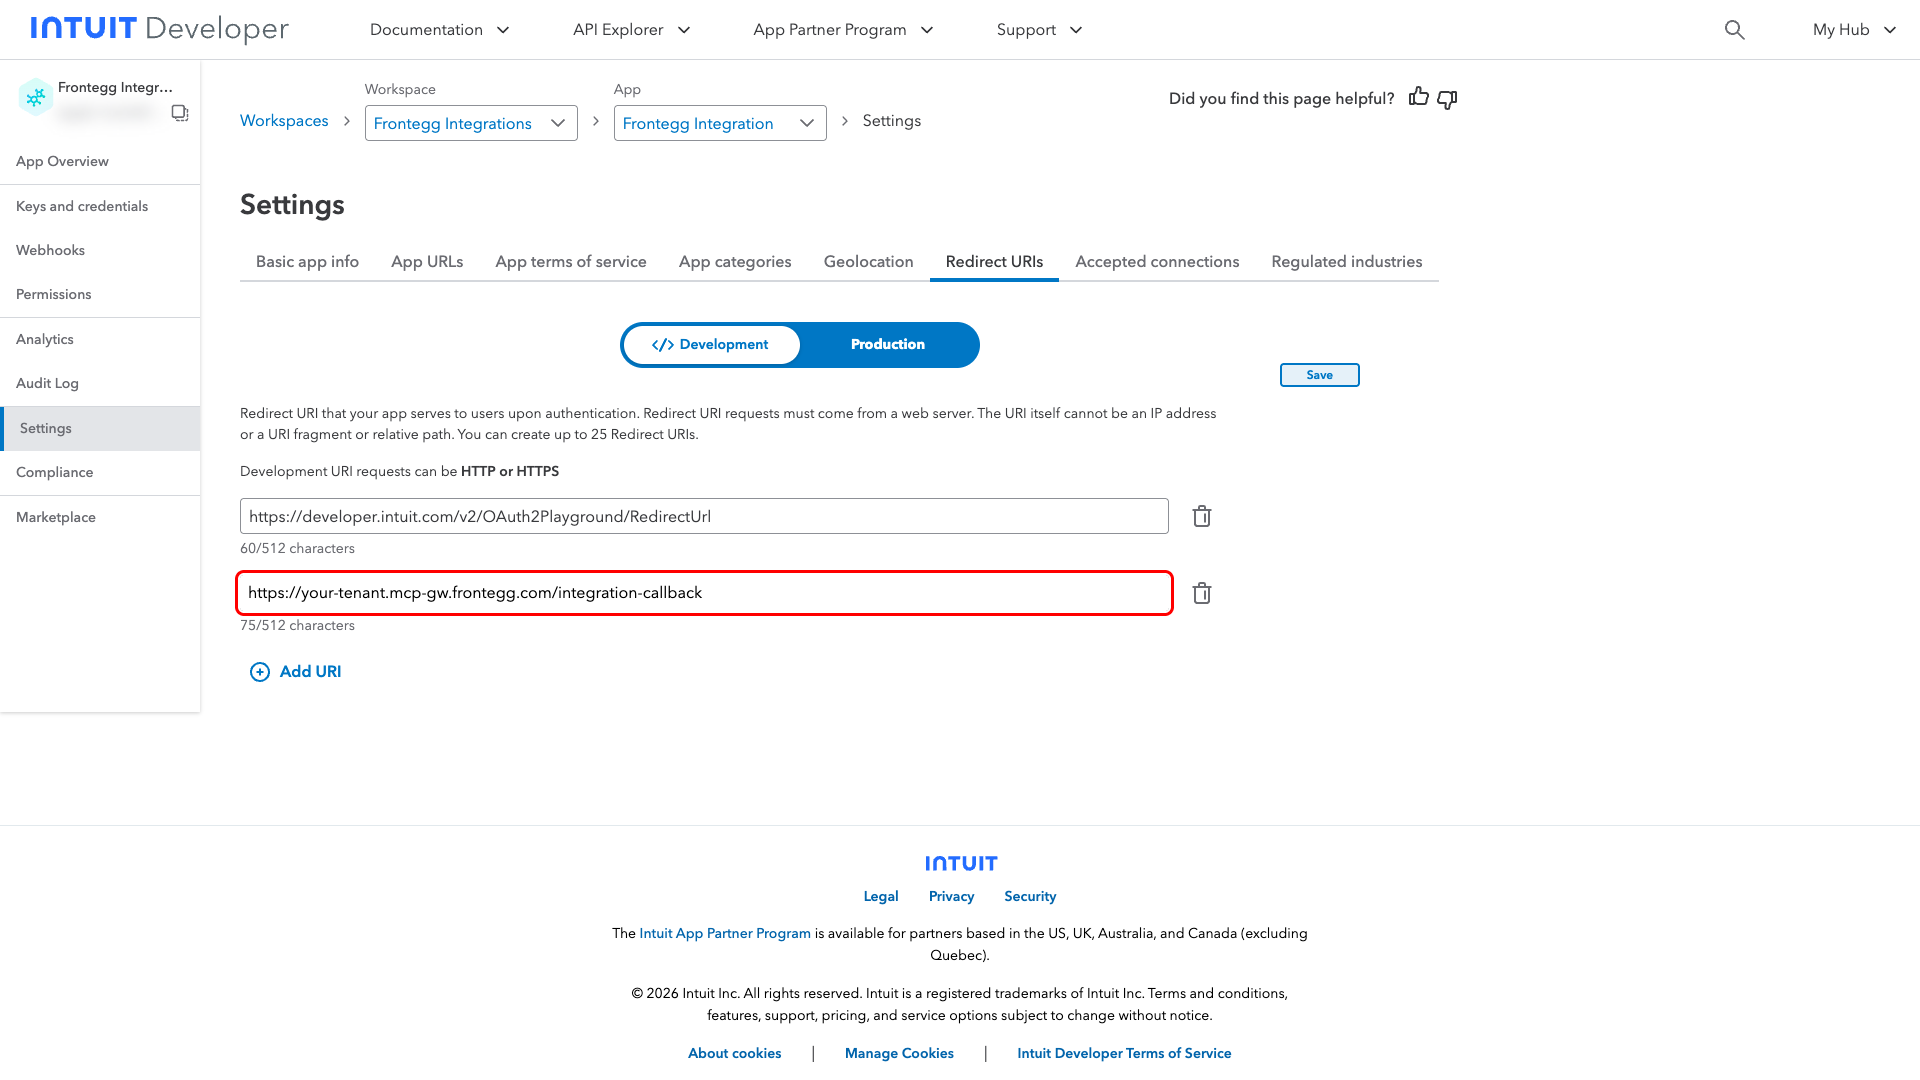
Go to Settings → Redirect URIs and select the same environment whose keys you copied in Step 2 (Development or Production). Click Add URI, enter your Frontegg Redirect URL, then click Save:
https://YOUR_MCP_GATEWAY_URL/integration-callback
Once you have obtained your Client ID and Client Secret from the steps above, enter them in the integration configuration page of the Frontegg portal:
- Open the Frontegg portal and navigate to [ENVIRONMENT] → Integrations → QuickBooks.
- Enter the Client ID and Client Secret in the corresponding fields.
- Select the required scopes:
| Scope | Description |
|---|---|
com.intuit.quickbooks.accounting | Read and write accounting data — customers, invoices, vendors, bills, accounts, items, estimates, purchase orders, and sales receipts |
com.intuit.quickbooks.payment | Read and write payment data |
com.intuit.quickbooks.payroll | Access payroll data |
com.intuit.quickbooks.payroll.timetracking | Access payroll time tracking data |
com.intuit.quickbooks.payroll.benefits | Access payroll benefits data |
- Click Save.
Keep your credentials secure
Keep your credentials secure
Never share or commit your Client Secret to version control.