Create SAML application with Rippling
This guide outlines the steps to create and configure a SAML application in Rippling, including setup, user assignments, and testing.
Step 1: Create SAML application
- Log in to your Rippling dashboard and click IT → Third-Party Access in the left sidebar.
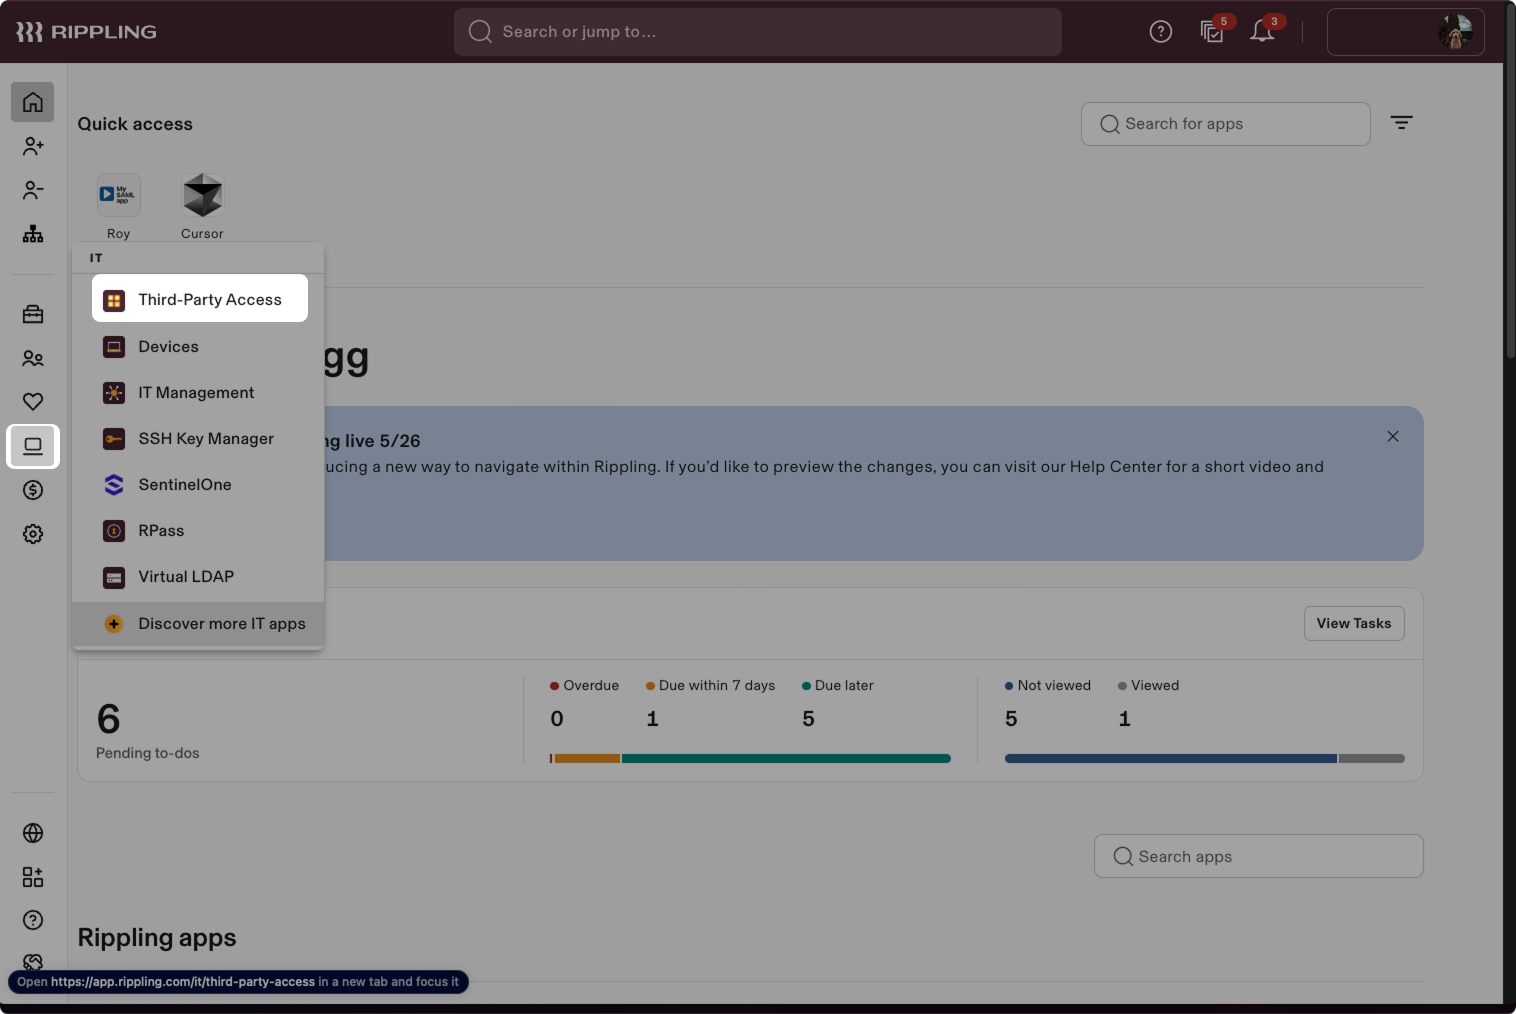
- Choose Add integration → Create a new custom integration.
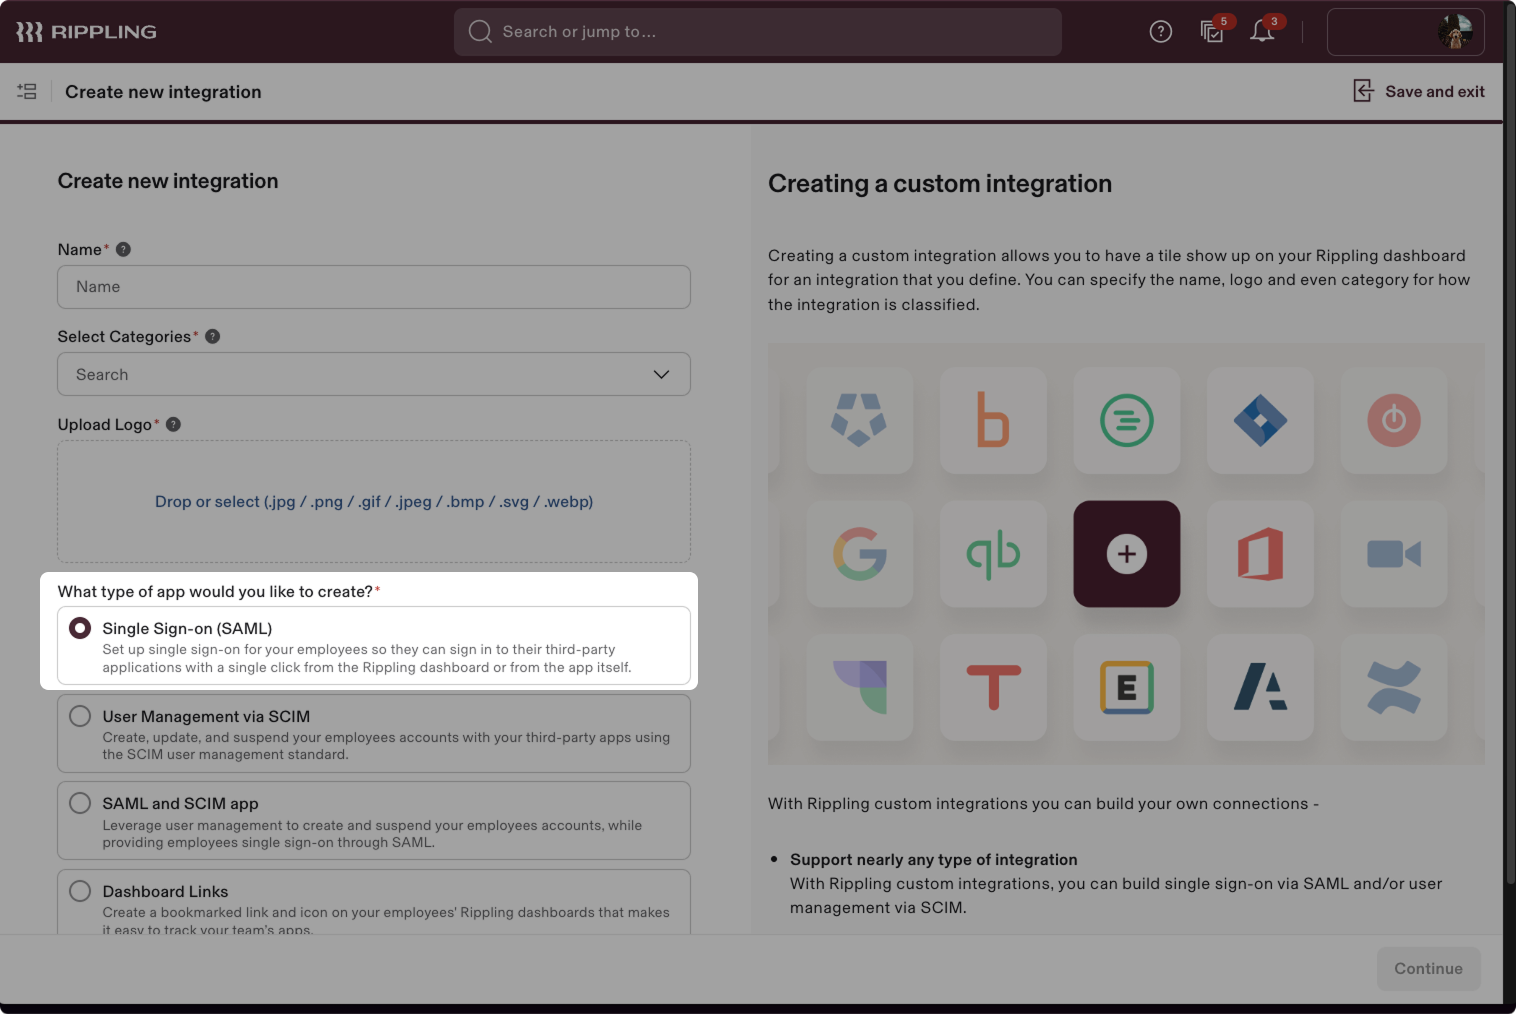
- Enter the name of your application, select the required categories, and upload the required logo.
- Select Single Sign-on (SAML) as the application type.
- Click Continue.
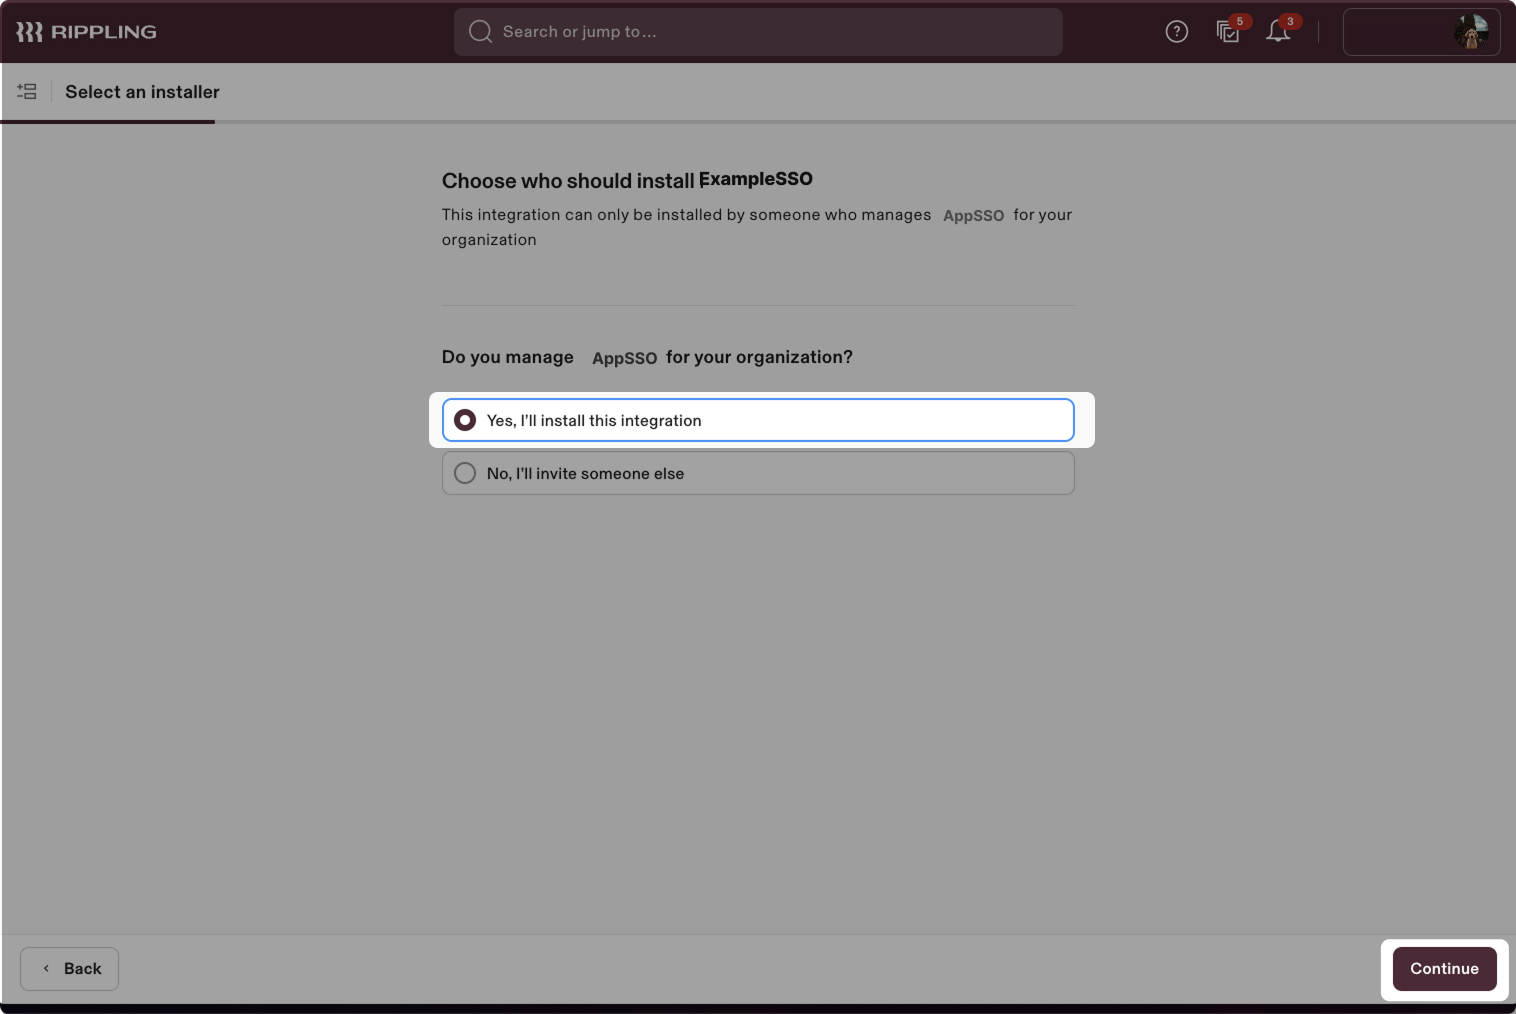
- Select Yes, I'll install this integration and click Continue.
Step 2: Set up Single Sign-On for the application
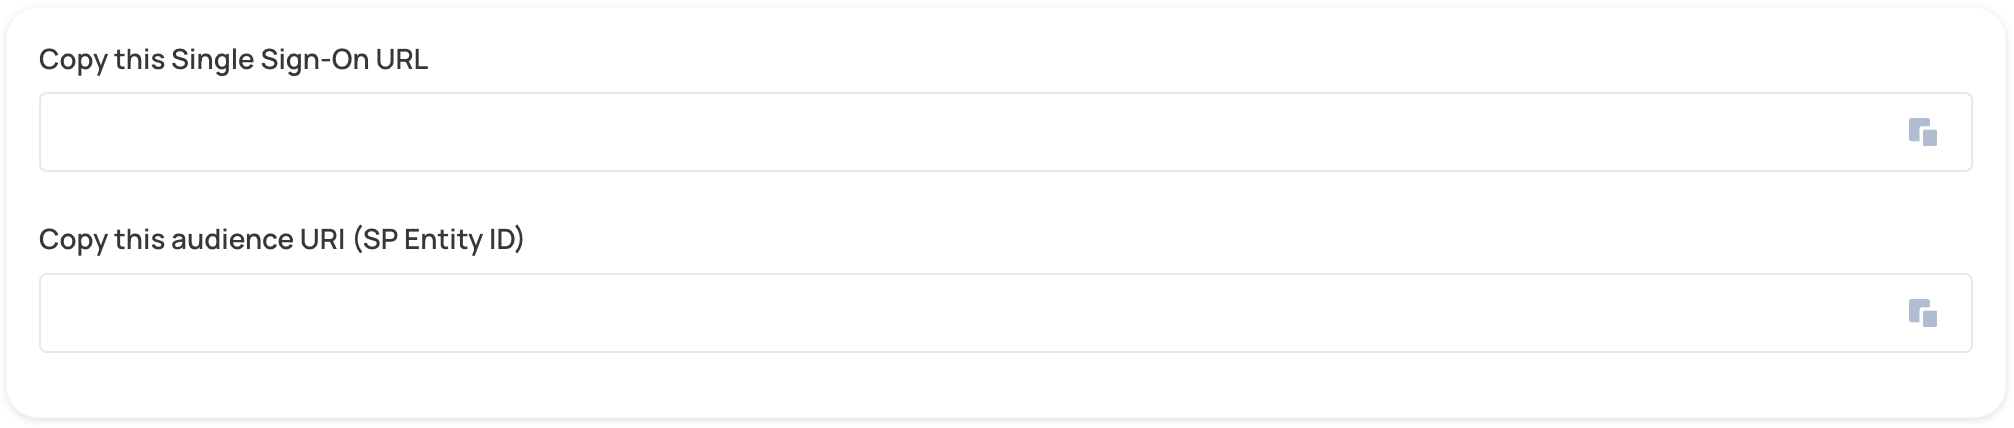
- Scroll down to the Assertion Consumer Service URL and Service Provider Entity ID fields, and paste the values that are provided by your service provider into their corresponding inputs (ACS URL and SP Entity ID) in Rippling:
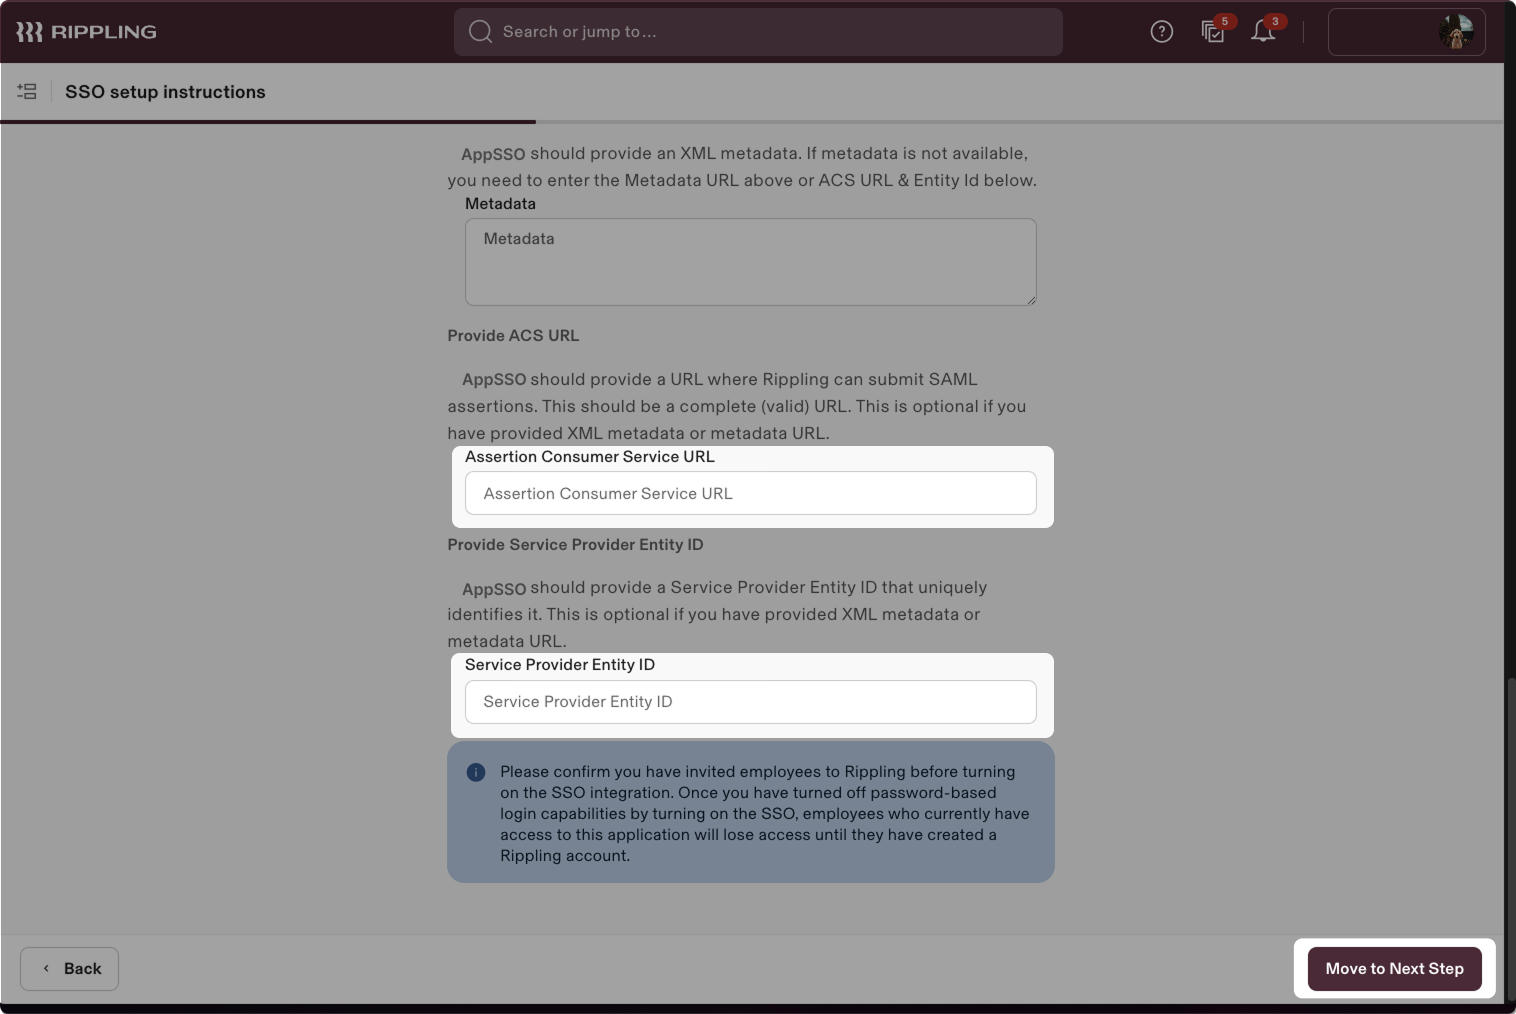
- Click Move to Next Step.
Step 3: Set up access
- Select the access permissions based on your requirements. By default, choose Everyone except contractors should have an account.
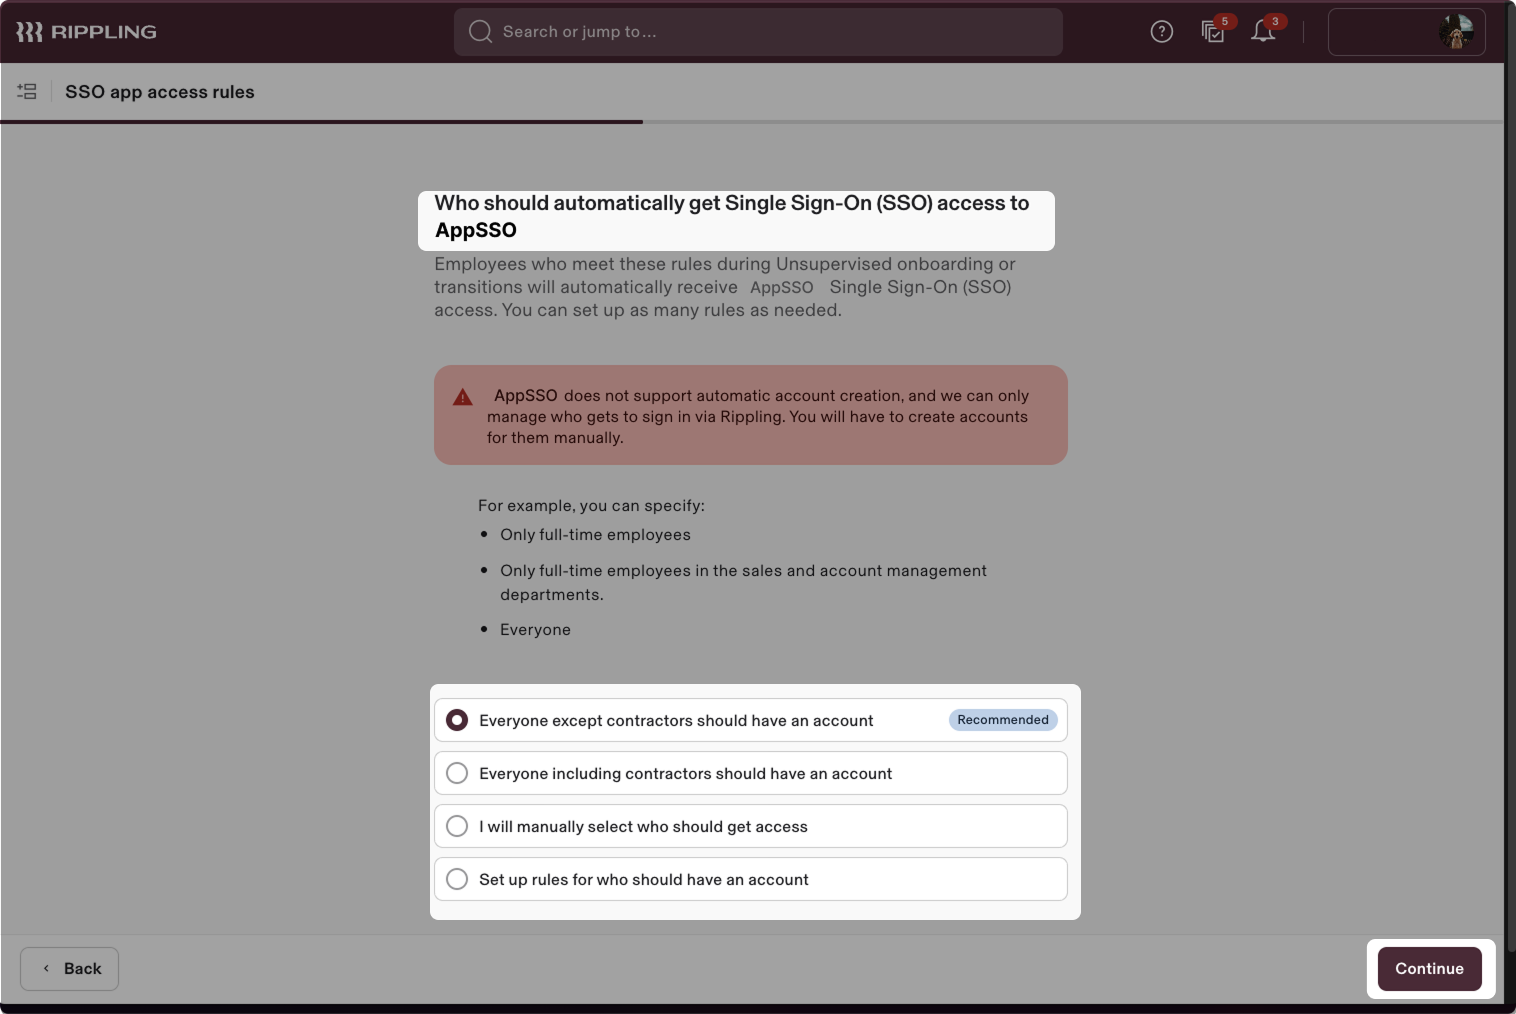
Click Continue.
Set the access timing according to your requirements. By default, set As soon as they've signed their offer letter or agreement.
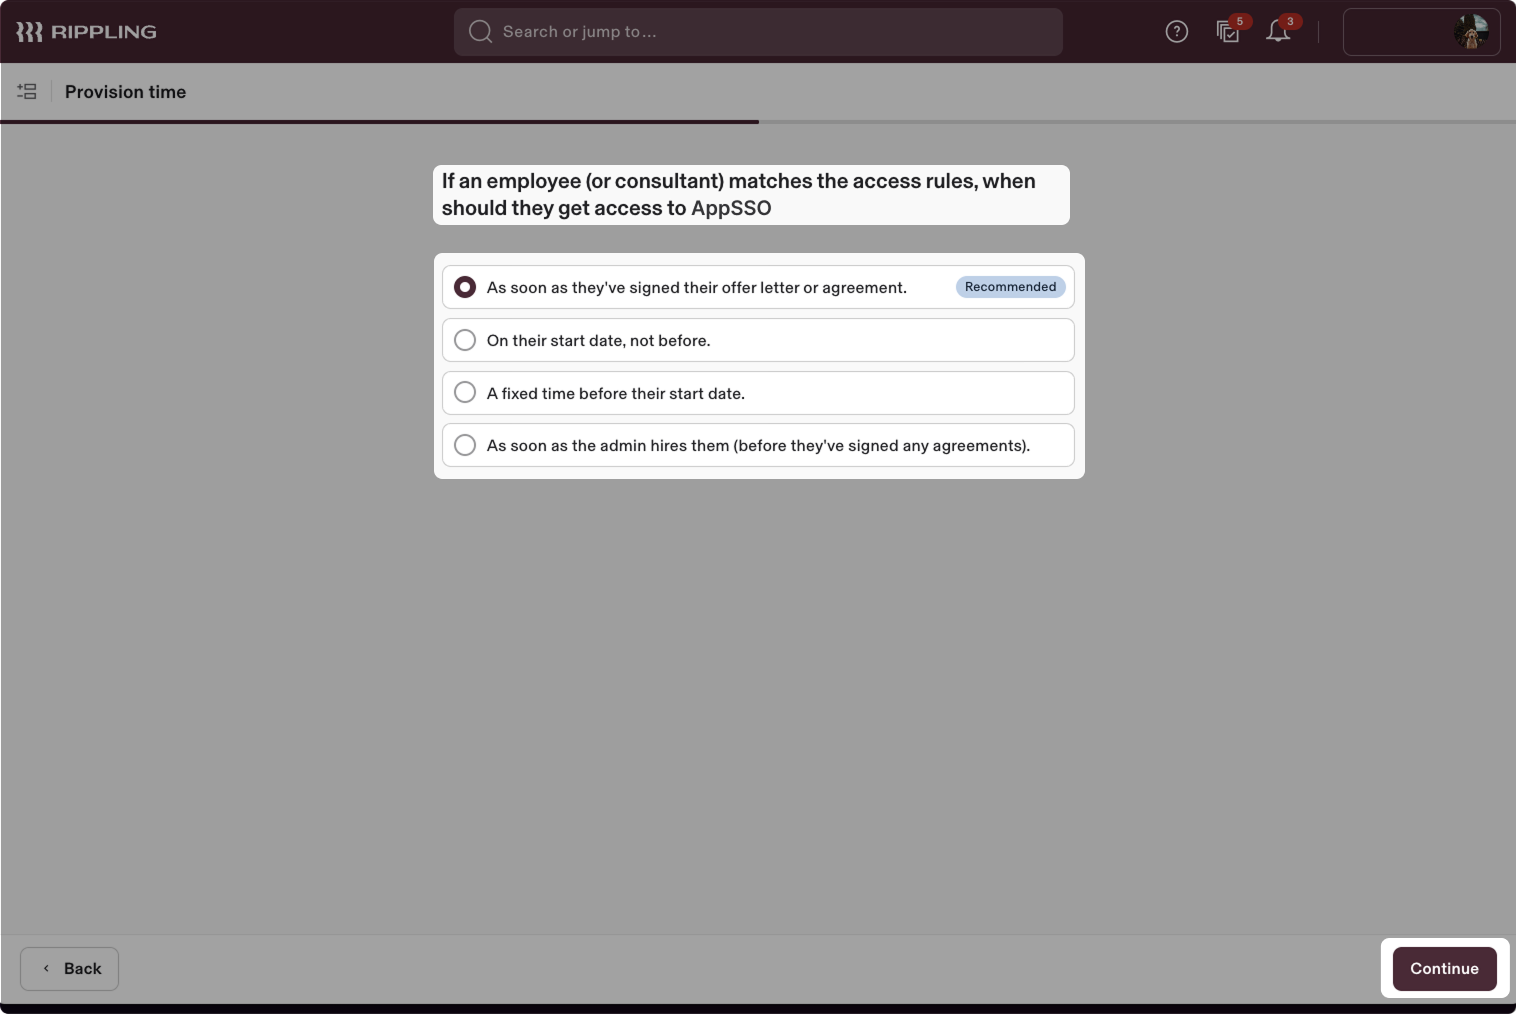
Click Continue.
Select the shared admin SSO, depending on your requirements. By default, set Let [ACCOUNT_NAME] admins sign in to [APP_NAME] admin account and provide the email address of the admin.
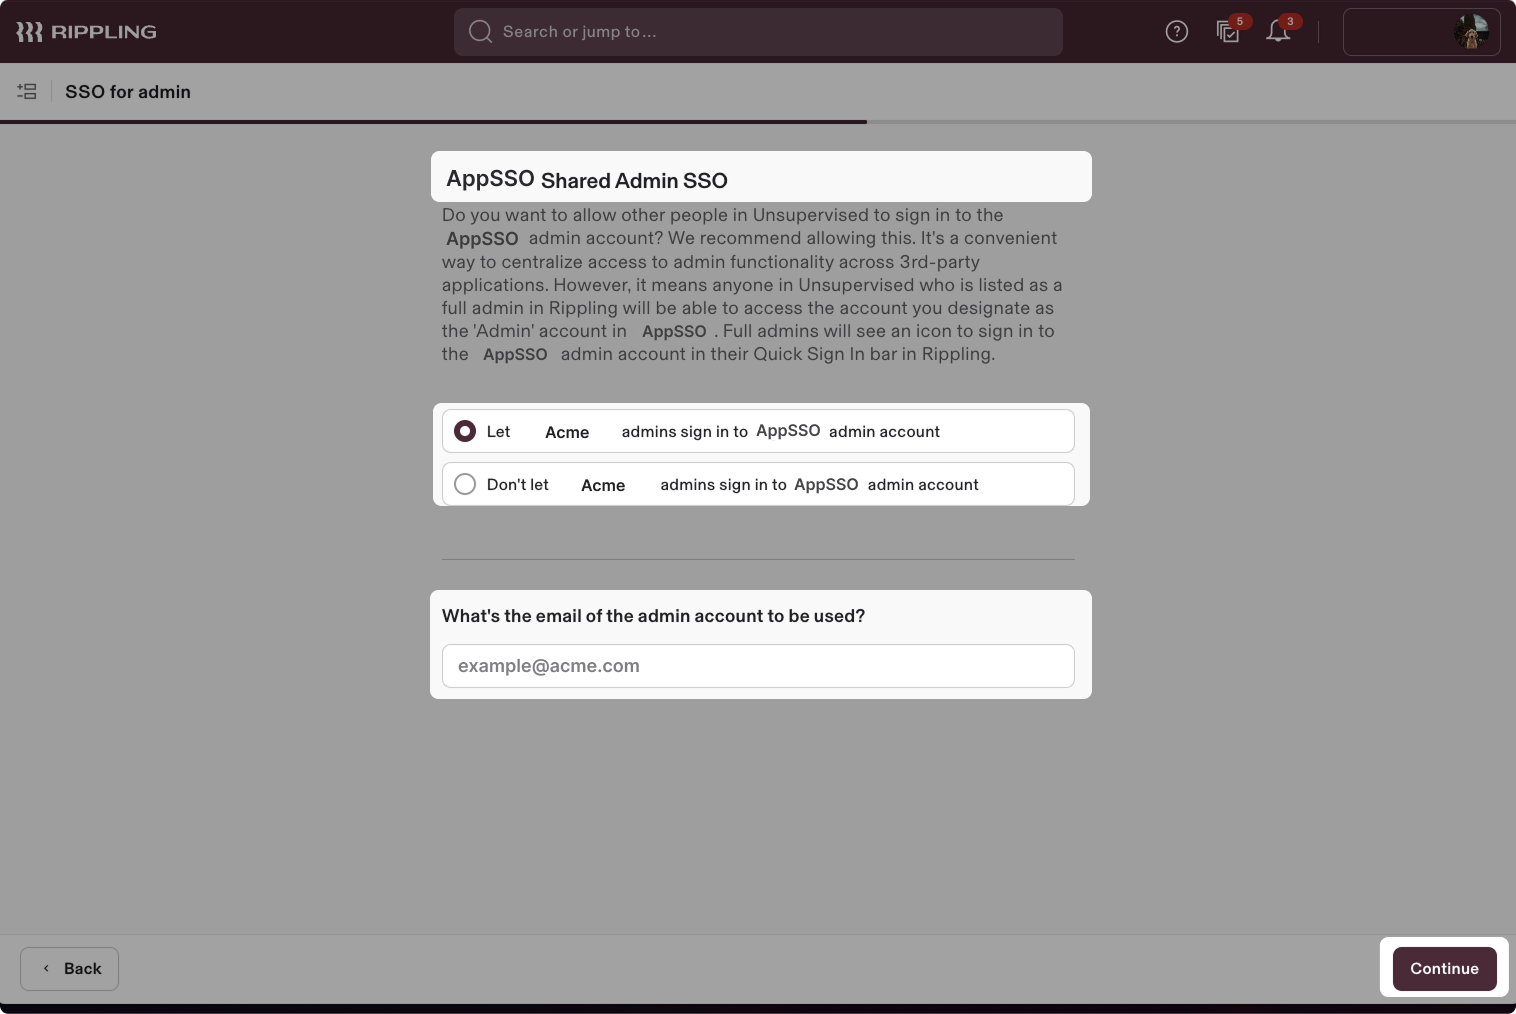
- Click Continue.
Step 4: Create group attribute
Click Create new attribute value.
If required, provide the optional attribute description.
If required, set the group attribute options.
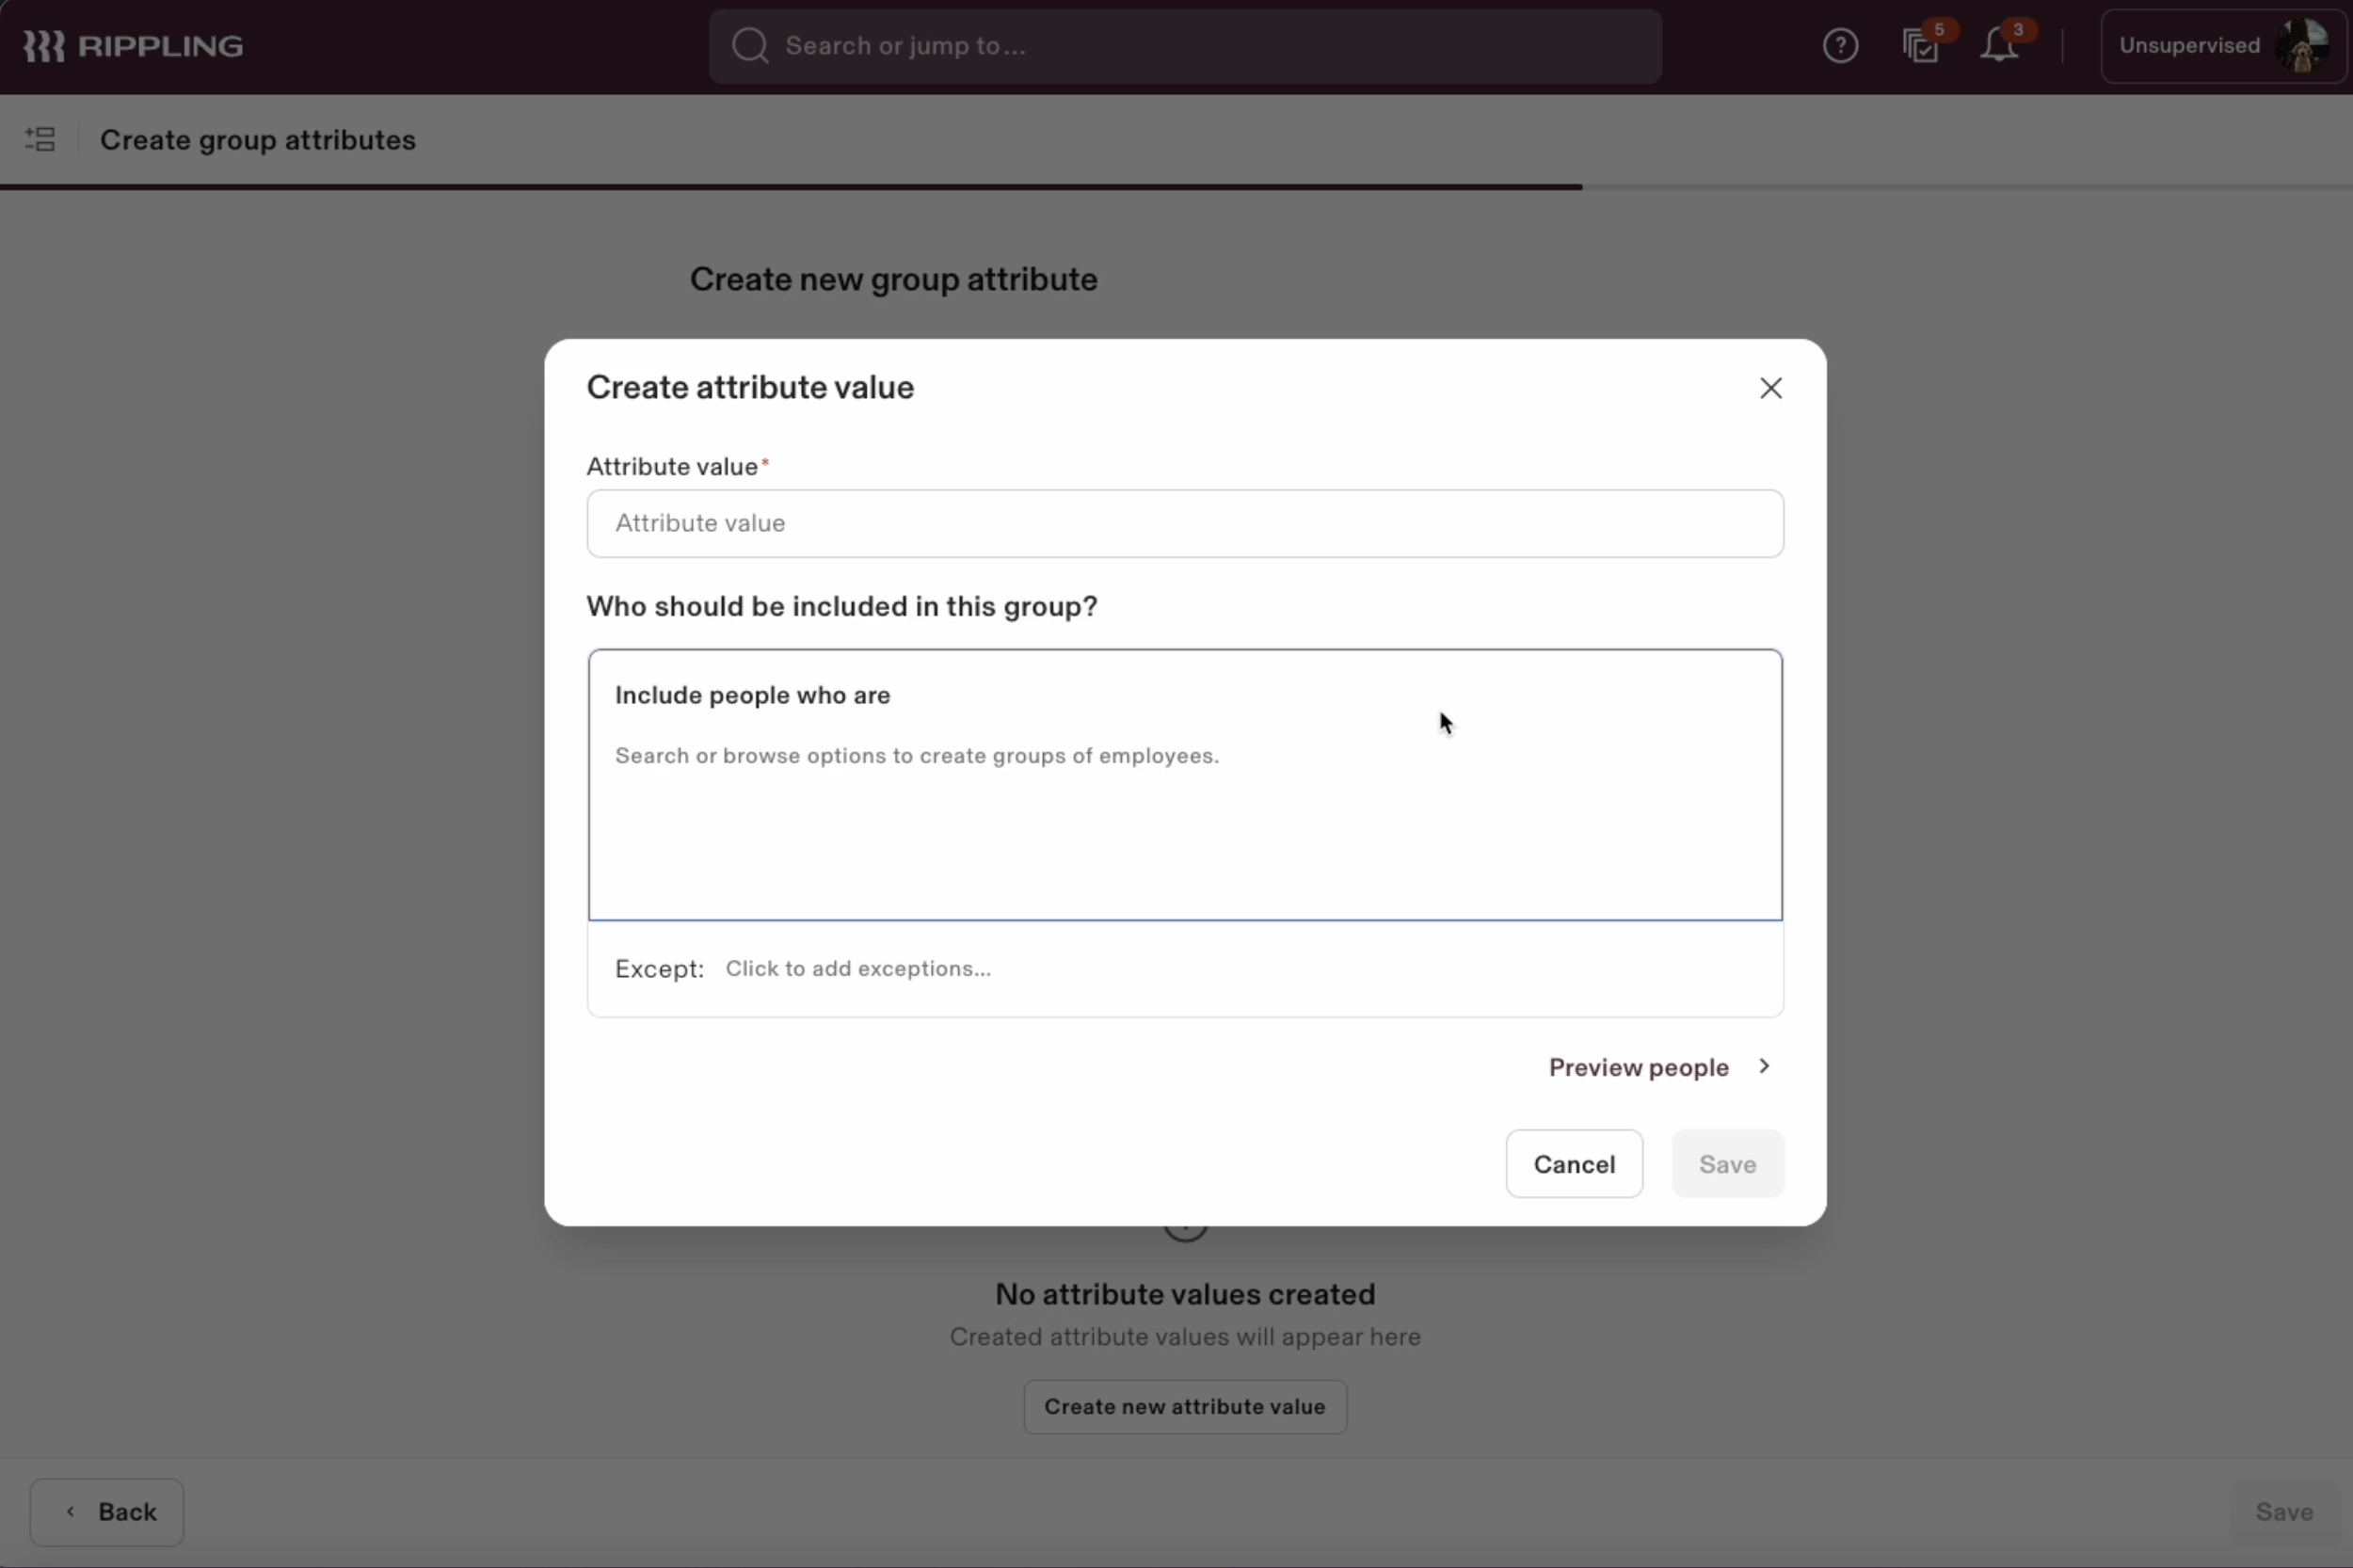
- Fill in the attribute value name, assign the people to be included in the group and click Save.
Step 5: Update identity provider details
- To complete the implementation of SAML SSO, you need to provide the application with your identity provider's metadata. To complete this step you may need to go back to the SSO settings from Step 2.
Automatic configuration
- Scroll down to the IdP metadata URL tab of the SAML app you just created.
- Copy the IdP metadata URL and paste it below.

Manual configuration
- Copy the value of the Single Sign-on URL and X.509 Certificate fields, and then paste them into the appropriate fields in the form below.

Step 6: Proceed with domain claiming and role assignment
- Click on Proceed with domain claiming and role assignment to confirm the completion the configuration of the IDP form.
- Follow the instructions in the Self-service SAML configuration guide to complete this step and manage authorization.